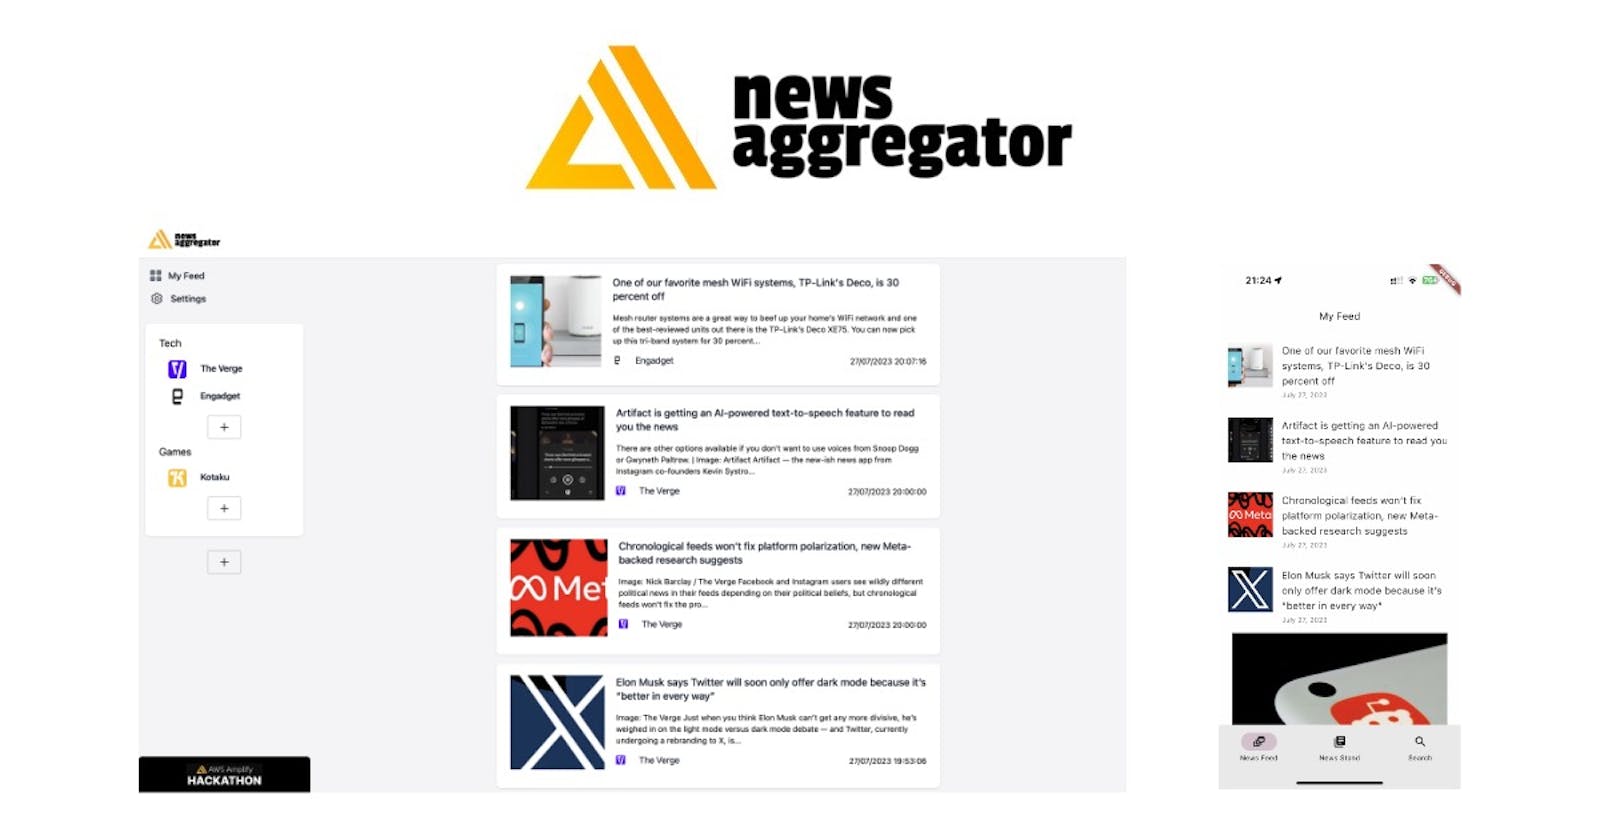
Building a News Aggregator App with AWS Amplify, Flutter, and React: A Comprehensive Guide
A news aggregator app allows you to read news from different sources on both mobile and desktop platforms
News is important and everywhere today. With so many sources, it's hard to read news easily. I made a web and mobile app to help with this. In this article, I'll show you how to make a news app using Flutter, React, and AWS Amplify . Get ready to learn how to create a great news-reading app! 🚀
Why did I choose Amplify?
Well, I went with AWS Amplify for a bunch of cool reasons. First off, Amplify makes your life easier by giving you ready-to-use stuff like Authentication, Database management, Lambdas, GraphQL API, and Storage. This way, you can save time and energy and just focus on making your app's main features awesome.
Plus, since it's an AWS thing, Amplify works like a charm with other AWS services, so you get to use a whole bunch of powerful tools and resources. This means your app will be super scalable, reliable, and secure.
Joining the hackathon is an amazing chance for me to play around with AWS Amplify while building my project.
During the hackathon, I get to dive deep into a lot of features and get my hands dirty with Amplify. This is gonna level up my development skills and help me get the hang of cloud-based app development.
So, let's give a warm welcome to the Amplify news aggregator:

If you don't feel like reading this whole thing, no worries! Just start using the app at this link: https://main.d29hoxfyo0vdci.amplifyapp.com
Project Overview
My fantastic app collects news from a wide variety of sources like RSS, YouTube, and Apple Podcasts! It creates beautifully normalized content for an enhanced reading experience, and it even generates snappy summaries to provide users with the most essential and concise information! 🌟
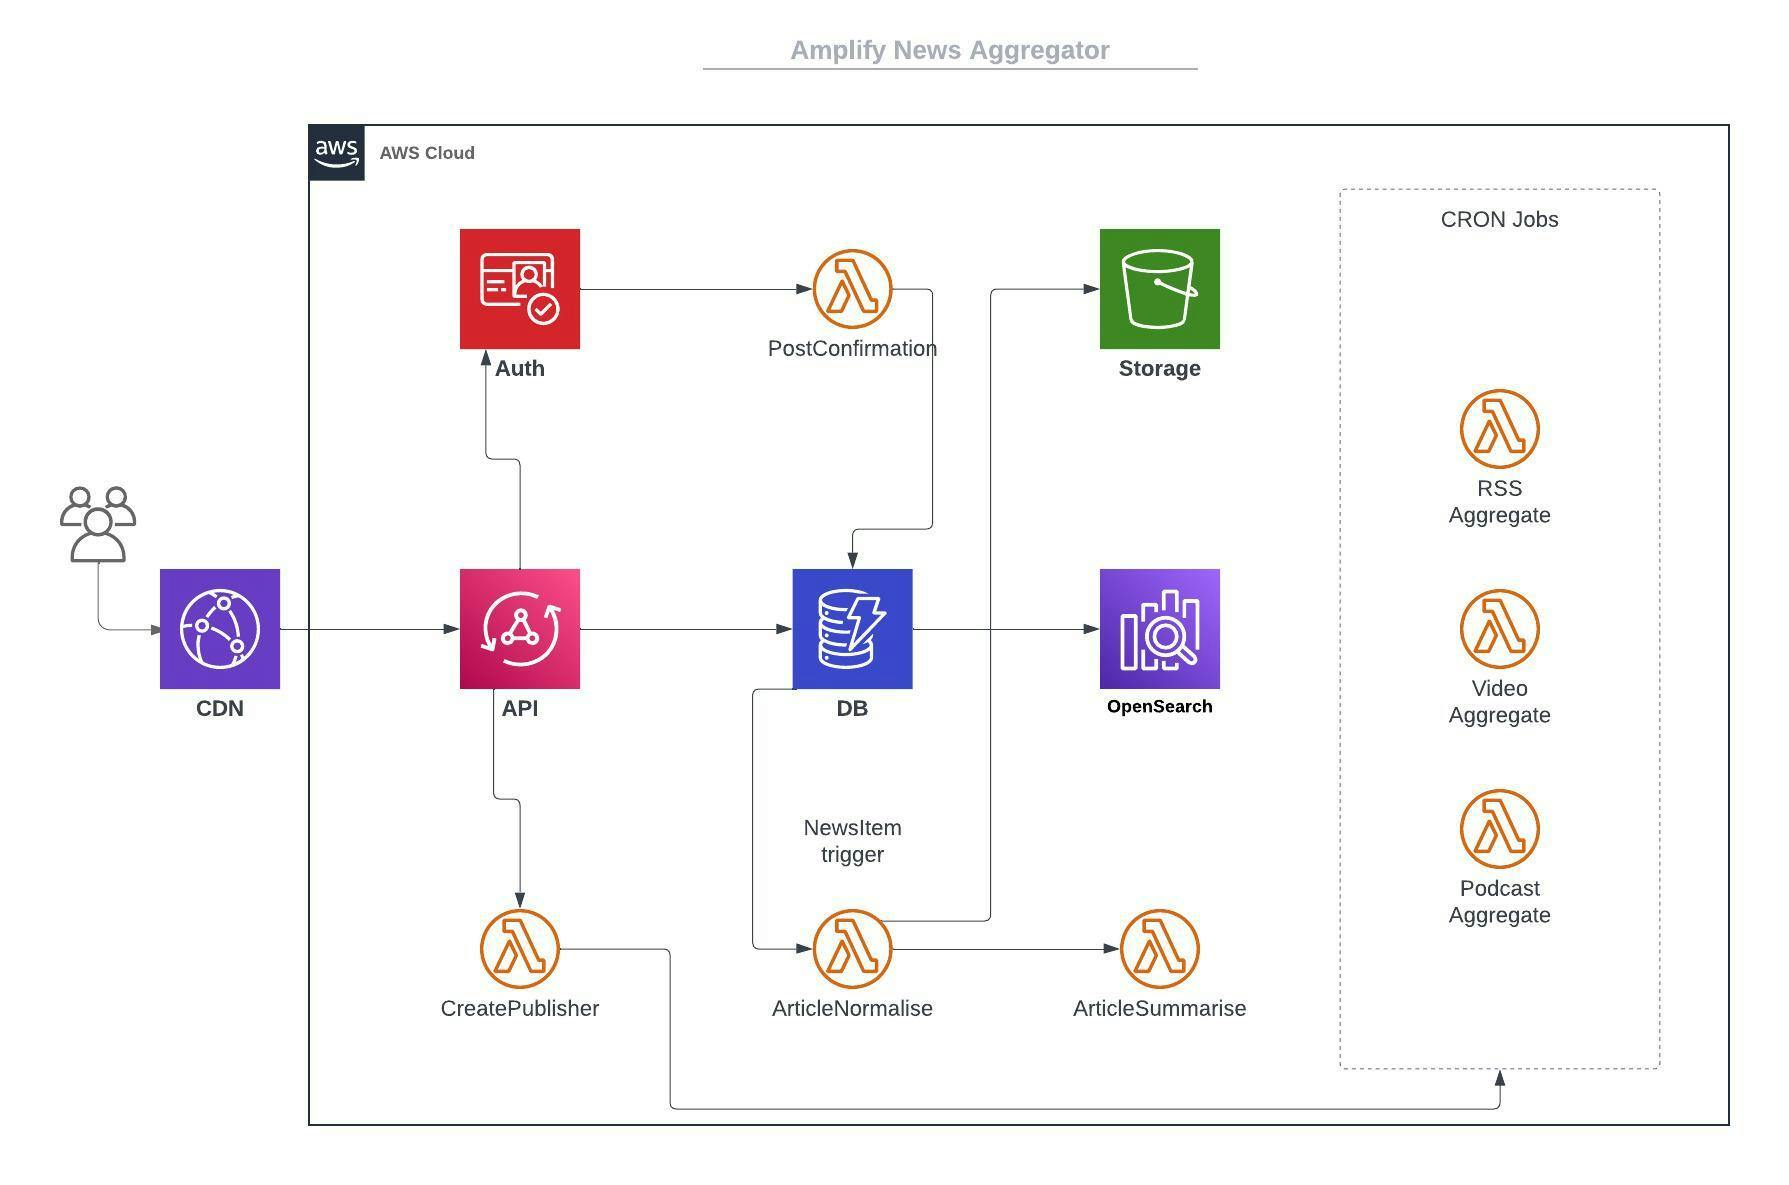
Amplify Backend: I've integrated top-notch authentication features with email and Google social login to ensure the utmost security for users! 🛡️ I chose GraphQL as the API specification to manage data and offer a cutting-edge development experience. For news aggregation and normalization, I crafted lambdas using TypeScript and Python, making the processing of news from different sources a breeze! 🚀 Plus, the images gathered during the news aggregation process are stored in Amazon S3 for super-efficient storage and retrieval!
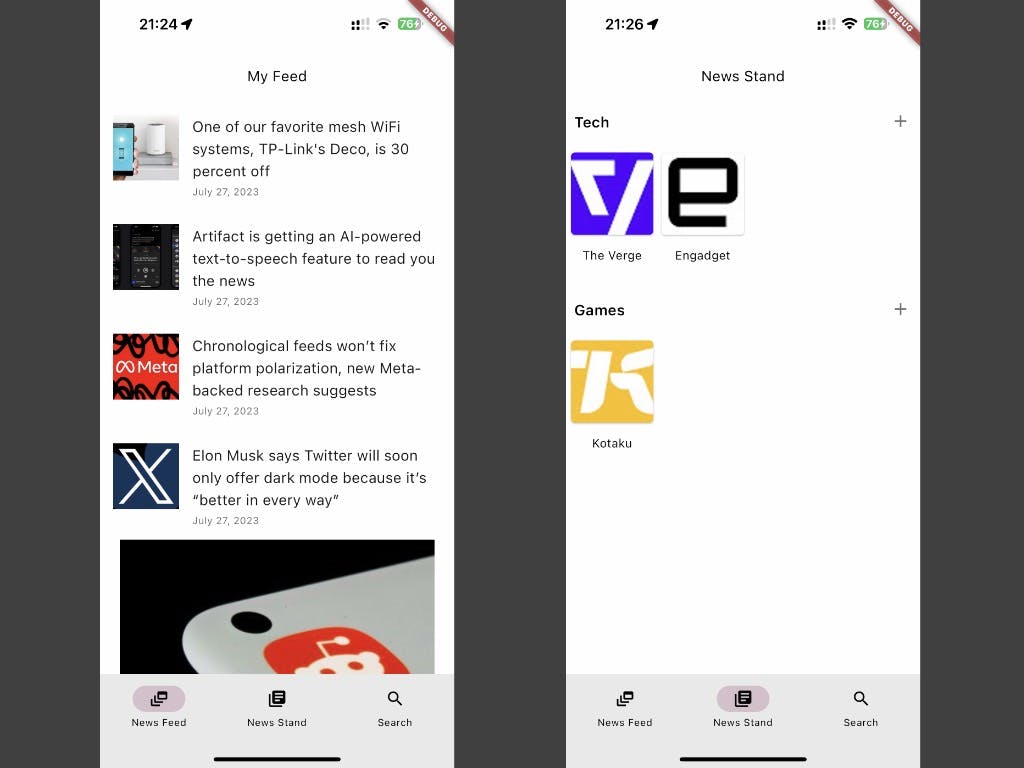
Mobile App: I decided to use Flutter, an incredibly powerful cross-platform framework! 📱 The app offers user authentication, a News Feed screen for devouring all the aggregated news, and a News Stand screen showcasing all publishers. Users can open news articles, play videos, and listen to podcasts for a truly immersive news-reading experience! 🎧
Web App: It boasts similar functions to the mobile app, like user authentication, a user news feed screen, and a publisher news feed screen. But wait, there's more! It also provides admin capabilities like topic creation and publisher addition, making these tasks a breeze and super-efficient when performed through a web interface! 💻
AWS Amplify Features I will use
Authentication: Cognito + Social Auth (Google)
API: AppSync - A managed GraphQL service featuring built-in websocket support. Amplify incorporates a component known as GraphQL Transformer, which generates code based on the description of the GraphQL schema. Additionally, I will utilize Lambda to implement some extra business logic and OpenSearch for advanced news searching
Database: DynamoDB - Amplify generates items for easy data structure and storage. It supports database hooks for storing information.
Storage: S3 - Used for storing images.
Hosting: Amplify Hosting - Helps build the project after each commit and hosts it on S3. It also utilizes CloudFront for CDN capabilities.
Additional tools:
Amplify CLI: Command line tool for configuring and deploying AWS Amplify application
Amplify UI: A library for building web application UI components. I will use them in both React and Flutter apps.
Amplify Studio: I will use it to create components and forms based on Figma designs.
Get ready for a fun and engaging read! Together, we'll dive into the world of app development with Amplify. We'll discover Amplify's strengths, the challenges it faces, and how I tackled some of them. Enjoy the journey!
Amplify Backend
In my case, I decided to use Amplify CLI to create almost all parts of my backend infrastructure. Amplify also has a great tool called Amplify Studio, where you can easily create data models and manage users and data. However, once you start doing some additional tasks, it will stop working. So, in my case, Amplify CLI is a better choice, and I will also be doing a lot of advanced things with it.
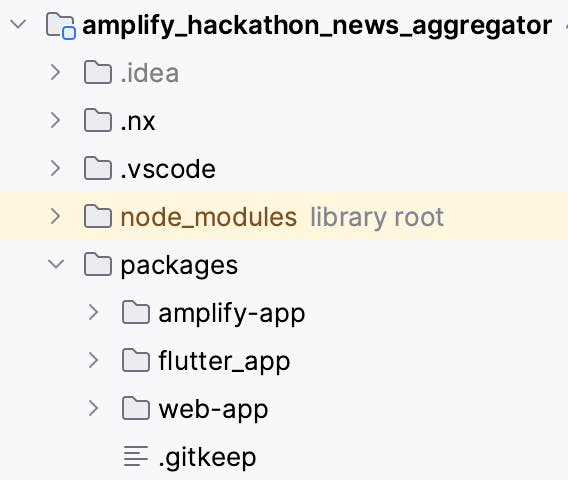
I decided not to install Amplify within another app, but instead to create a separate app in my monorepo. So the backend app will contain only the Amplify application and shared business logic for Lambda functions.
For creating a project with Amplify CLI and fulfilling all prerequisites, please refer to the documentation.
Authentication
With the Amplify CLI, I used the command amplify add auth to add authentication. If you require a default configuration, you need to perform a minimal amount of actions to set up authentication. In my case, I also needed authentication with a social provider (Google), and I wanted to have a Lambda function that would be called after every successful user creation. Therefore, I had to go through many more steps in the CLI API.
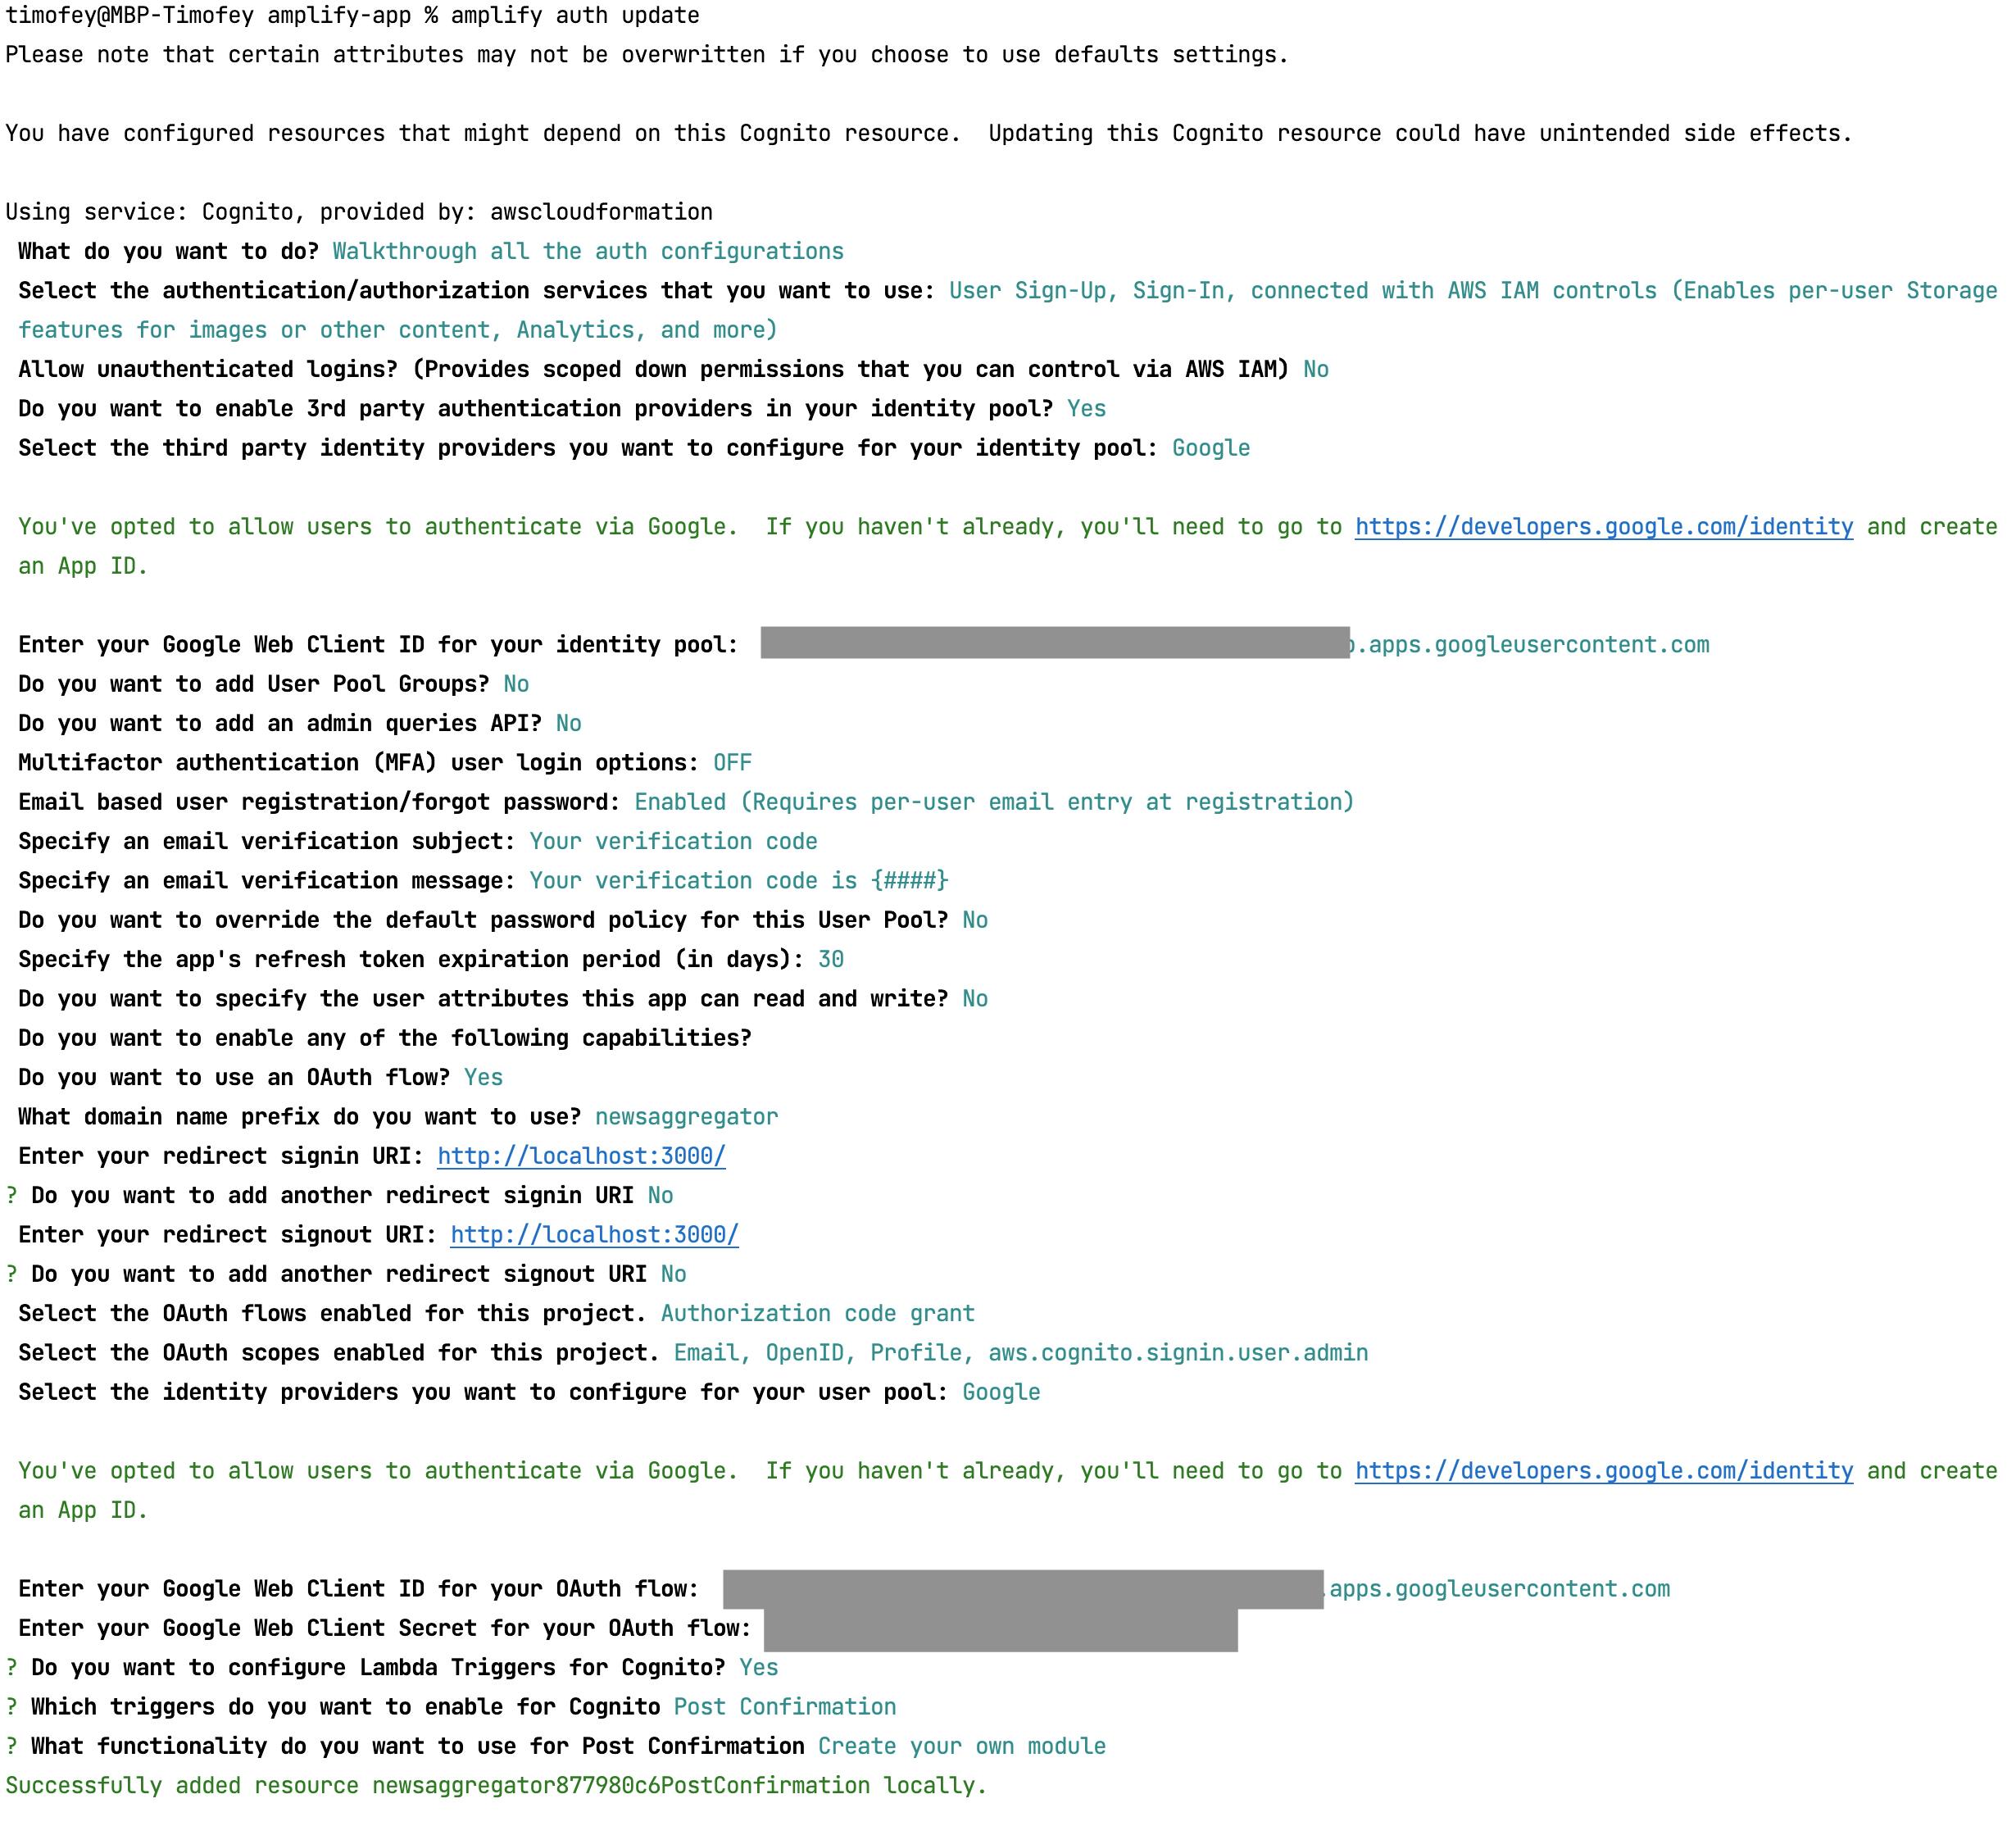
I know what you're thinking - "Oh, how many commands!". And I agree, especially if you encounter failure along the way, you'll need to start everything from scratch 🤣.
As you can see, I created a PostConfirmation hook - it is a Lambda function that will be called every time a user successfully signs up, whether through email or social media. Just look for its name: newsaggregator877980c6PostConfirmation. You can change it if you'd like. 🥲 Ugh, my inner perfectionist is freaking out.
Alright, we have completed the authentication process. Let's move on to data modelling.
Storage
Since this is a news aggregator, it is necessary to save all data related to articles, videos, and podcasts, including images. With the Amplify CLI, I can easily set up a storage using the command amplify storage add.
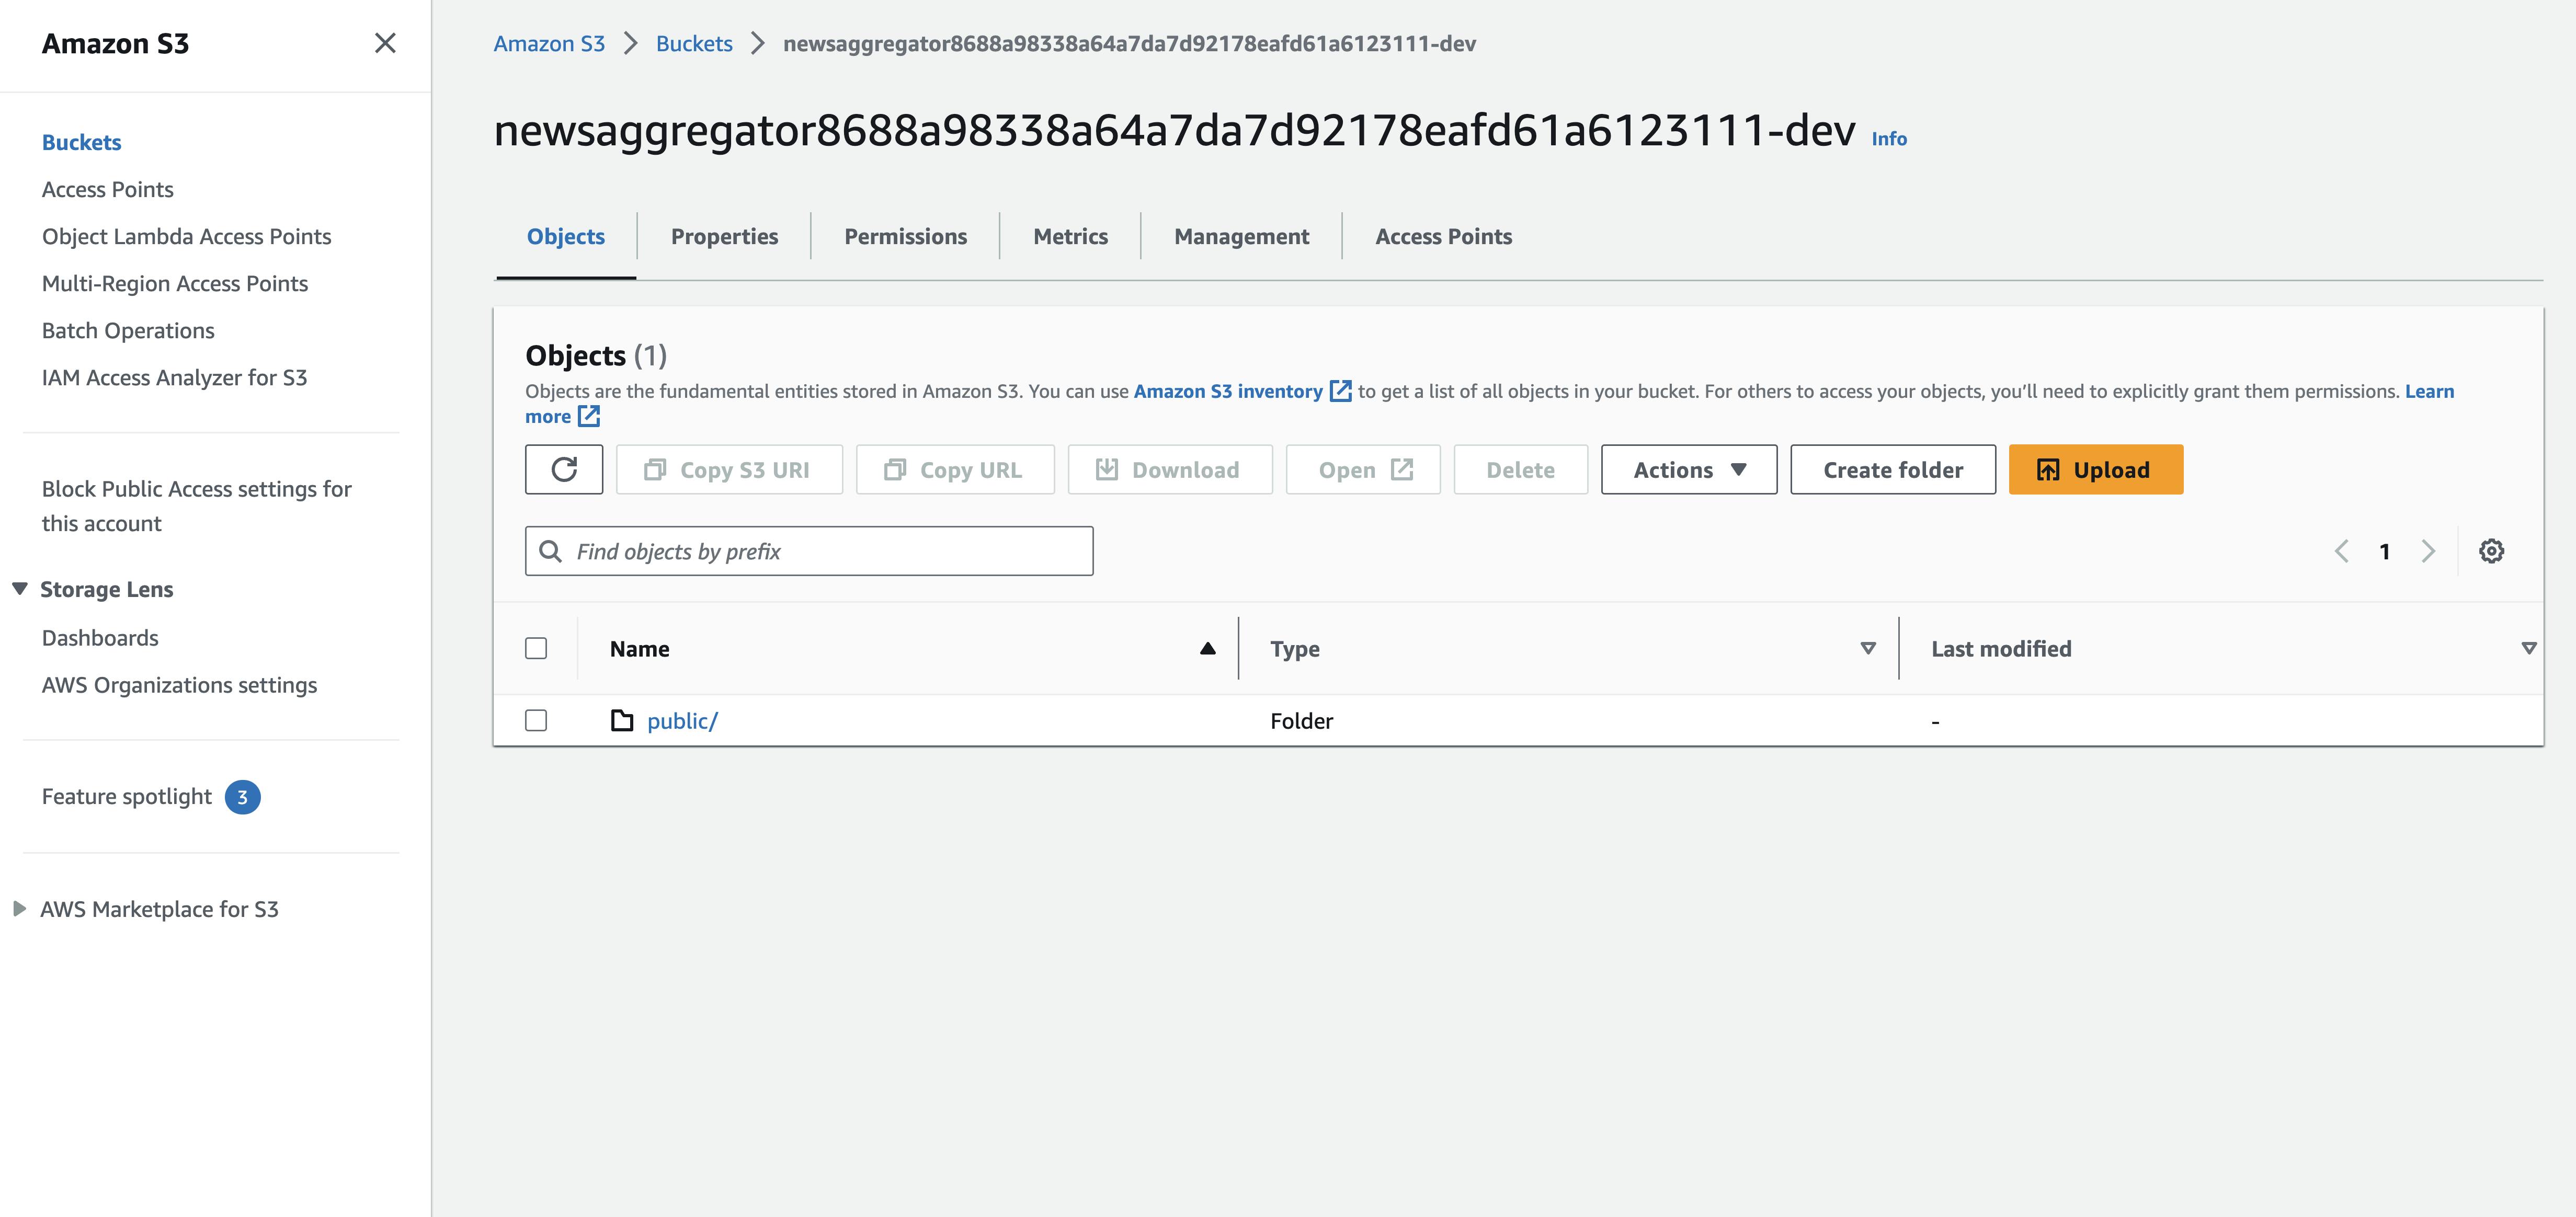
Btw, about the name, you can't change it, so yeah, 🥲
Data Modeling and API Development
Why GraphQL?
Now, about data modelling and API development, let me tell you why I'm a fan of GraphQL. It's super efficient because it can access the properties of multiple resources and follow references between them. Unlike REST APIs that need multiple URLs, GraphQL APIs fetch all the data your app needs in just one request. This makes apps using GraphQL speedy even on slow mobile network connections. 🚀
I've used GraphQL a lot in my past projects, and I usually had to write tons of code for basic CRUD operations for each data entity. But guess what? Not today! 🎉
With Amplify, I just need to create a GraphQL schema for each of your data models and add some additional directives to set up authentication rules, establish indexes, and attach additional Lambdas with custom business logic. Sounds cool, huh? 🦄
First, I need to create an API using the CLI. I entered the command amplify api add, and chose GraphQL as the API type.
Amplify asked, what authorization mode I want to use. By default, it uses API key auth mode. This is great if you have some data that needs to be accessed by guest users or if you don't want to think about authorization rules for your data. I chose Amazon Cognito User Pool auth mode. This means that every piece of data should be accessed by an authorized Cognito user. Later, we will see that inside the Lambda function, we can obtain a Cognito user object because we know which user is requesting the data. That's why every data entity will have an @auth directive with the Cognito user pool provider.
Ok, let's add some data entities to our schema.
Topic & Publisher
In my app, users need to create a publisher. A publisher can be a news company or a blogger. Publishers can be grouped by topics.
type Topic @model @auth(rules: [{ allow: private, provider: userPools }]) {
    id: ID!
    title: String!
    createdAt: AWSDateTime
    updatedAt: AWSDateTime

    publishers: [Publisher!]! @hasMany(indexName: "byTopic", fields: ["id"])
    news: [NewsItem!]! @hasMany(indexName: "byTopic", fields: ["id"])

    creatorID: ID! @index(name: "byUser")
}
The publisher should include various news sources, such as RSS channels, YouTube channels, and Apple Podcast RSS feeds. Due to the lack of support for GraphQL unions within the API, it is necessary to create a separate news source entity for each type.
enum SourceType {
    CUSTOM
    RSS
    YOUTUBE
    TWITTER
    ITUNES
    WEBSITE
}
type PublisherSourceWebsite {
    url: String!
}

type PublisherSourceRSS {
    url: String!
}

type PublisherSourceYouTube {
    playlistUrl: String
    channelID: String!
    username: String
}

type PublisherSourceITunes {
    url: String!
}

type PublisherSourceTwitter {
    username: String!
}

type PublisherSource @model @auth(rules: [{ allow: private, provider: userPools }]) {
    id: ID!
    type: String! @index(name: "byType") # SourceType enum
    title: String
    isHidden: Boolean!
    publisherTopicID: ID! @index(name: "byPublisherTopic")
    publisherID: ID! @index(name: "byPublisherAndType", sortKeyFields: ["type"])

    website: PublisherSourceWebsite
    rss: PublisherSourceRSS
    youtube: PublisherSourceYouTube
    twitter: PublisherSourceTwitter
    itunes: PublisherSourceITunes

    creatorID: ID! @index(name: "byUser")
}

type Publisher @model @auth(rules: [{ allow: private, provider: userPools }]) {
    id: ID!
    title: String!
    description: String!
    createdAt: AWSDateTime!
    updatedAt: AWSDateTime

    topicID: ID! @index(name: "byTopic")
    topic: Topic! @belongsTo(fields: ["topicID"])
    sources: [PublisherSource!]! @hasMany(indexName: "byPublisherAndType", fields: ["id"])
    avatarID: ID!
    avatar: Picture! @hasOne(fields: ["avatarID"])
    coverID: ID
    cover: Picture @hasOne(fields: ["coverID"])

    news: [NewsItem!]! @hasMany(indexName: "byPublisher", fields: ["id"])

    creatorID: ID! @index(name: "byUser")
}
These entities have relationships with each other, so I used the @hasMany directive for one-to-many relations and @hasOne for one-to-one relations. Each relationship should have an @index. Some indexes have a name. This makes it possible to query data accurately using these indexes. More information about indexes and relationships can be found in the documentation.
User
As you may recall from previous paragraphs, I created an auth hook to implement user creation after each user signs up. Here is a model of the user entity in the API that will be created:
type User @model @auth(rules: [{ allow: private, provider: userPools }]) {
    id: ID!
    userName: String! @index(name: "byUserName", queryField: "getUserByUserName")
    email: String!
    createdAt: AWSDateTime!
    updatedAt: AWSDateTime!

    publishers: [Publisher!]! @hasMany(indexName: "byUser", fields: ["id"])
    topics: [Topic!]! @hasMany(indexName: "byUser", fields: ["id"])
    news: [NewsItem!]! @hasMany(indexName: "byUser", fields: ["id"])
}
News
I will create a primary news entity and separate entities for each news data type: RSS, YouTube, or iTunes (for Apple podcasts). The RSS type will include scraped content and a summary, generated using various Lambda functions.
type NewsItemDataRSS {
    url: String!
    ampUrl: String
    categories: [String!]
    author: String
    isScraped: Boolean!

    # After scraping
    coverUrl: String
    contentHtml: String
    contentText: String
    contentJson: String
    wordsCount: Int
    readingDurationInMilliseconds: Int

    # After machine learning
    keywords: [String!]
    summary: String
}

type NewsItemDataYouTube {
    videoId: String!
    coverUrl: String
}

type NewsItemDataITunes {
    audioUrl: String!
    coverUrl: String
    keywords: [String!]
    durationFormatted: String
}

type NewsItem @model @auth(rules: [{ allow: private, provider: userPools }]) @searchable {
    id: String! @primaryKey(sortKeyFields: ["publishedAt"])
    type: SourceType!
    title: String!
    description: String!
    publishedAt: AWSDateTime!
    createdAt: AWSDateTime!
    updatedAt: AWSDateTime

    coverID: ID
    cover: Picture @hasOne(fields: ["coverID"])
    publisherID: ID! @index(name: "byPublisher", sortKeyFields: ["publishedAt"])
    publisher: Publisher! @belongsTo(fields: ["publisherID"])
    topicID: ID! @index(name: "byTopic", sortKeyFields: ["publishedAt"])
    topic: Topic! @belongsTo(fields: ["topicID"])
    creatorID: ID! @index(name: "byUser", sortKeyFields: ["publishedAt"])

    rss: NewsItemDataRSS
    youtube: NewsItemDataYouTube
    itunes: NewsItemDataITunes

}
To sort news by the published date, create a sort index within the @primaryKey directive.
Additionally, I added a @searchable directive. It is a very cool and underestimated Amplify feature. This directive handles streaming data to the Amazon OpenSearch Service and configures search resolvers that search that information. The search will work faster and offer more options. You can read more about it in the documentation.
Query & Mutation
According to my data schema, the Amplify GraphQL Transformer will generate a much larger schema for AWS AppSync, which will include all CRUD operations for my data entities connected to DynamoDB items. But what if I want to have some custom data queries or mutations? Amplify provides a possibility for it.
input GetNewsItemRSSInput {
    id: String!
}

type Query {
    myUser: User! @function(name: "NewsAggregatorMyUser-${env}")
    getNewsItemRSS(input: GetNewsItemRSSInput!): NewsItem @function(name: "NewsAggregatorGetNewsItemRSS-${env}")
}

input CreatePublisherSourceRSSInput {
    url: String!
}

input CreatePublisherSourceYoutubeInput {
    username: String
    channelID: String
    url: String
}

input CreatePublisherSourceTwitterInput {
    username: String!
}

input CreatePublisherSourceCustomInput {
    type: SourceType!
    rss: CreatePublisherSourceRSSInput
    youtube: CreatePublisherSourceYoutubeInput
    twitter: CreatePublisherSourceTwitterInput
    itunes: CreatePublisherSourceRSSInput
}

input CreatePublisherCustomInput {
    title: String!
    description: String
    avatarUrl: String
    coverUrl: String
    topicID: ID!
    websiteUrl: String
    sources: [CreatePublisherSourceCustomInput!]
}

type Mutation {
    createPublisherCustom(input: CreatePublisherCustomInput!): Publisher! @function(name: "NewsAggregatorCreatePublisher-${env}")
}
To request user-related data, I need to know the user ID. To simplify the web and mobile application code, I decided to create a custom query called myUser, connected to a small Lambda function. This function will obtain the Cognito user's email from the API event and automatically retrieve the user ID from DynamoDB.
Additionally, I want to simplify publisher creation. Amplify automatically created a mutation called createPublisher for me, as well as each publisher sources mutation. However, this means that if I want to create a publisher, I need to use 3-5 mutations from the client side to create: the publisher, 1-3 publisher sources, and the publisher avatar picture. To simplify this process, I will create a custom mutation called createPublisherCustom with custom business logic inside a Lambda function.
Picture
I want to save news article covers and publisher avatars in S3. However, it is also very important to have information about the pictures in the database.
type Picture @model @auth(rules: [{ allow: private, provider: userPools }]) {
    id: ID!
    type: PictureType!
    bucket: String!
    key: String!
    resized(input: ResizedImageCustomInput): ResizedPicture @function(name: "NewsAggregatorPropertyResizedPicture-${env}")
    createdAt: AWSDateTime
    updatedAt: AWSDateTime
}

input ResizedImageCustomInput {
    width: Int!
    height: Int!
}

type ResizedPicture {
    original: String!
    custom: String!
    small: String!
    medium: String!
    large: String!
}
Additionally, I want to resize pictures on-demand for web and mobile applications. Every screen size requires a different size of the picture for faster image loading. That's why I created a resized property. A Lambda function, attached to this property, will provide me with a resized version of the image. This property has its input.
To be honest, this solution is not the best and will encounter performance issues with large amounts of data. This is because we have an N+1 problem. You can read more about this problem here.
How to solve this issue?
Since we have a serverless backend, we cannot use a data loader like in a monolithic backend. There are a few ways to address this problem in AppSync. With Lambda resolvers, you can utilize BatchInvoke. However, this solution only partially addresses the issue, as the maximum batch size is limited to 5. The problem remains unresolved, and we hope the Amplify team will find an optimal solution in future.
Alright, I mentioned some Lambda resolvers in the schema before. You can find more information about resolvers in the documentation. Now, let's create them along with the other resolvers.
Lambda functions
Amplify provides an easy way to create, test, and deploy Lambda functions using various languages, including JavaScript, Java, Go, .NET Core, and Python. It's great that you can use multiple languages in your backend since each Lambda function is isolated.
In my case, I will use JavaScript for most of the Lambda functions and Python for those involving machine learning. But wait, JavaScript in 2023? Well, I can write type-safe code with annotations, but what about code sharing? I can use Lambda layers, but they won't work locally if I want to test my code. However, it's still complex.
To simplify function development, I decided to use TypeScript. Let me show you how I set up my environment.
Using TypeScript to Write Lambda Functions
Step 1. Set up the TypeScript configuration and bundling
Since I'm using the NX monorepo tool, I already have a tsconfig.json, and each project extends it.
To bundle TypeScript, I chose Rollup. Why Rollup? Because it can compile TypeScript into ES modules, which makes your code smaller in size and more readable. It takes some time to set it up properly. Here is my Rollup configuration in the amplify application folder:
import commonjs from '@rollup/plugin-commonjs';
import typescript from 'rollup-plugin-typescript2';
import autoExternal from 'rollup-plugin-auto-external';
import json from '@rollup/plugin-json';
import path from "path";

export default {
    input: 'index.ts',
    output: {
        dir: '.',
        format: 'cjs'
    },
    plugins: [ autoExternal({
        builtins: true,
        dependencies: true,
        packagePath: path.resolve('./package.json'),
        peerDependencies: false,
    }), json(), commonjs(), typescript()],
};
Step 2. Creating a function with Amplify CLI
You can create a new function using the amplify function add command. Then, you should select an appropriate function name.

Why is this function name so complex?
Step 3. Bundle setup in each function
To bundle this function, you need to create a rollup.config.js and tsconfig.json file inside each Lambda's src folder. Both should extend their root configurations:
// rollup.config.js

import config from "../../../../../rollup.config";
export default config;

// tsconfig.json
{
  "extends": "../../../../../tsconfig.json"
}
Additionally, you should add the build and watch commands to the package.json file inside src folder:
{
  "name": "newsaggregatoraggregaterssfeed",
  "version": "2.0.0",
  "description": "Lambda function generated by Amplify",
  "main": "index.js",
  "license": "Apache-2.0",
  "scripts": {
    "watch": "rollup -c -w",
    "build": "rollup -c"
  },
  "dependencies": {
    "rss-parser": "^3.12.0"
  },
  "devDependencies": {
    "@types/aws-lambda": "^8.10.92"
  }
}
Now, you can create an index.ts file inside the src folder and write your Lambda code. Additionally, you can import functions from other locations. In my case, I have an src folder at the top level of the Amplify project folder, which allows me to easily share my business logic.
Here is what my Amplify app folder looks like:
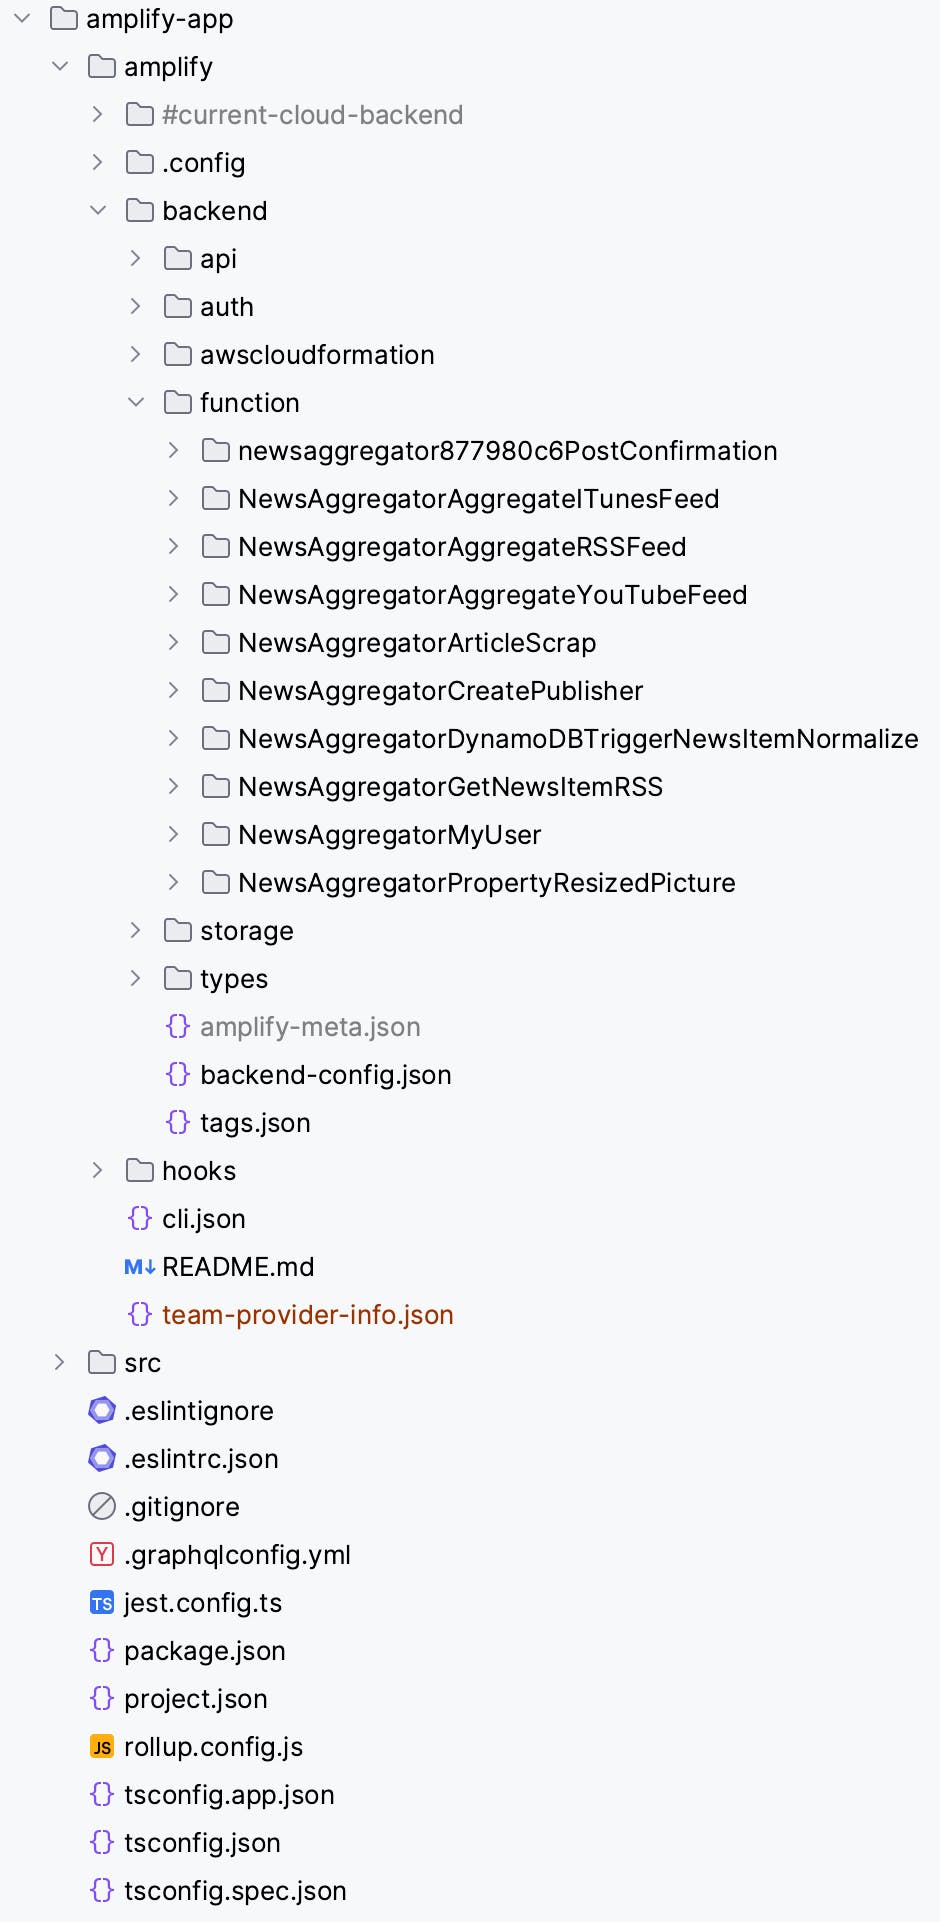
However, that's not all. If you call the Amplify function 'build NewsAggregatorAggregateRSSFeed', it will now work.
Step 4. Teach the Amplify CLI to build your function.
There are two ways to accomplish this:
Set up a build command hook. You can read more about it here.
Add build instructions for each function.
I chose the second way. In the root of my Amplify application folder, you can see a package.json file. Amplify provides you with the possibility to add a build instruction for each function. Here's what my scripts look like:

Sure, it might not be the prettiest solution, but when you create a new function, you'll need to add a new script for it. No worries, though! 🤜🤛
That's it. Now you can bundle your function individually or use the amplify function build command.
Adding some additional feature
Here is an example of the NewsAggregatorMyUser Lambda function:
import { AppSyncResolverHandler } from 'aws-lambda';

import {
  getUserByEmail,
  getUserEmailFromEventIdentity,
} from '../../../../../src/repositories/user.repository';
import { GetNewsItemRSSQueryVariables, User } from '../../../../../src/API';

export const handler: AppSyncResolverHandler<
  GetNewsItemRSSQueryVariables,
  User,
  any
> = async (event) => {
  const userEmail = getUserEmailFromEventIdentity(event);
  return await getUserByEmail(userEmail);
};
Since lambdas are fully typed, it is necessary to provide the type for each lambda argument and result. Sometimes, you may need to specify the type of the source object, as I did in the NewsAggregatorPropertyResizedPicture function.
Amplify has made our lives easier by auto-generating an AppSync schema for us. This means we can effortlessly ask it to create TypeScript types for this schema too. Then, we can use these types within our lambdas, just like in the example above. To make this magic happen, simply run the amplify codegen command. Cool, right? 😎
Lambda permissions
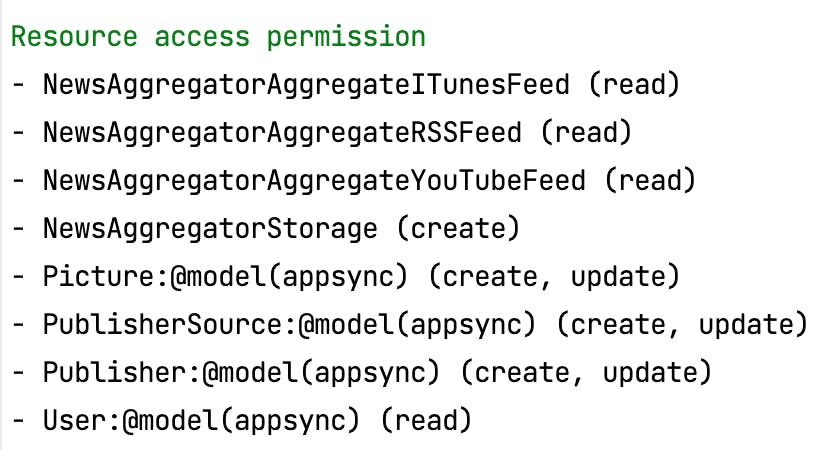
It is crucial to grant your Lambda access to other AWS resources. For instance, in the NewsAggregatorCreatePublisher function, I need to create a few data entities in DynamoDB, upload some images to S3, and call the NewsAggregatorAggregateRSSFeed lambda to aggregate this publisher's news right after its creation. How can this be achieved?
Upon creating the function, or after utilizing the amplify function update command, you should select the 'Resource access permission' option.
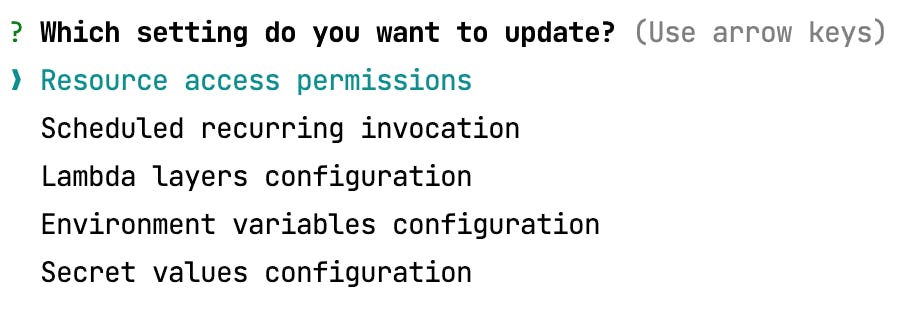
You will be prompted to choose which resource access permissions you want to grant. For example, this function requires these permissions:
Lambda variables
NewsAggregatorAggregateRSSFeed utilizes the YouTube API to obtain information about a publisher's YouTube channel. To accomplish this, the YouTube API and an API key are required. The question arises: where should this information be saved? This is where Lambda variables come in handy. After running the amplify function update command, I can choose an option to set up a Lambda variable for each environment.

Lambda recurring invocation
Since my project is a news aggregator, it needs to aggregate news regularly. Therefore, my aggregation Lambda should have a recurring invocation setup. It's great that Amplify allows you to set this up through the CLI for each Lambda.

Now, I'm happily gathering RSS news and YouTube videos every hour and podcasts daily. It's so convenient that Amplify 😍lets me set this up through the CLI for each Lambda!
Setup lambda as DynamoDB Trigger
In my app, users can read an article's content and summary without visiting a website. To achieve this, I need to scrape each article after its creation. With serverless architecture, it's very easy to set up. The NewsAggregatorAggregateRSSFeed Lambda should do this after each article is created. It's much better to use an event-driven architecture pattern for this flow, but due to limited time during the hackathon, I had to choose another approach and create a DynamoDB trigger. I set it up so that after each NewsItem entity is created in DynamoDB, this Lambda launches automatically.
To create a DynamoDB trigger, you need to select the Lambda trigger as a function template after creating the function, and then choose your DynamoDB entity to trigger it:
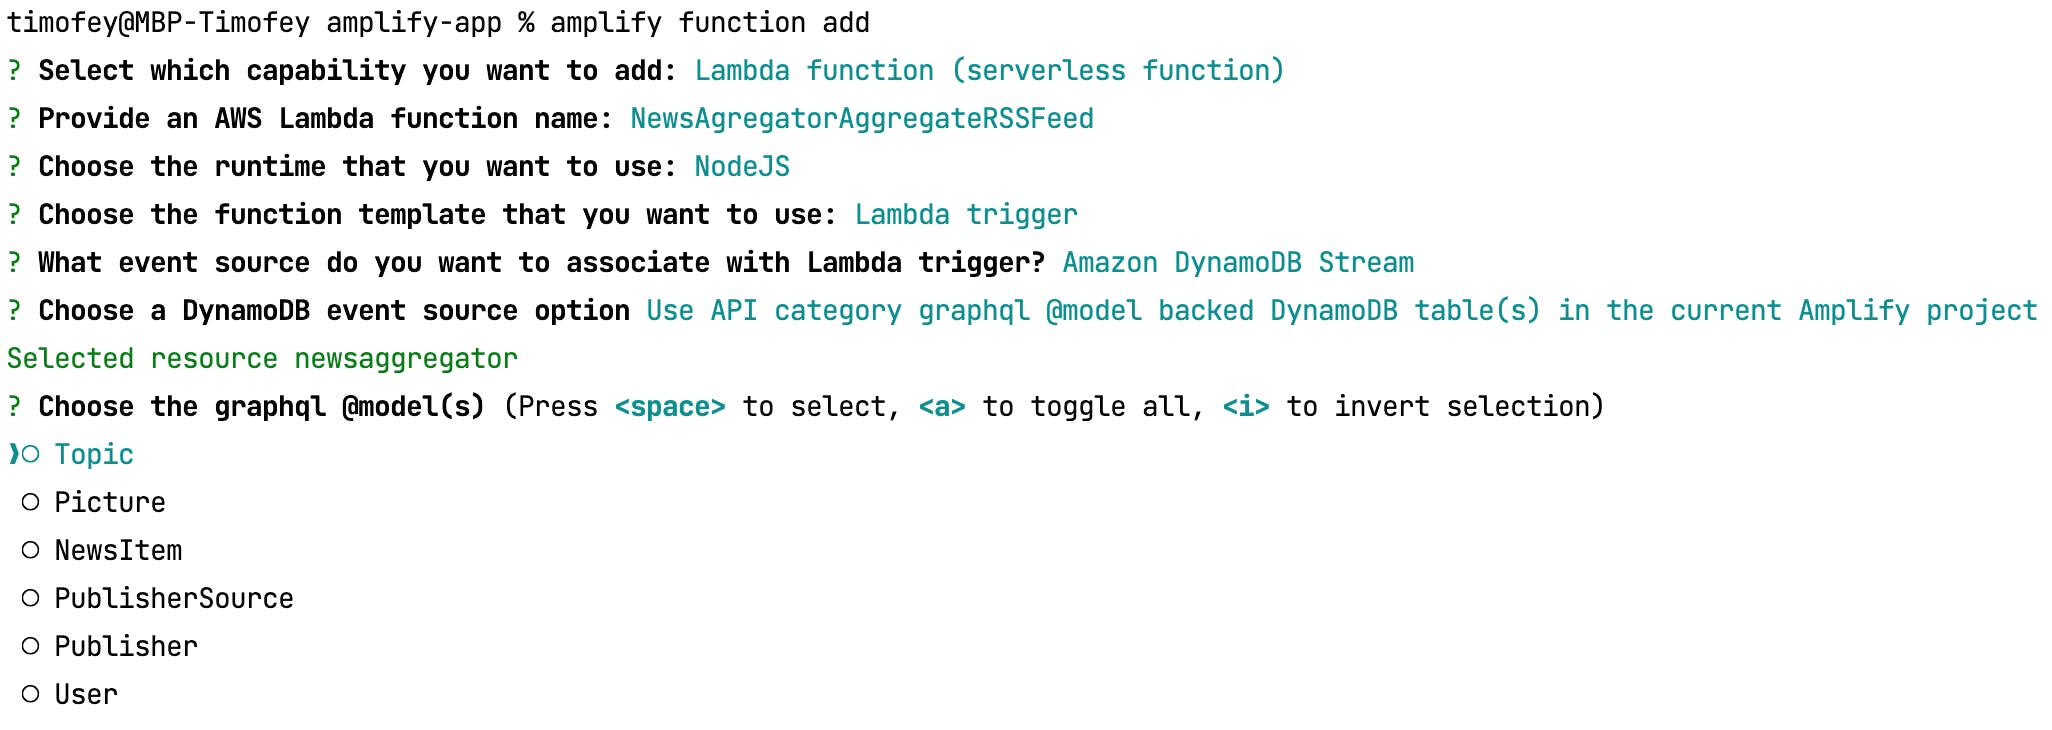
After configuring the AWS console, you will see that your Lambda is attached as a trigger and will launch after every entity creation or update.
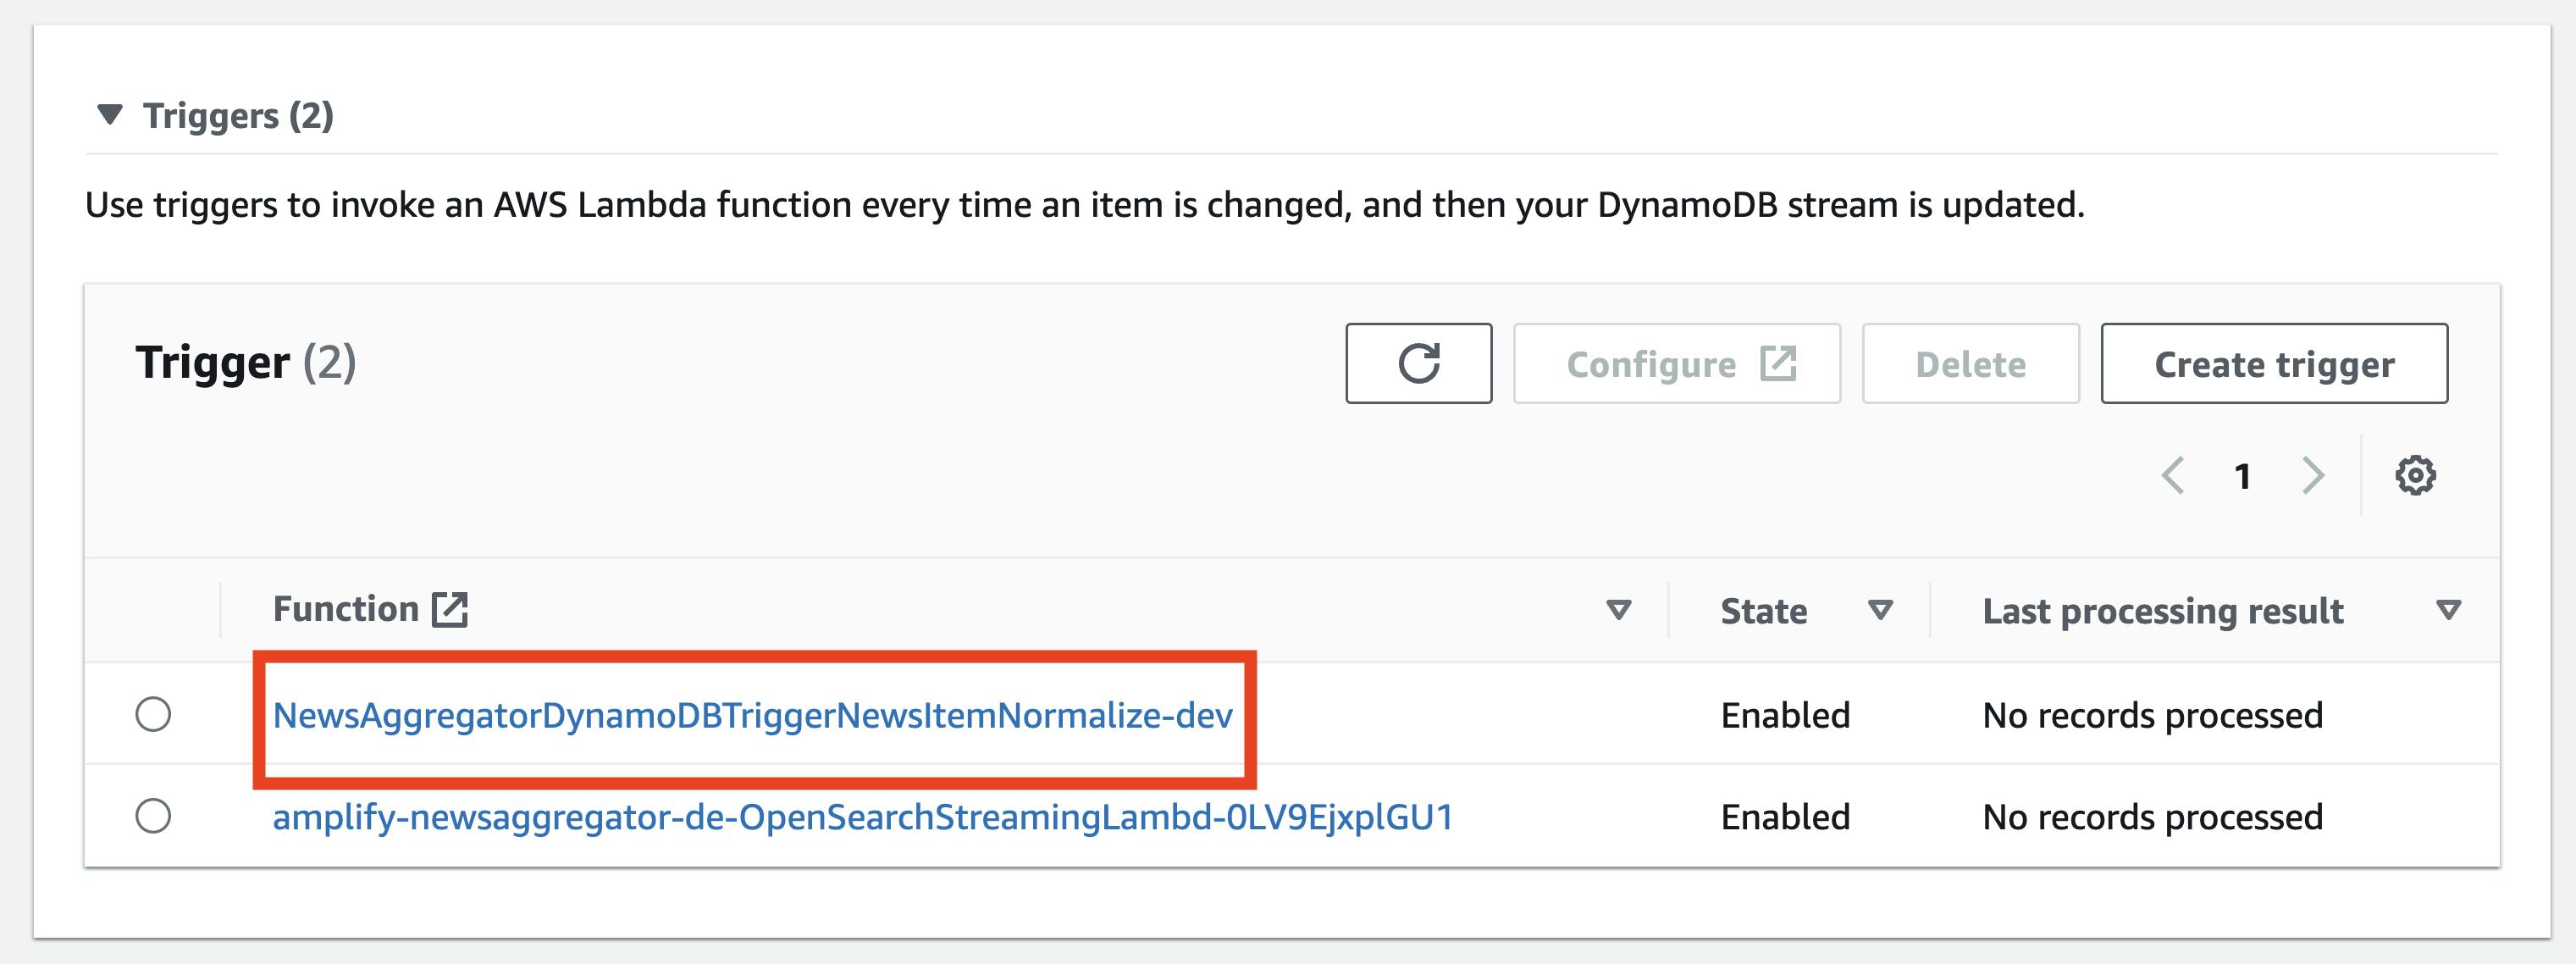
Here is how this Lambda appears internally:
export const handler: DynamoDBStreamHandler = async (
  event
): Promise<DynamoDBBatchResponse> => {
  const batchItemFailures: DynamoDBBatchItemFailure[] = [];

  const updatedNewsItems: NewsItem[] = [];
  console.log('Records Count: ' + event.Records.length);
  for (const record of event.Records) {
    if (record.eventName == 'INSERT') {
      console.log('DynamoDB Record: %j', record.dynamodb);
      const newsItem = unmarshall(
        record.dynamodb.NewImage as Record<string, AttributeValue>
      ) as NewsItem;
      try {
        let updatedNewsItem: NewsItem = null;
        switch (newsItem.type) {
          case SourceType.RSS:
            updatedNewsItem = await normalizeNewsItemFromRSS(newsItem);
            updatedNewsItems.push(updatedNewsItem);
            break;
        }
      } catch (e) {
        const curRecordSequenceNumber = record.dynamodb.SequenceNumber;
        batchItemFailures.push({ itemIdentifier: curRecordSequenceNumber });
      }
    }
  }

  await Promise.all([
    ...updatedNewsItems.map(updateNewsItem),
    ...updatedNewsItems.filter((item) => !!item.coverID).map(createCover),
  ]);

  return { batchItemFailures: batchItemFailures };
};
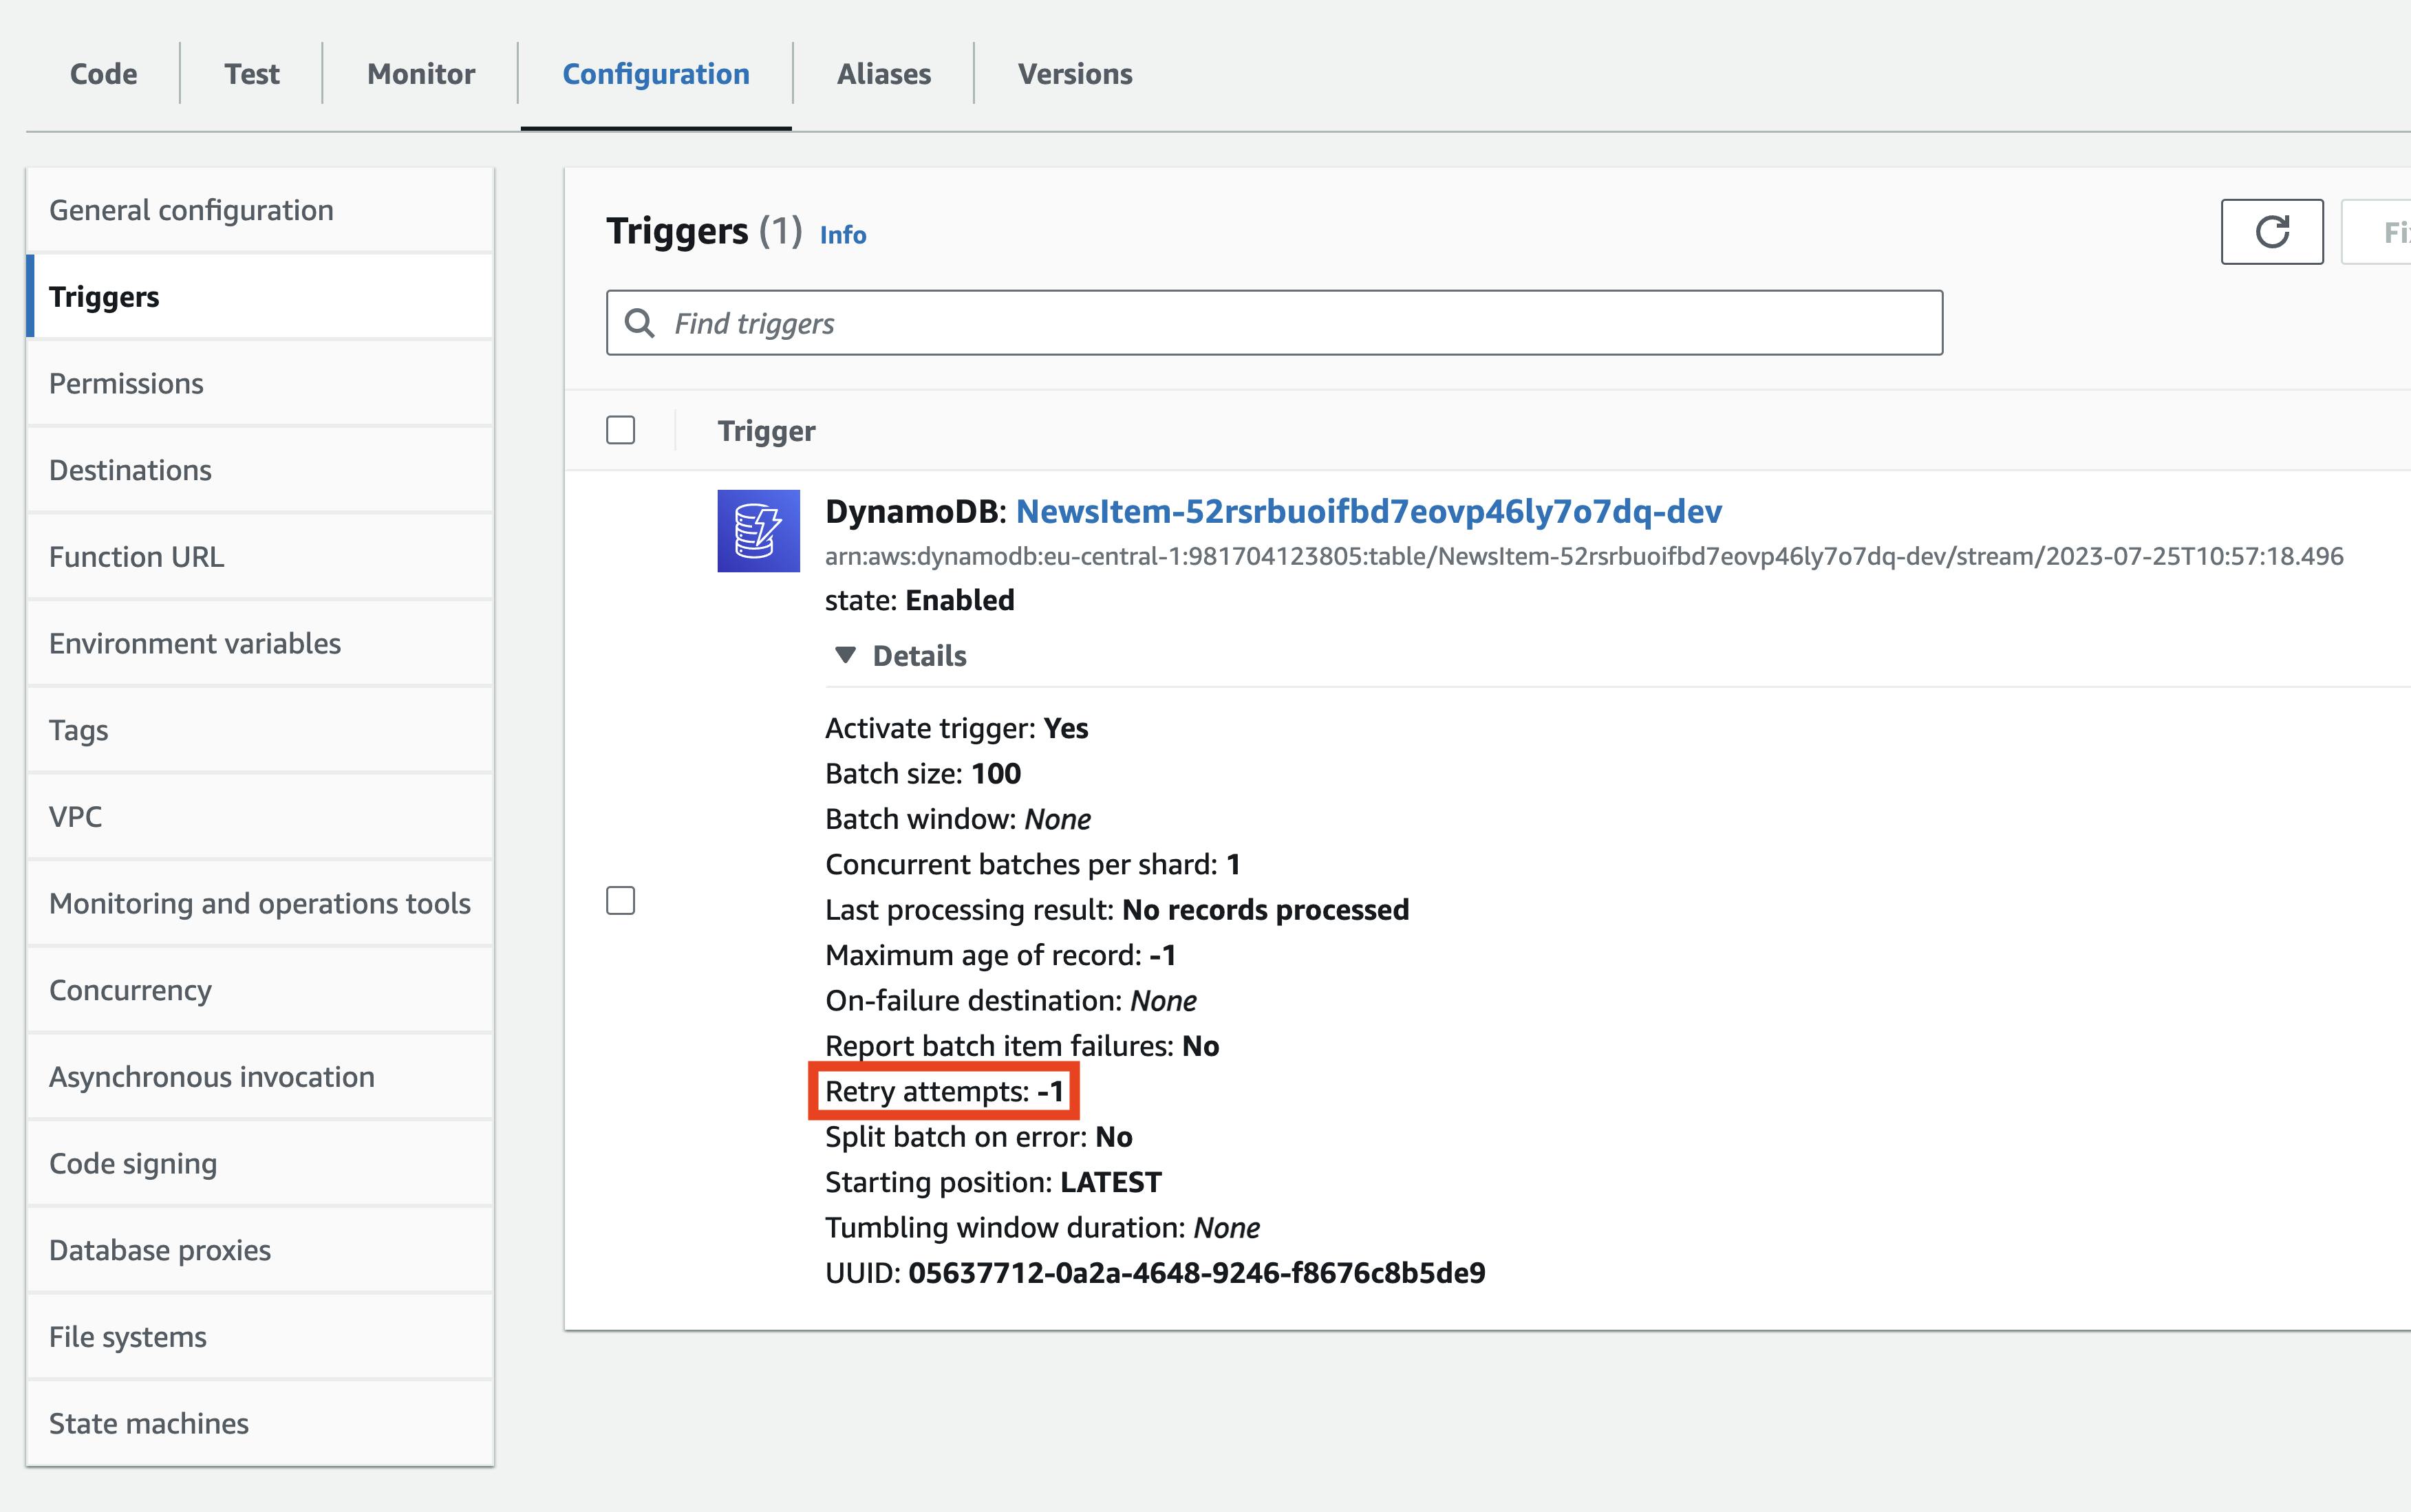
You gotta make sure that lambda's working right. If it messes up, AWS will just keep running it forever. No joke. Check it out in the trigger config:
Local Lambda testing
To test my Lambda function locally, I provide an event.json file with mock event arguments. After I launch the amplify mock function NewsAggregatorCreatePublisher command.

Checking logs
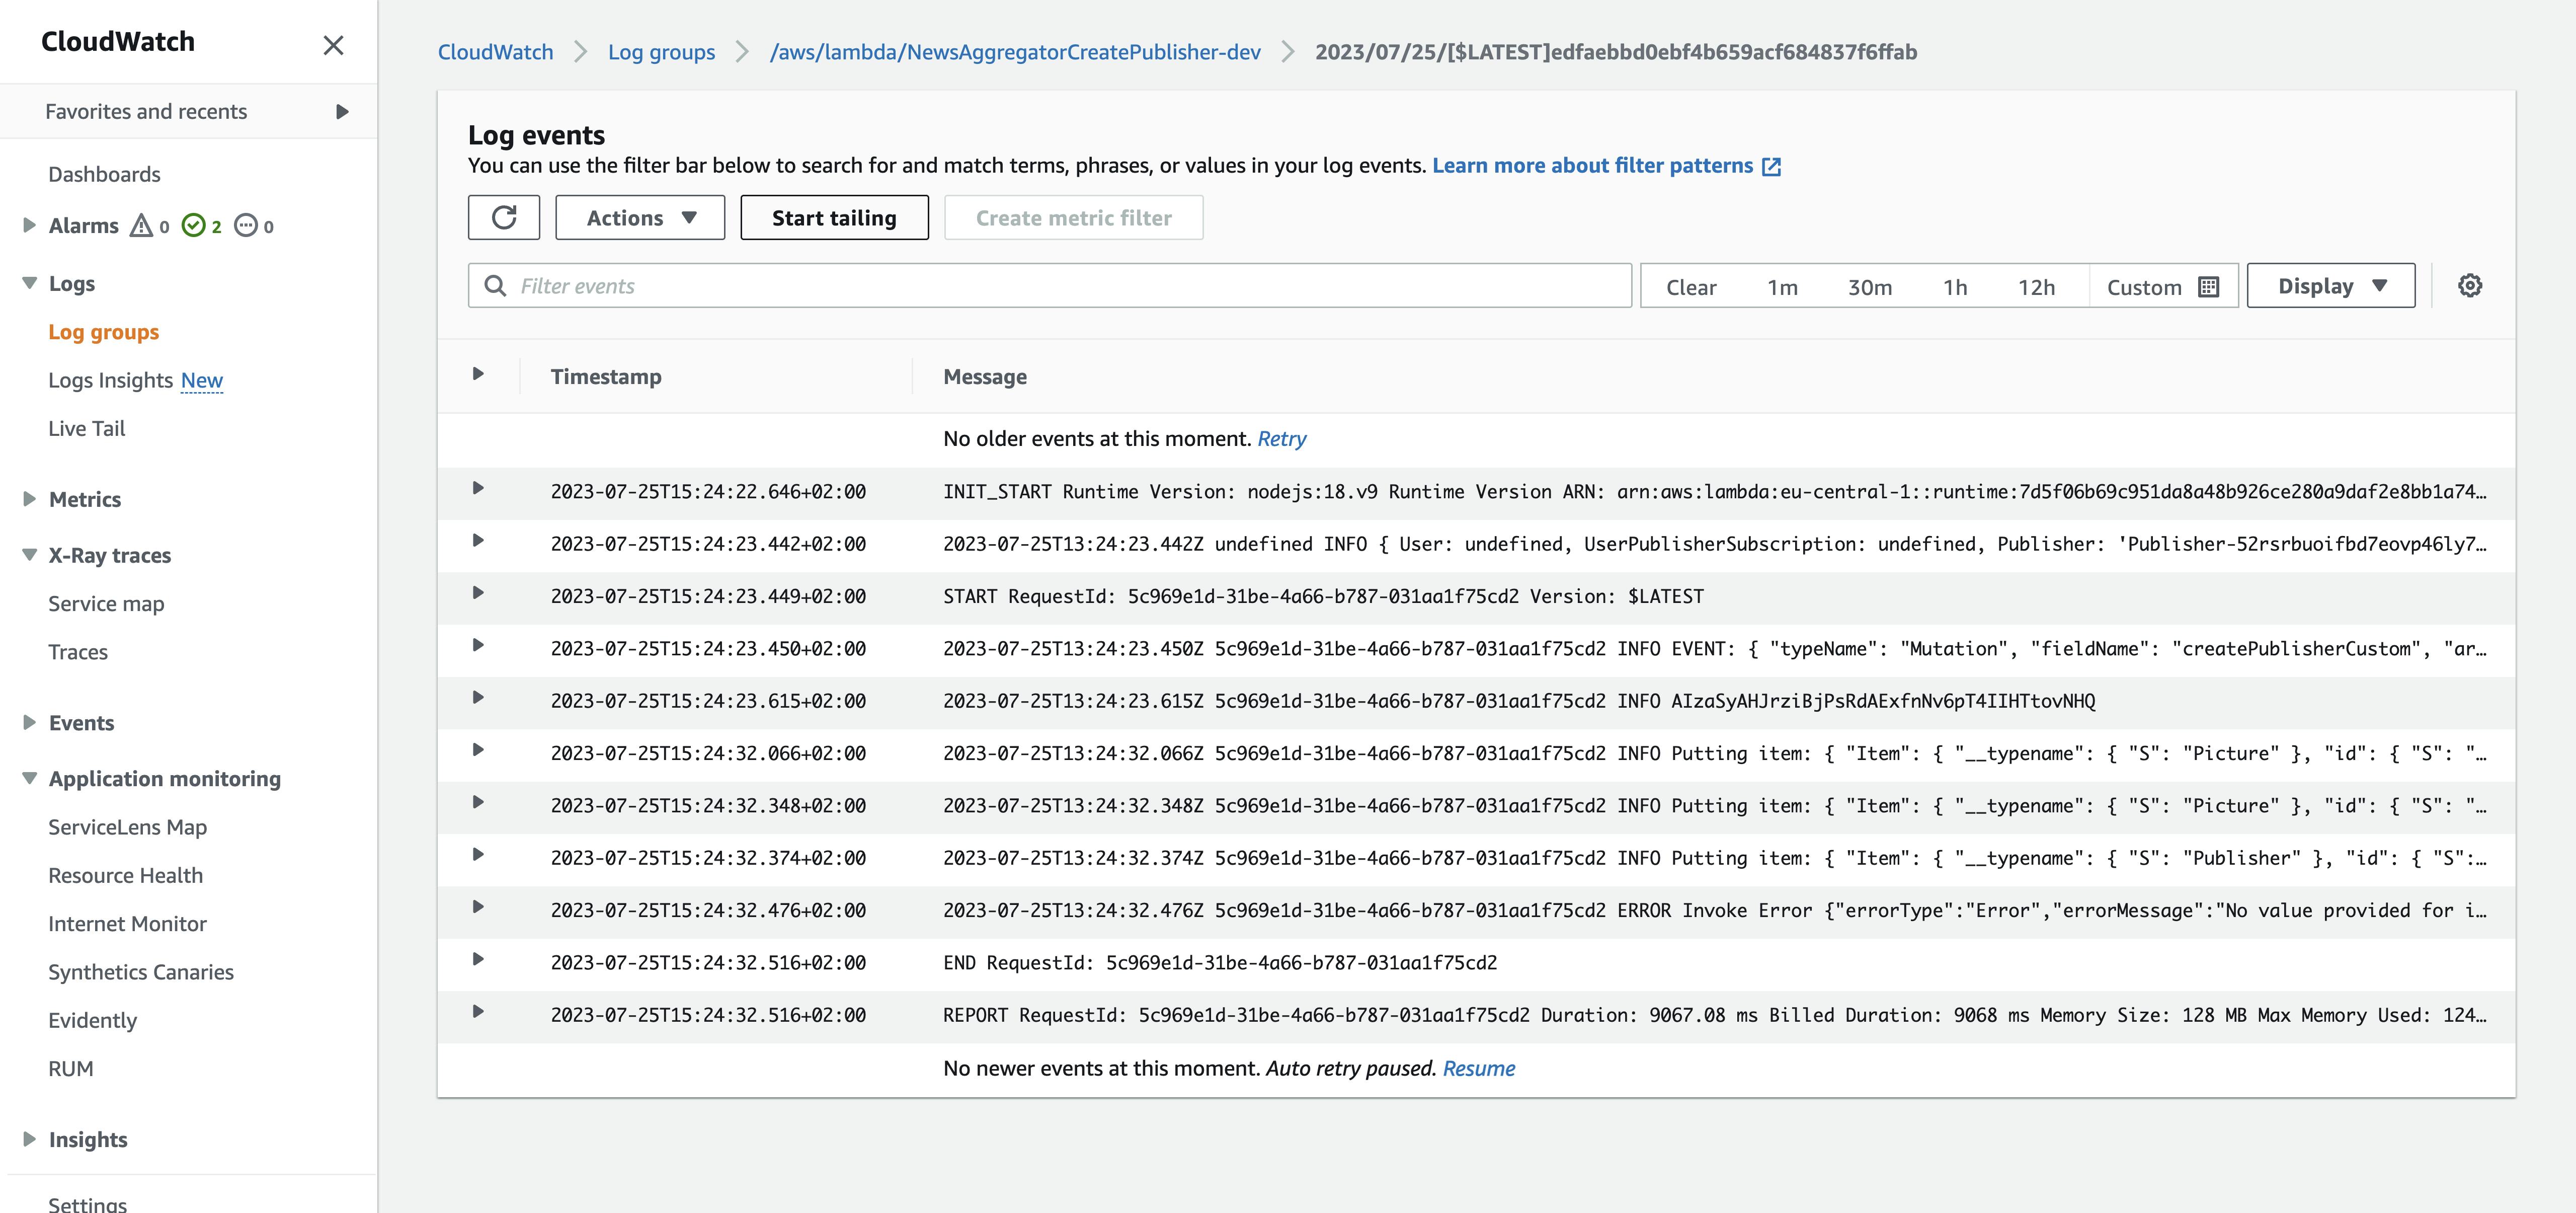
To check logs after deploy, AWS provides a useful service called CloudWatch. Every Lambda should have a CloudWatch group where you can check logs for each function invocation.
Extending amplify backend
If you want to utilize more features that Amplify provides, you can use the AWS Cloud Development Kit. However, in my case, I found a better solution.
AWS has an excellent solution library, where you can easily deploy a solution with the full power of AWS CloudFormation. Here, I discovered a Serverless Image Handler. It uses AWS services in conjunction with the sharp open-source image processing software and is optimized for dynamic image manipulation. You can use this solution to help maintain high-quality images on your websites and mobile applications, driving user engagement.

All you need to do is open this page and click the "Launch in the AWS Console" button. Don't forget to change the region afterwards from the default us-east-1. This is what the configuration looks like:
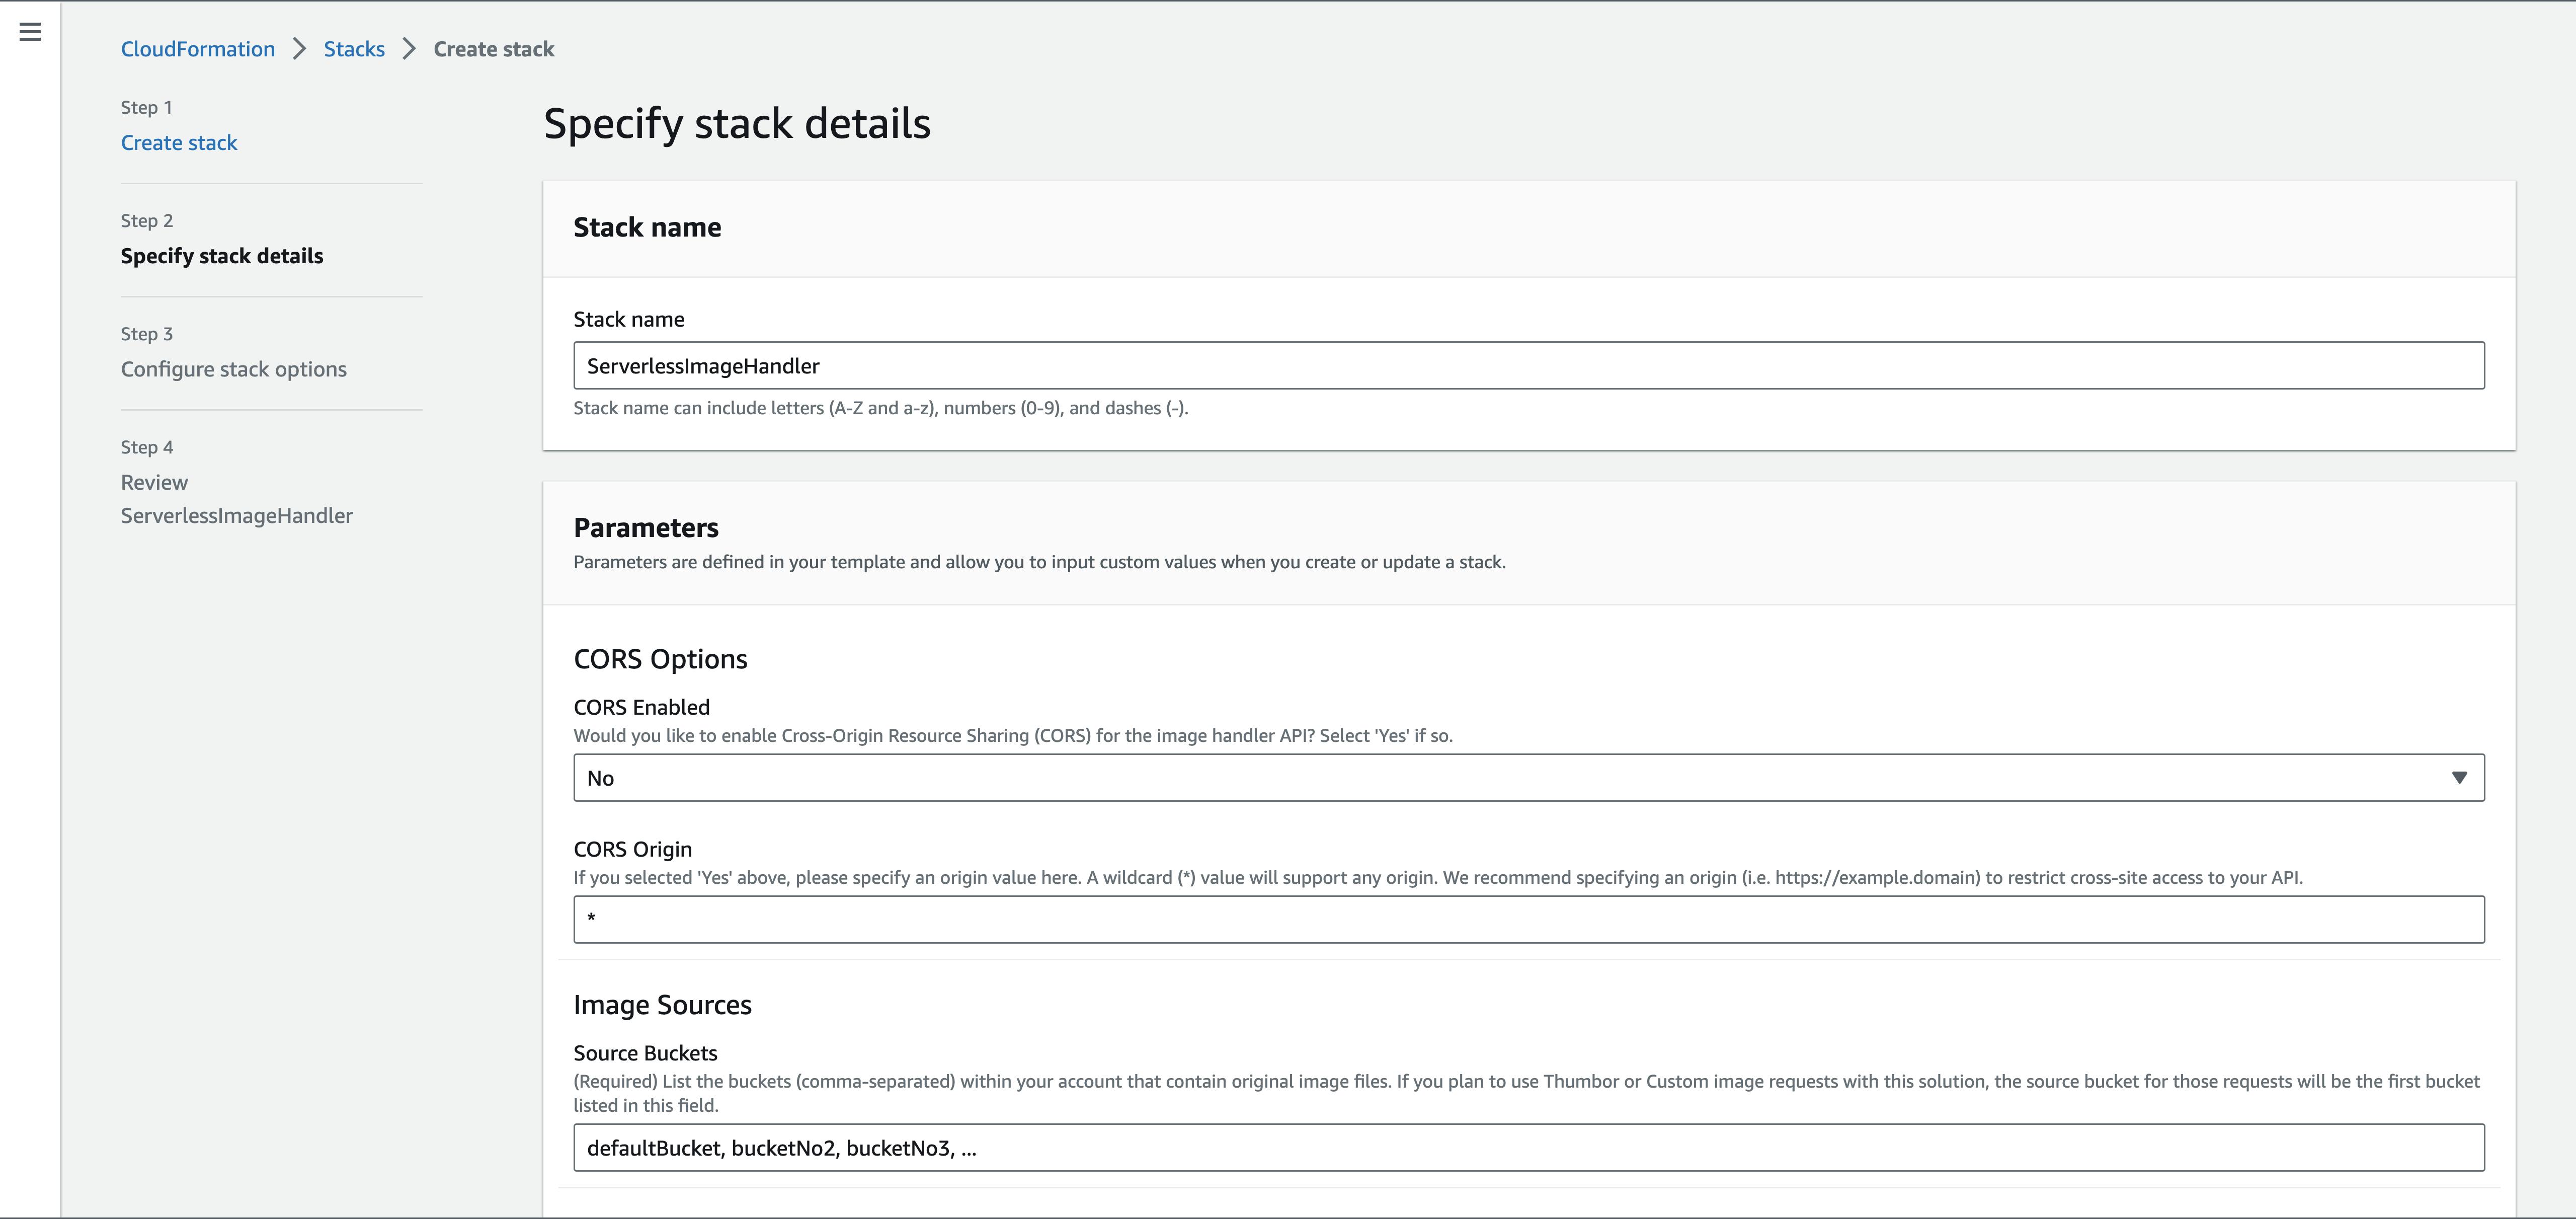
In just 10-20 minutes, I have a super cool image resizer all set up and good to go. 🔥
In the CloudFormation stack page, under the Output tab, I can obtain the image resizer domain.
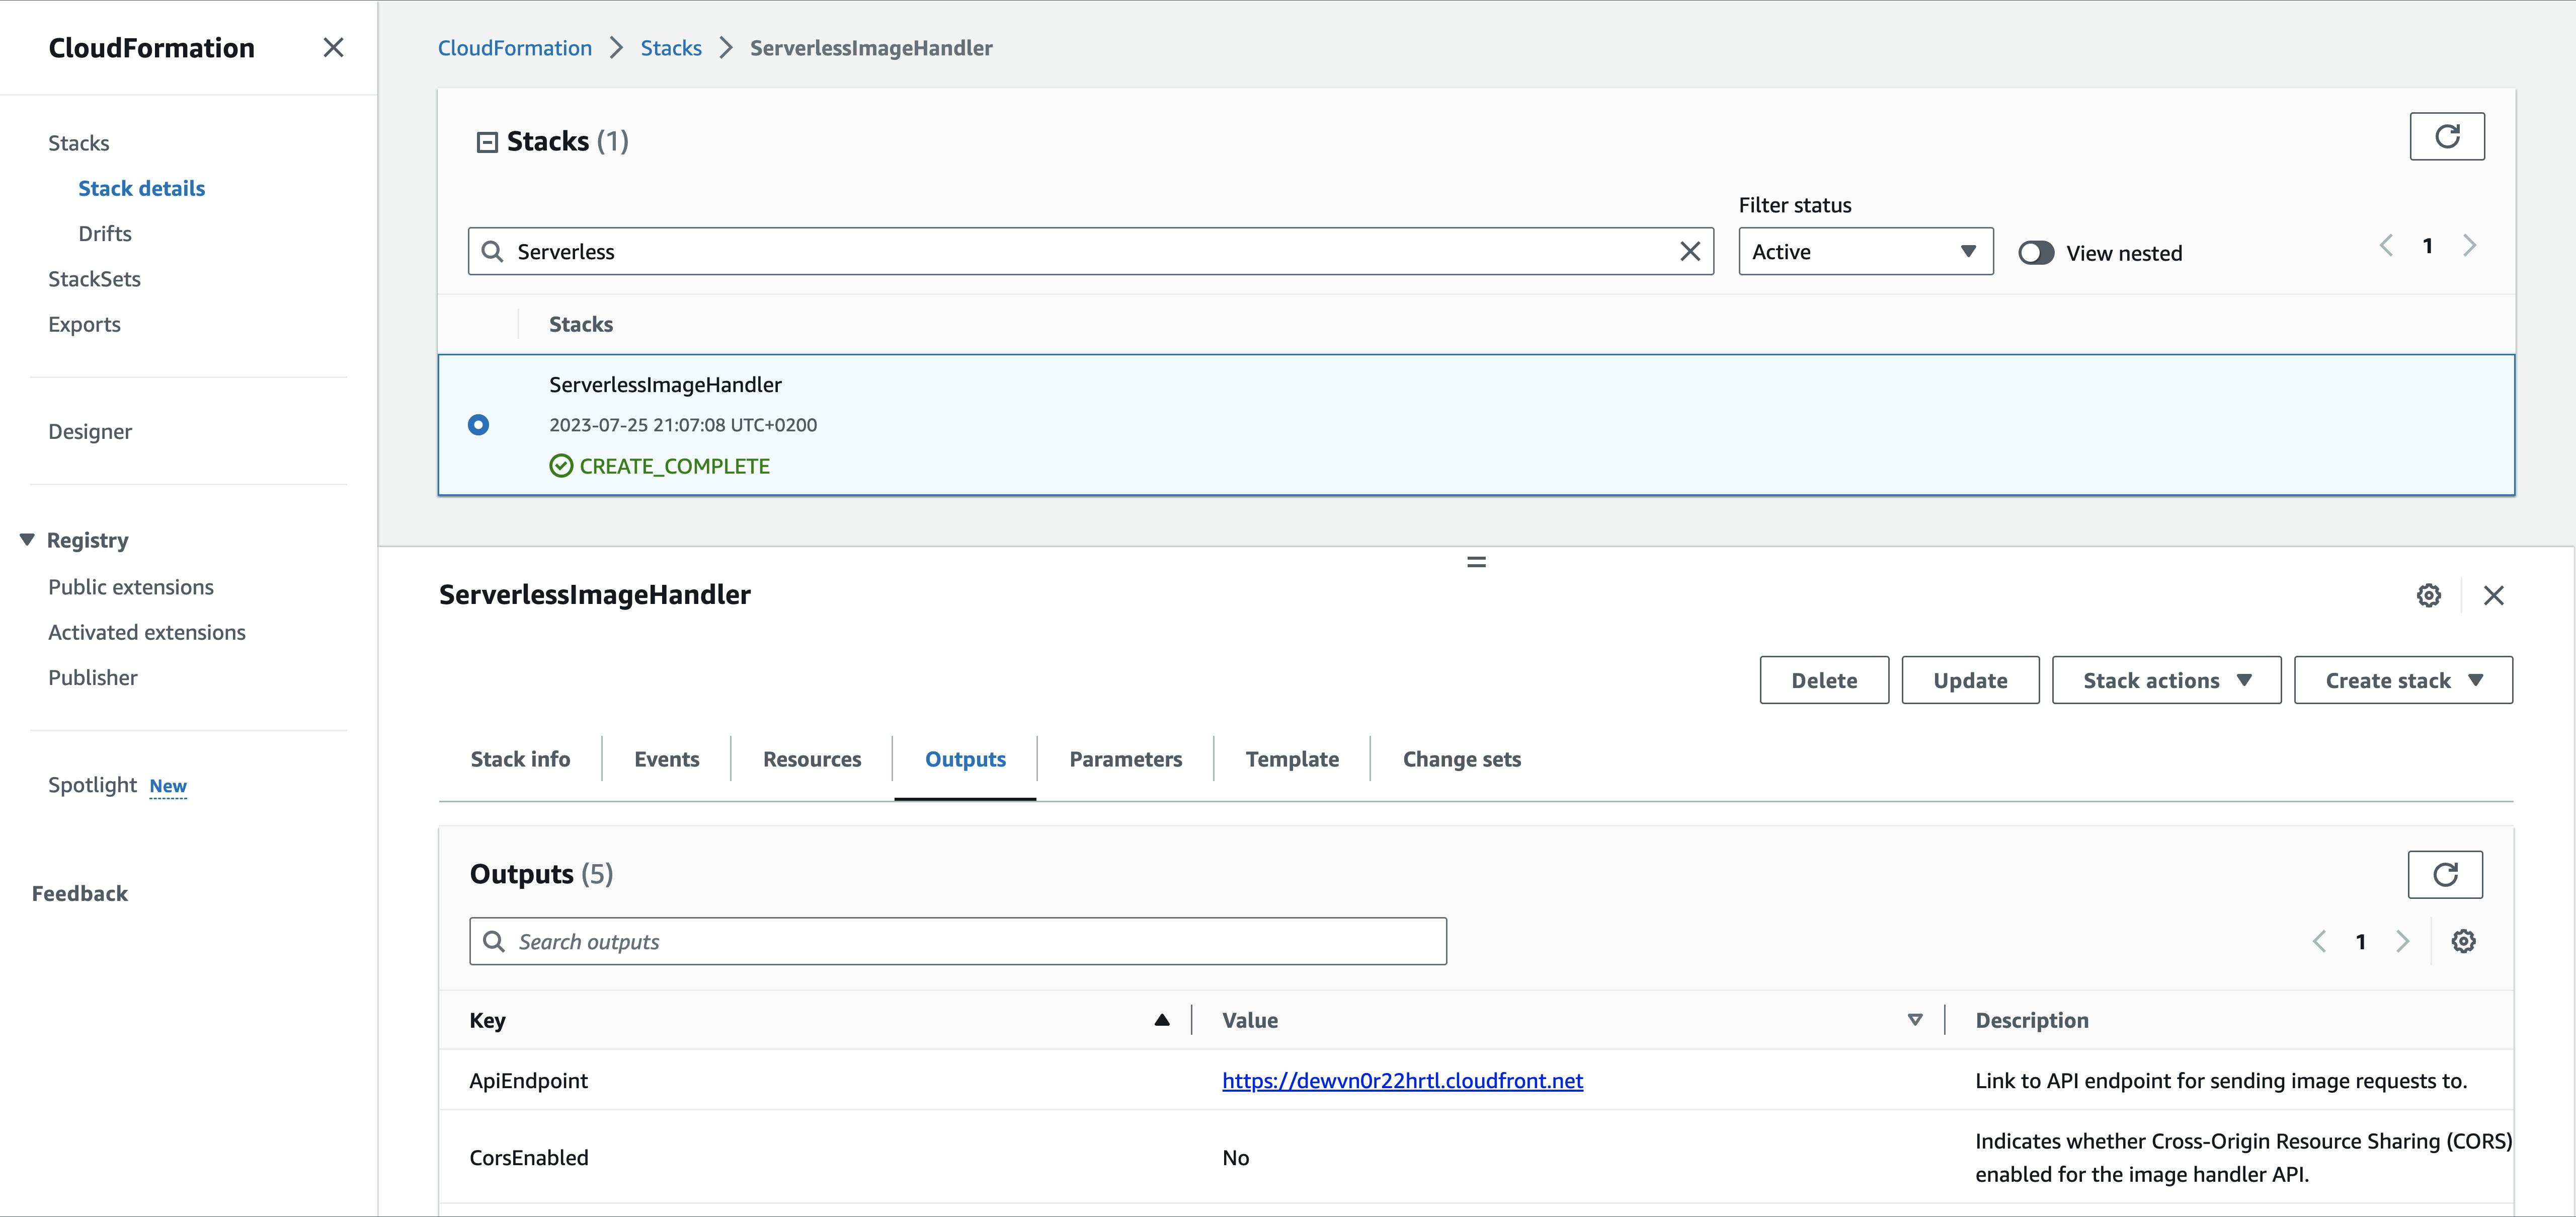
Deploy and Testing
Alright, now let's deploy all our infrastructure to the cloud. After calling amplify push, the Amplify CLI will create a CloudFormation template with all the necessary instructions. Then, we just need to wait until it finishes.
Here, I'd like to mention the @searchable directive from the GraphQL API. The Amplify CLI will inform us that it will create a small instance for OpenSearch, so make sure to be aware that you will be charged for it monthly!

Additionally, this deployment will take approximately 20 minutes.

Once everything is all setup and deployed, we can have some fun testing out our API! It's pretty awesome that we can easily request our data straight from the AppSync console:
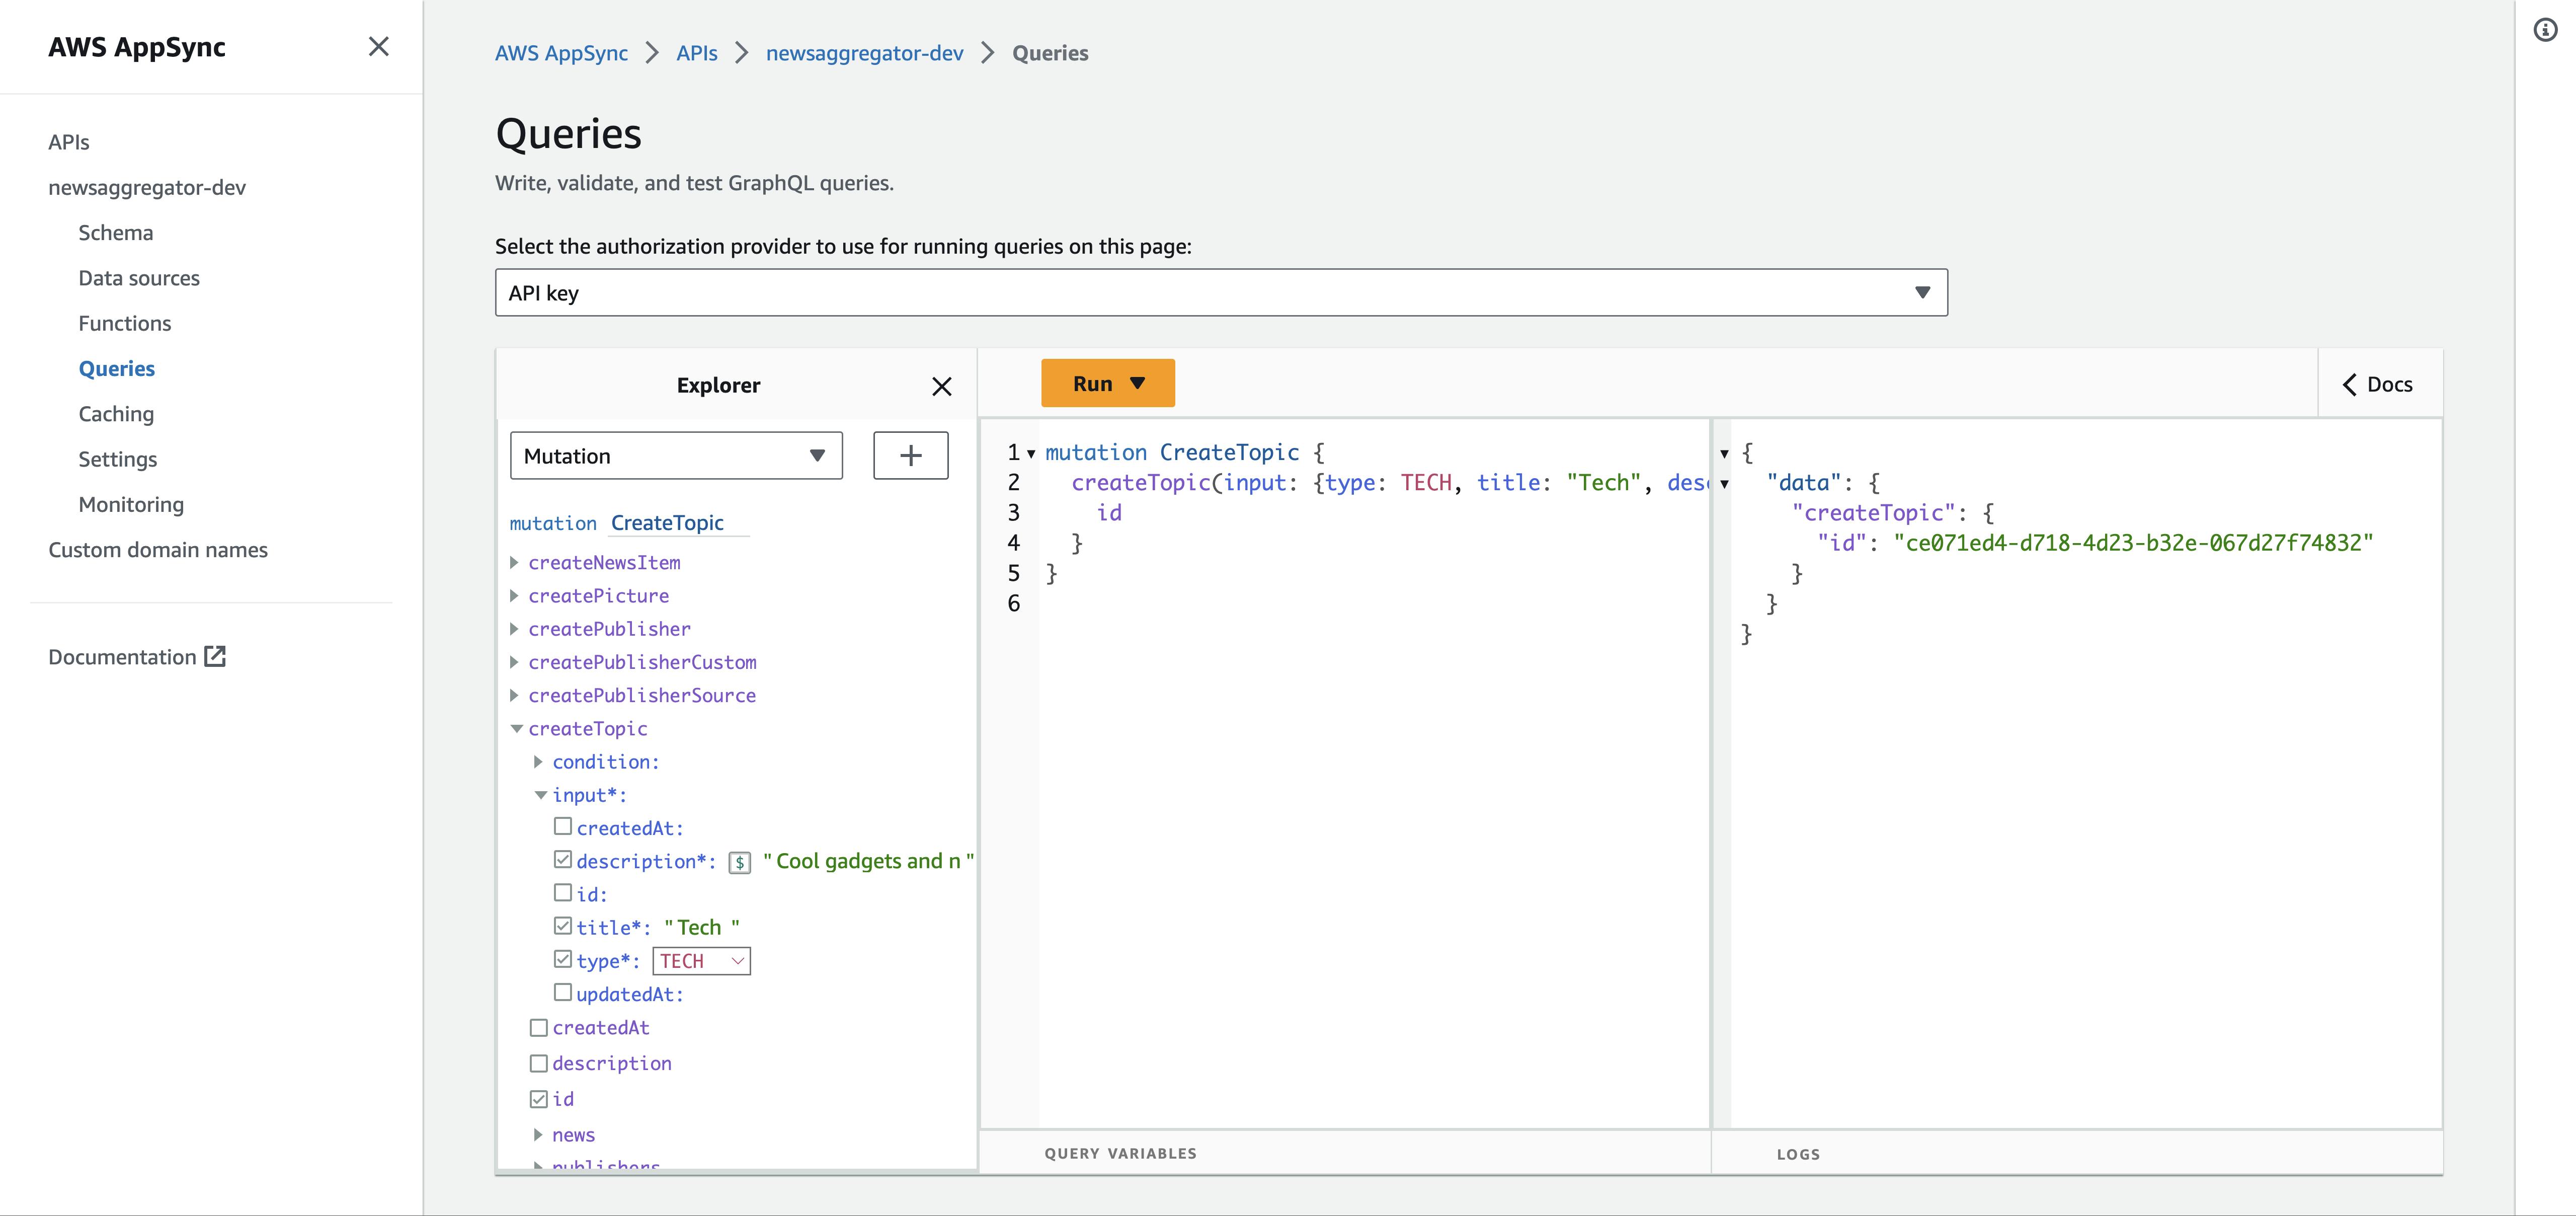
Great news, it worked! 🎉 Now, let's take a peek at our DynamoDB database together:
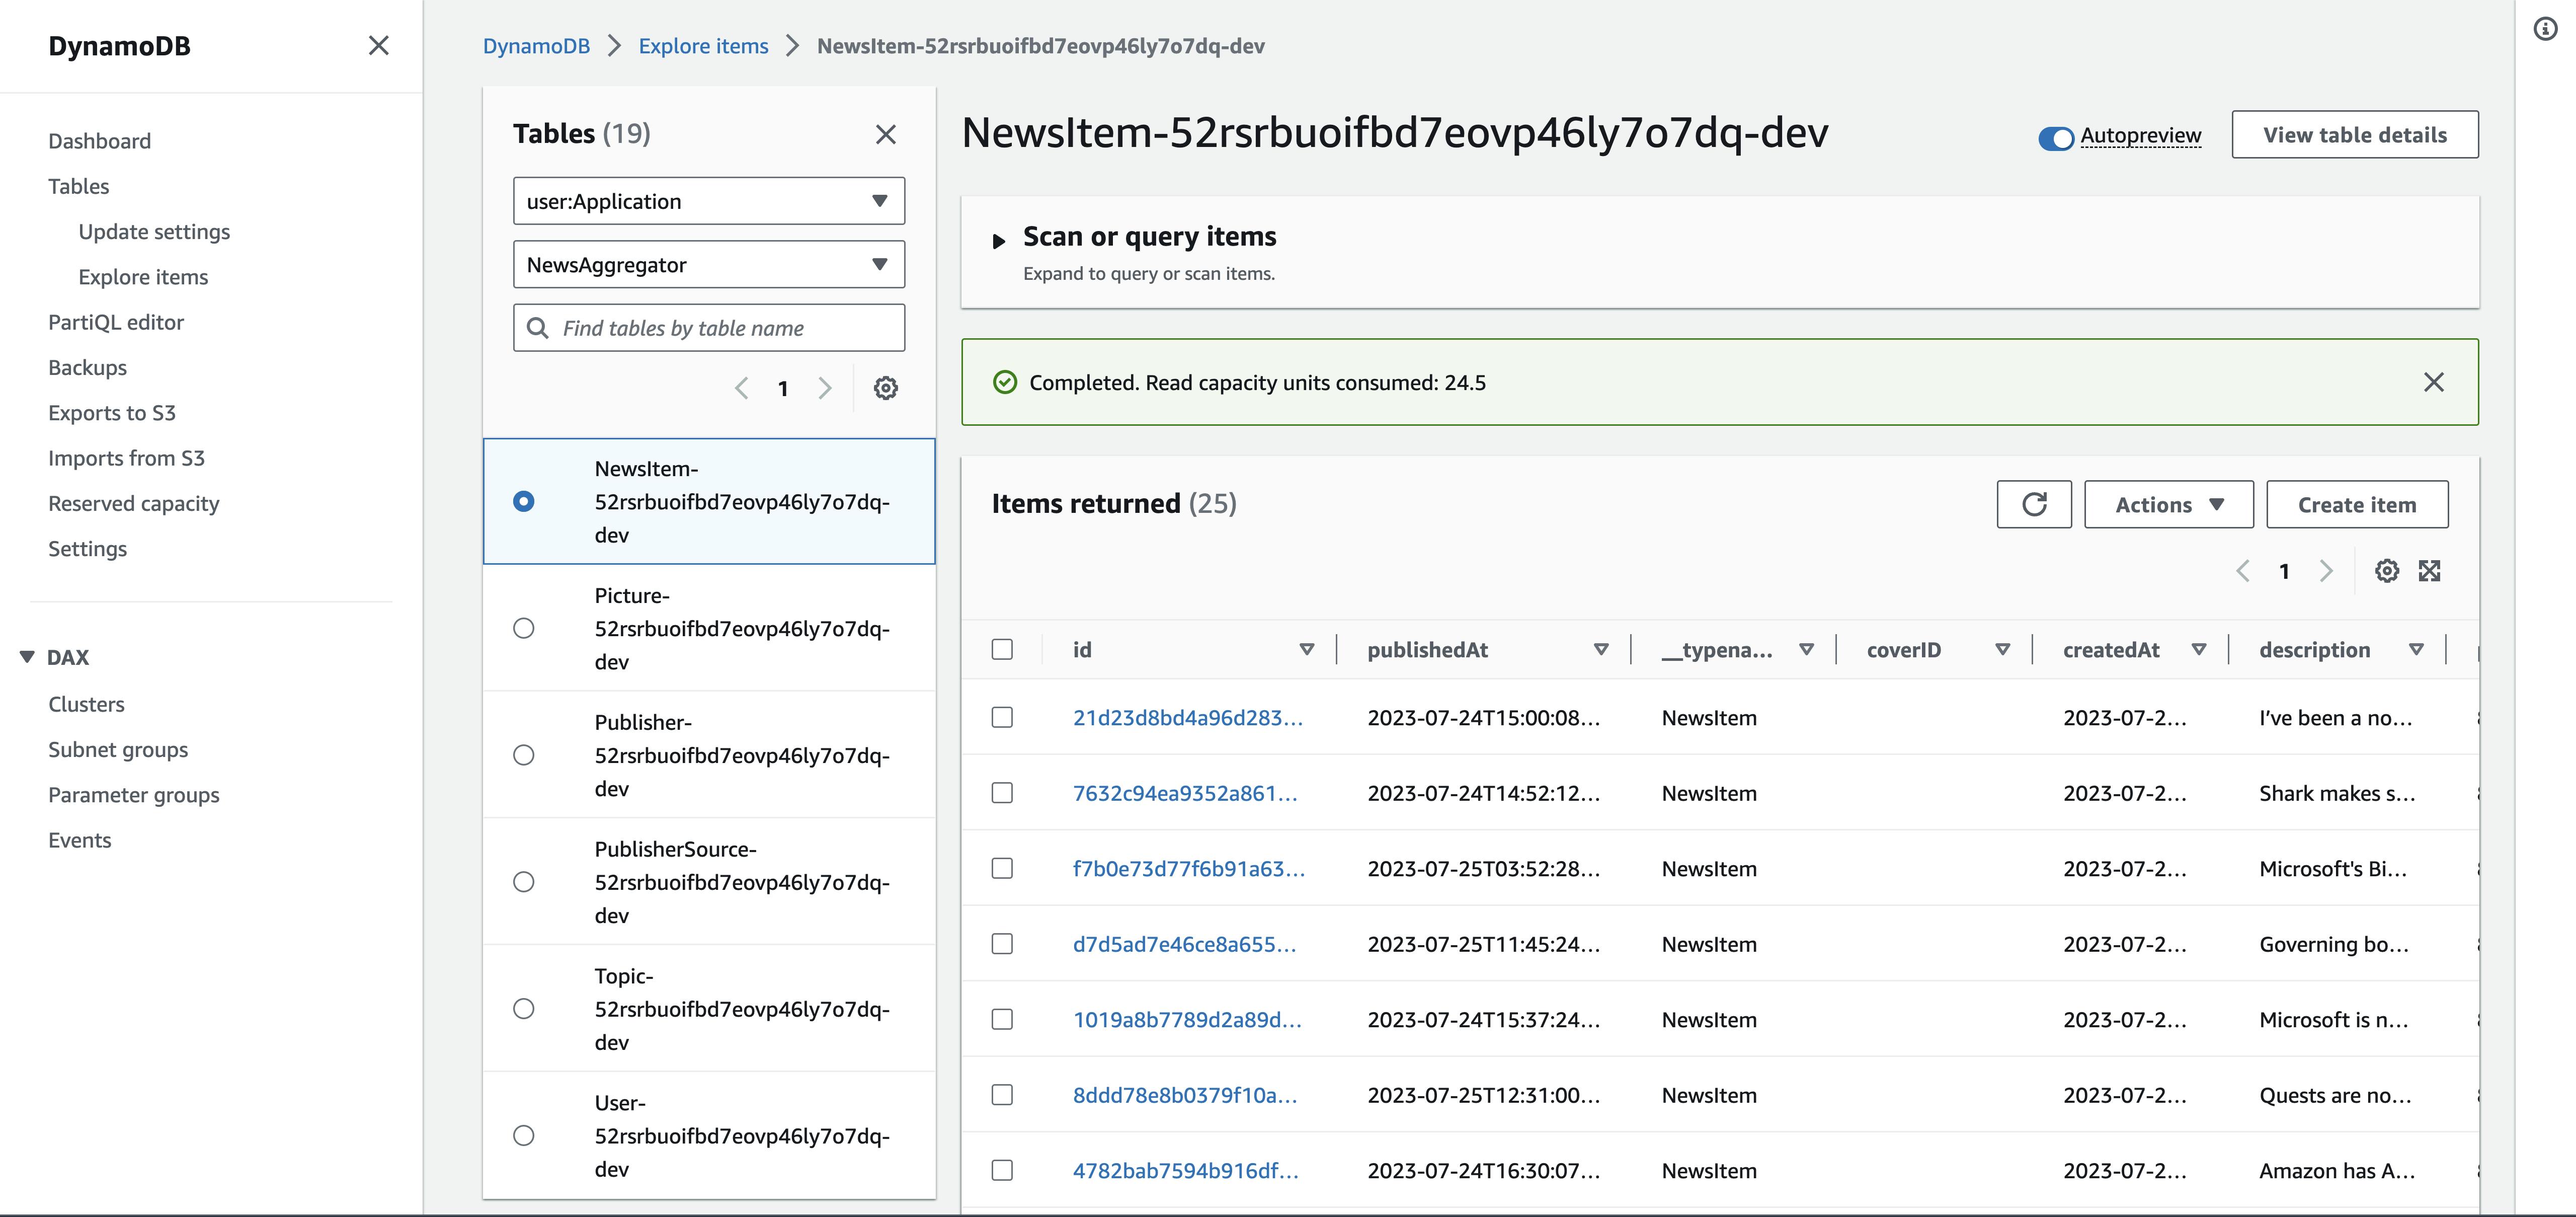
After we make sure that Amplify Backend is running smoothly, let's dive into creating some cool client apps. No worries, we've already tackled the major part of the article. Now, let's gear up for some exciting adventures ahead! 😄
Mobile app
The primary purpose of the mobile app is to provide an exceptional content reading experience on mobile platforms.
To ensure compatibility with both iOS and Android platforms (and eventually macOS and Windows), I chose the Flutter framework. Flutter is an open-source framework developed by Google for creating visually appealing, natively compiled, multi-platform applications from a single codebase. Flutter utilizes a reactive programming language called Dart, which makes development faster and easier compared to traditional methods.
Moreover, to speed up app creation, I used a Flutter News Toolkit with ready-made parts for important functions like news feeds, pages, and sharing on social media.
Here are the mobile app's key features:
Authorization - for signing in or signing up
News feed - to view the latest news from added publishers
Newsstand - to browse all added topics and publishers
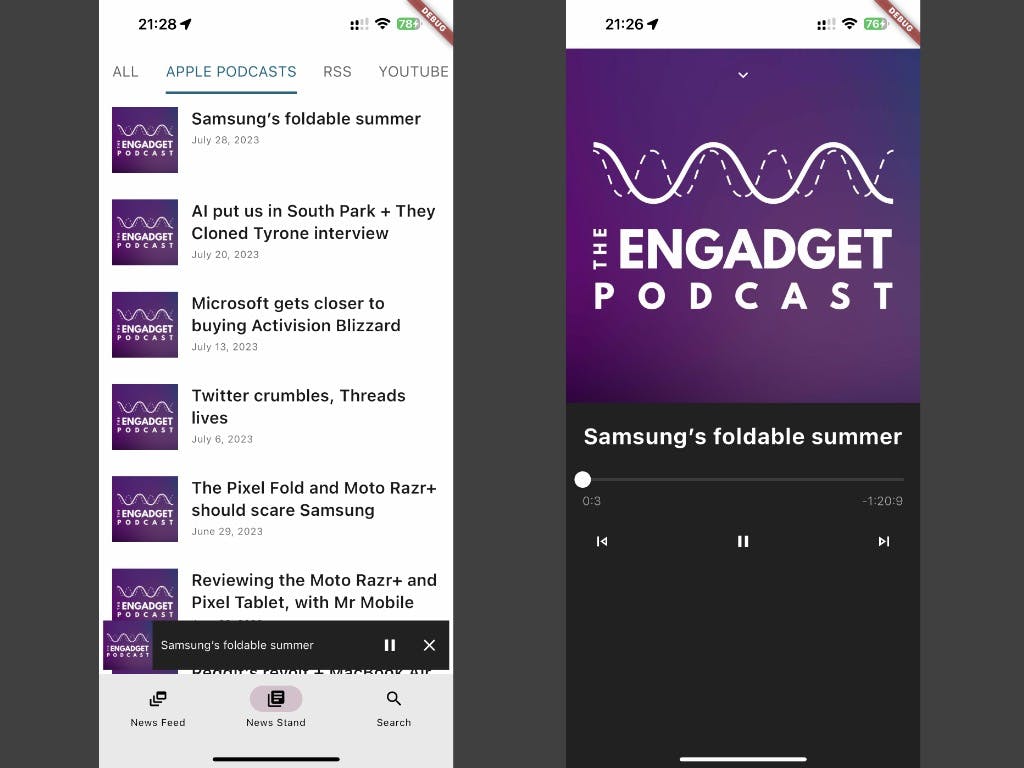
Publisher news feed - to access news from a specific publisher. Users can also filter news by source (RSS, YouTube, or Apple Podcasts)
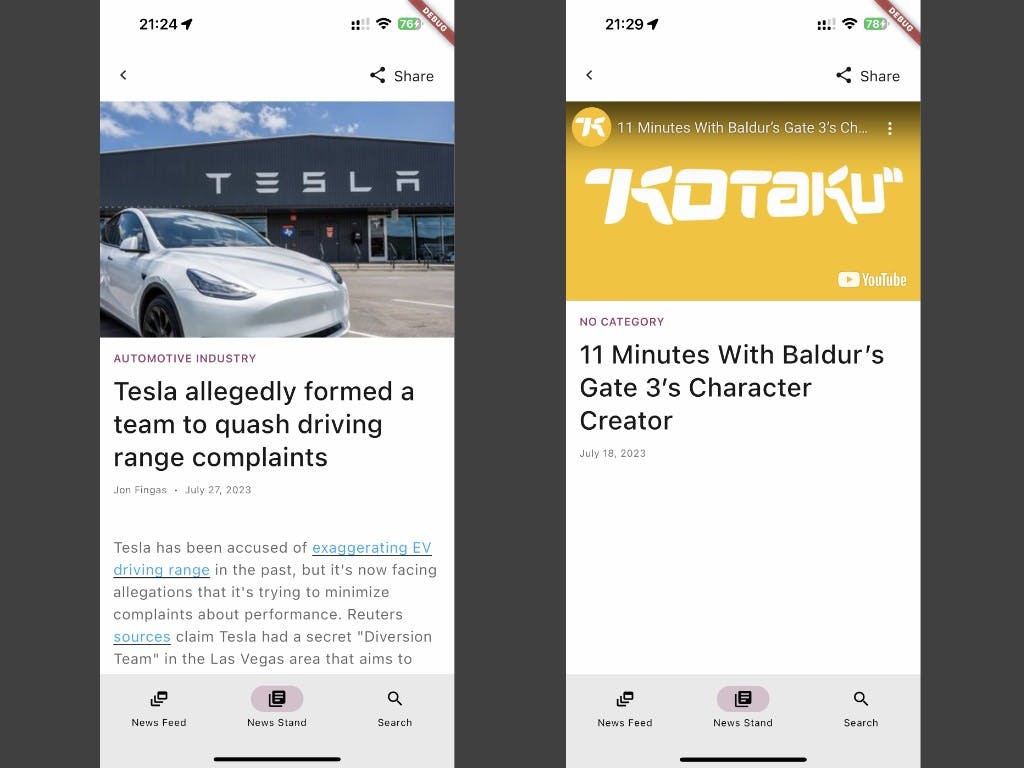
Open article page - to read scraped news article content or summaries
Open video page - to watch YouTube videos
Open podcast page - to play podcasts. Users can minimize the player to continue reading news articles while simultaneously listening to podcasts
To integrate my project with the Amplify backend, I utilized the Amplify SDK for Flutter. I'm truly impressed that the Amplify team rewrote almost all of the libraries from scratch in the Dart language. Here are the libraries I used:
amplify_core: ^1.2.0
amplify_flutter: ^1.2.0
amplify_auth_cognito: ^1.2.0
amplify_authenticator: ^1.2.1
Alright, let's take a closer look at how I integrated the Amplify backend into my Flutter app using these awesome libraries! 😊
Pulling the project
To begin working with Amplify, I needed to pull my Amplify project into the Flutter app folder. To accomplish this, I used the amplify pull command and selected all the required options from the CLI.
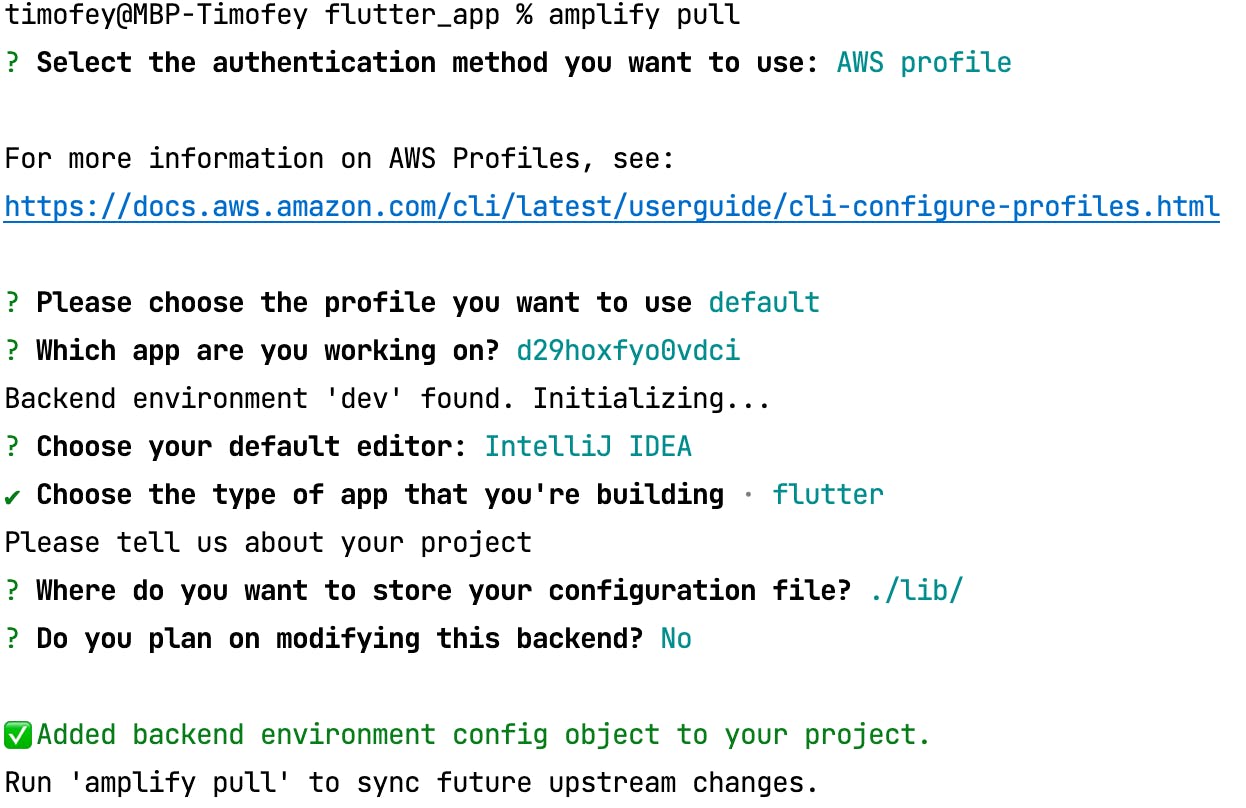
After completing this step, I now have an amplifyconfiguration.dart file in the lib folder, and I can initialize the Flutter libraries.
Authentication
In order to achieve authentication, I made use of two highly effective libraries that significantly streamlined the process:
amplify_auth_cognito: This comprehensive library is specifically designed to provide a wide array of authentication methods, which greatly simplifies the implementation of user authentication in the application.
amplify_authenticator: This user-friendly library offers a simplistic yet efficient authentication screen that comes equipped with both sign-in and sign-up options.
This is how I initialized Amplify in the main.dart file.
Future<void> _init() async {
  final authPlugin = AmplifyAuthCognito();
  await Amplify.addPlugins([authPlugin]);
  try {
    await Amplify.configure(amplifyconfig);
  } on AmplifyAlreadyConfiguredException {
    safePrint(
        'Tried to reconfigure Amplify; this can occur when your app restarts on Android.');
  }
}
Next, to create a simple authentication screen, I wrapped my app with Authenticator widget.
@override
Widget build(BuildContext context) {
  return Authenticator(
    child: MaterialApp.router(
        themeMode: ThemeMode.light,
        theme: const AppTheme().themeData,
        darkTheme: const AppDarkTheme().themeData,
          routerConfig: routerConfig,
          builder: Authenticator.builder(),
      ),
    );
  }
}
To be honest, the authentication screen looks very simple and buggy, but for an initial prototype, it's okay.
GraphQL API
Amplify has great libraries to work with the GraphQL API:
amplify_api helps make GraphQL requests and automatically manages API sessions.
amplify_datastore provides a queryable, on-device data store with offline capabilities.
And I didn't use either. Why? 🧐
As I mentioned in the Amplify Backend section, I didn't want to use the data store because I wanted to utilize advanced and complex GraphQL API. Yes, now I need to manage the data state on my own, but I can make complex GraphQL requests. amplify_api is used for that purpose. But why didn't I use it either?
Here is an example of fetching data using amplify_api, taken from the documentation:
Future<Todo?> queryItem(Todo queriedTodo) async {
  try {
    final request = ModelQueries.get(
      Todo.classType,
      queriedTodo.modelIdentifier,
    );
    final response = await Amplify.API.query(request: request).response;
    final todo = response.data;
    if (todo == null) {
      safePrint('errors: ${response.errors}');
    }
    return todo;
  } on ApiException catch (e) {
    safePrint('Query failed: $e');
    return null;
  }
}
And it's great. I can easily request my data entity. But what if I want to query some nested data entities, or two data entities in one request? Or what if I want to utilize search queries provided by the @searchable directive?
I can use a more advanced workflow:
const getPost = 'getPost';
const graphQLDocument = '''query GetPost(\$id: ID!) {
  $getPost(id: \$id) {
    id
    title
    rating
    status
    comments {
      items {
        id
        postID
        content
      }
    }
  }
}''';
final getPostRequest = GraphQLRequest<Post>(
  document: graphQLDocument,
  modelType: Post.classType,
  variables: <String, String>{'id': somePostId},
  decodePath: getPost,
);
The biggest issue here is that I need to write GraphQL requests in code. However, I don't want to do this because it's type unsafe and will take more time.
That's why I decided to use another GraphQL library with a GraphQL code generator. The code generator will create types for the GraphQL schema, as well as all queries and mutations that I need to handle. In my case, I chose graphql_flutter as the GraphQL client, along with graphql_codegen for GraphQL code generation.
I configured graphql_codegen in a build.yaml file.
targets:
  $default:
    builders:
      graphql_codegen:
        options:
          clients:
            - graphql
            - graphql_flutter
          scalars:
            AWSDateTime:
              type: DateTime
Now, I need to provide a GraphQL API and scalars schema. To build a GraphQL schema, I run the amplify api gql-compile command and then copy the final AppSync schema to the lib folder inside the Flutter app.
Here are the scalar definitions:
scalar AWSTimestamp
scalar AWSDateTime
scalar AWSJSON
After this, I can create a GraphQL file for queries or mutations:
query GetPublisherNewsFeedByType($publisherID: ID!, $type: String!, $nextToken: String) {
    searchNewsItems(
        filter: {publisherID: {eq: $publisherID}, type: {eq: $type}},
        sort: {direction: desc, field: publishedAt},
        limit: 100,
        nextToken: $nextToken
    ) {
        items {
            ...NewsItemFull
        }
        nextToken
    }
}
I've used the publisher's newsfeed searchNewsItems query provided by the @searchable directive in this query. And guess what? I can now also use GraphQL fragments! Pretty cool, right? 💪
Final result
Demo video
Screens
User's feed and Newsstand
Open article and video
Open podcast
Web app
Web apps should do the same as mobile apps but with additional features like topic and publisher creation. This is because the desktop interface will be better suited for it.
I chose React as the main framework because it has a large community and a wide selection of libraries. Additionally, it allows me to use the Amplify UI library with the Amplify Studio UI component feature.
But first, let's enable Amplify Studio, because as you remember, previously I used only the API.
Amplify Studio and UI component builder
To do this, I opened the AWS console and then accessed my Amplify project:
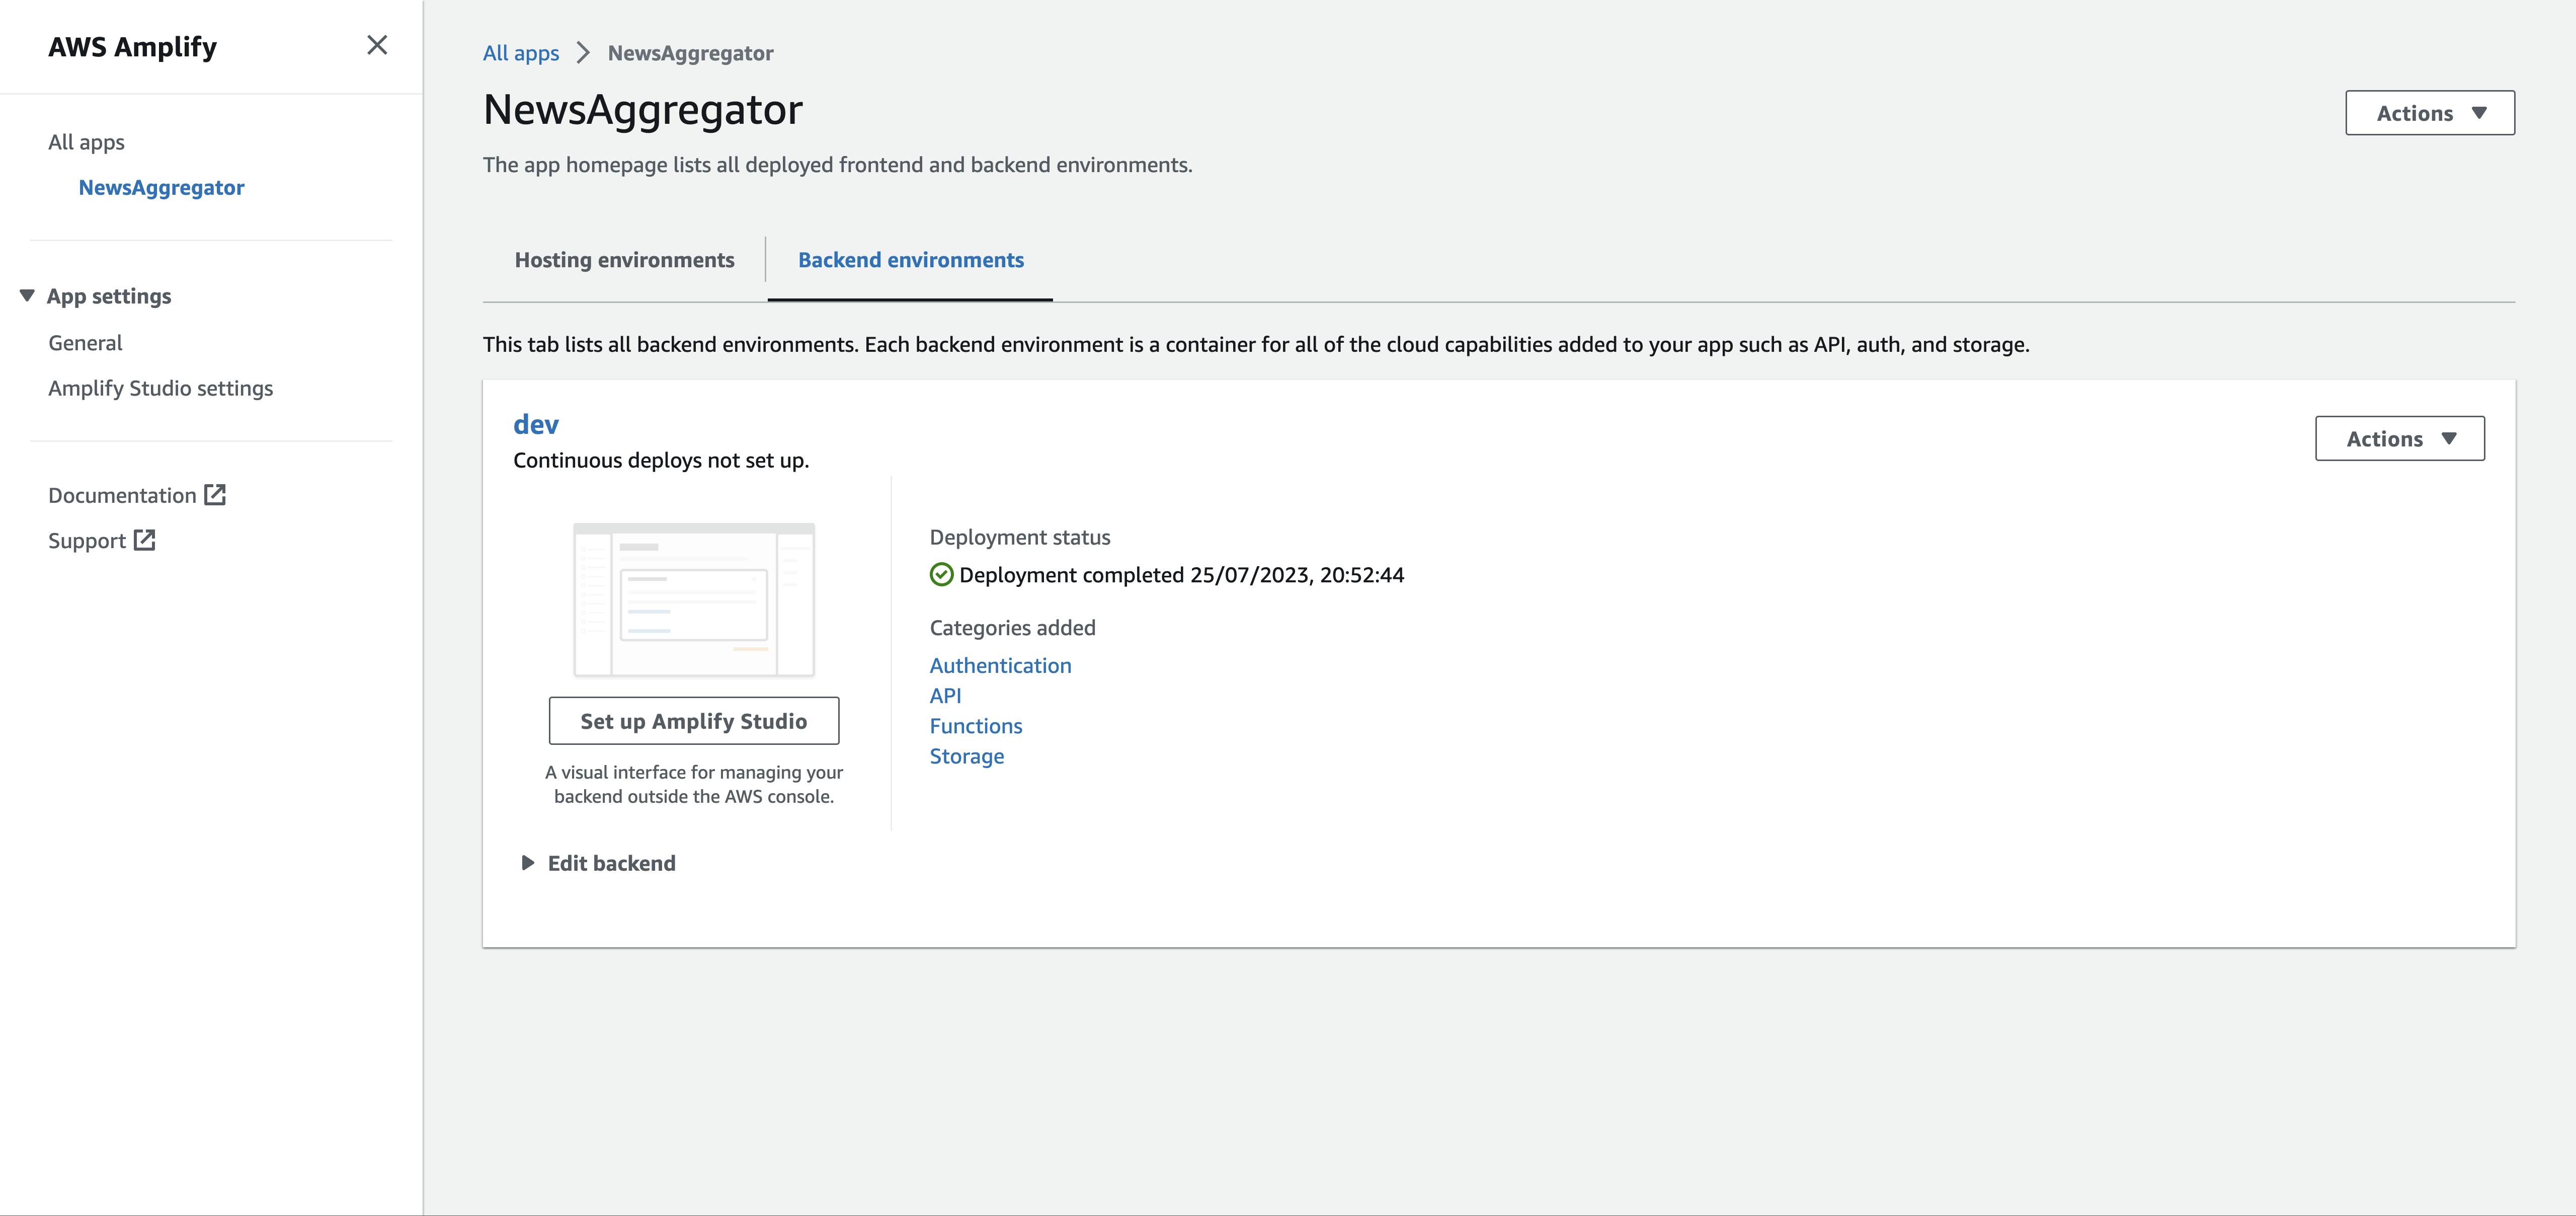
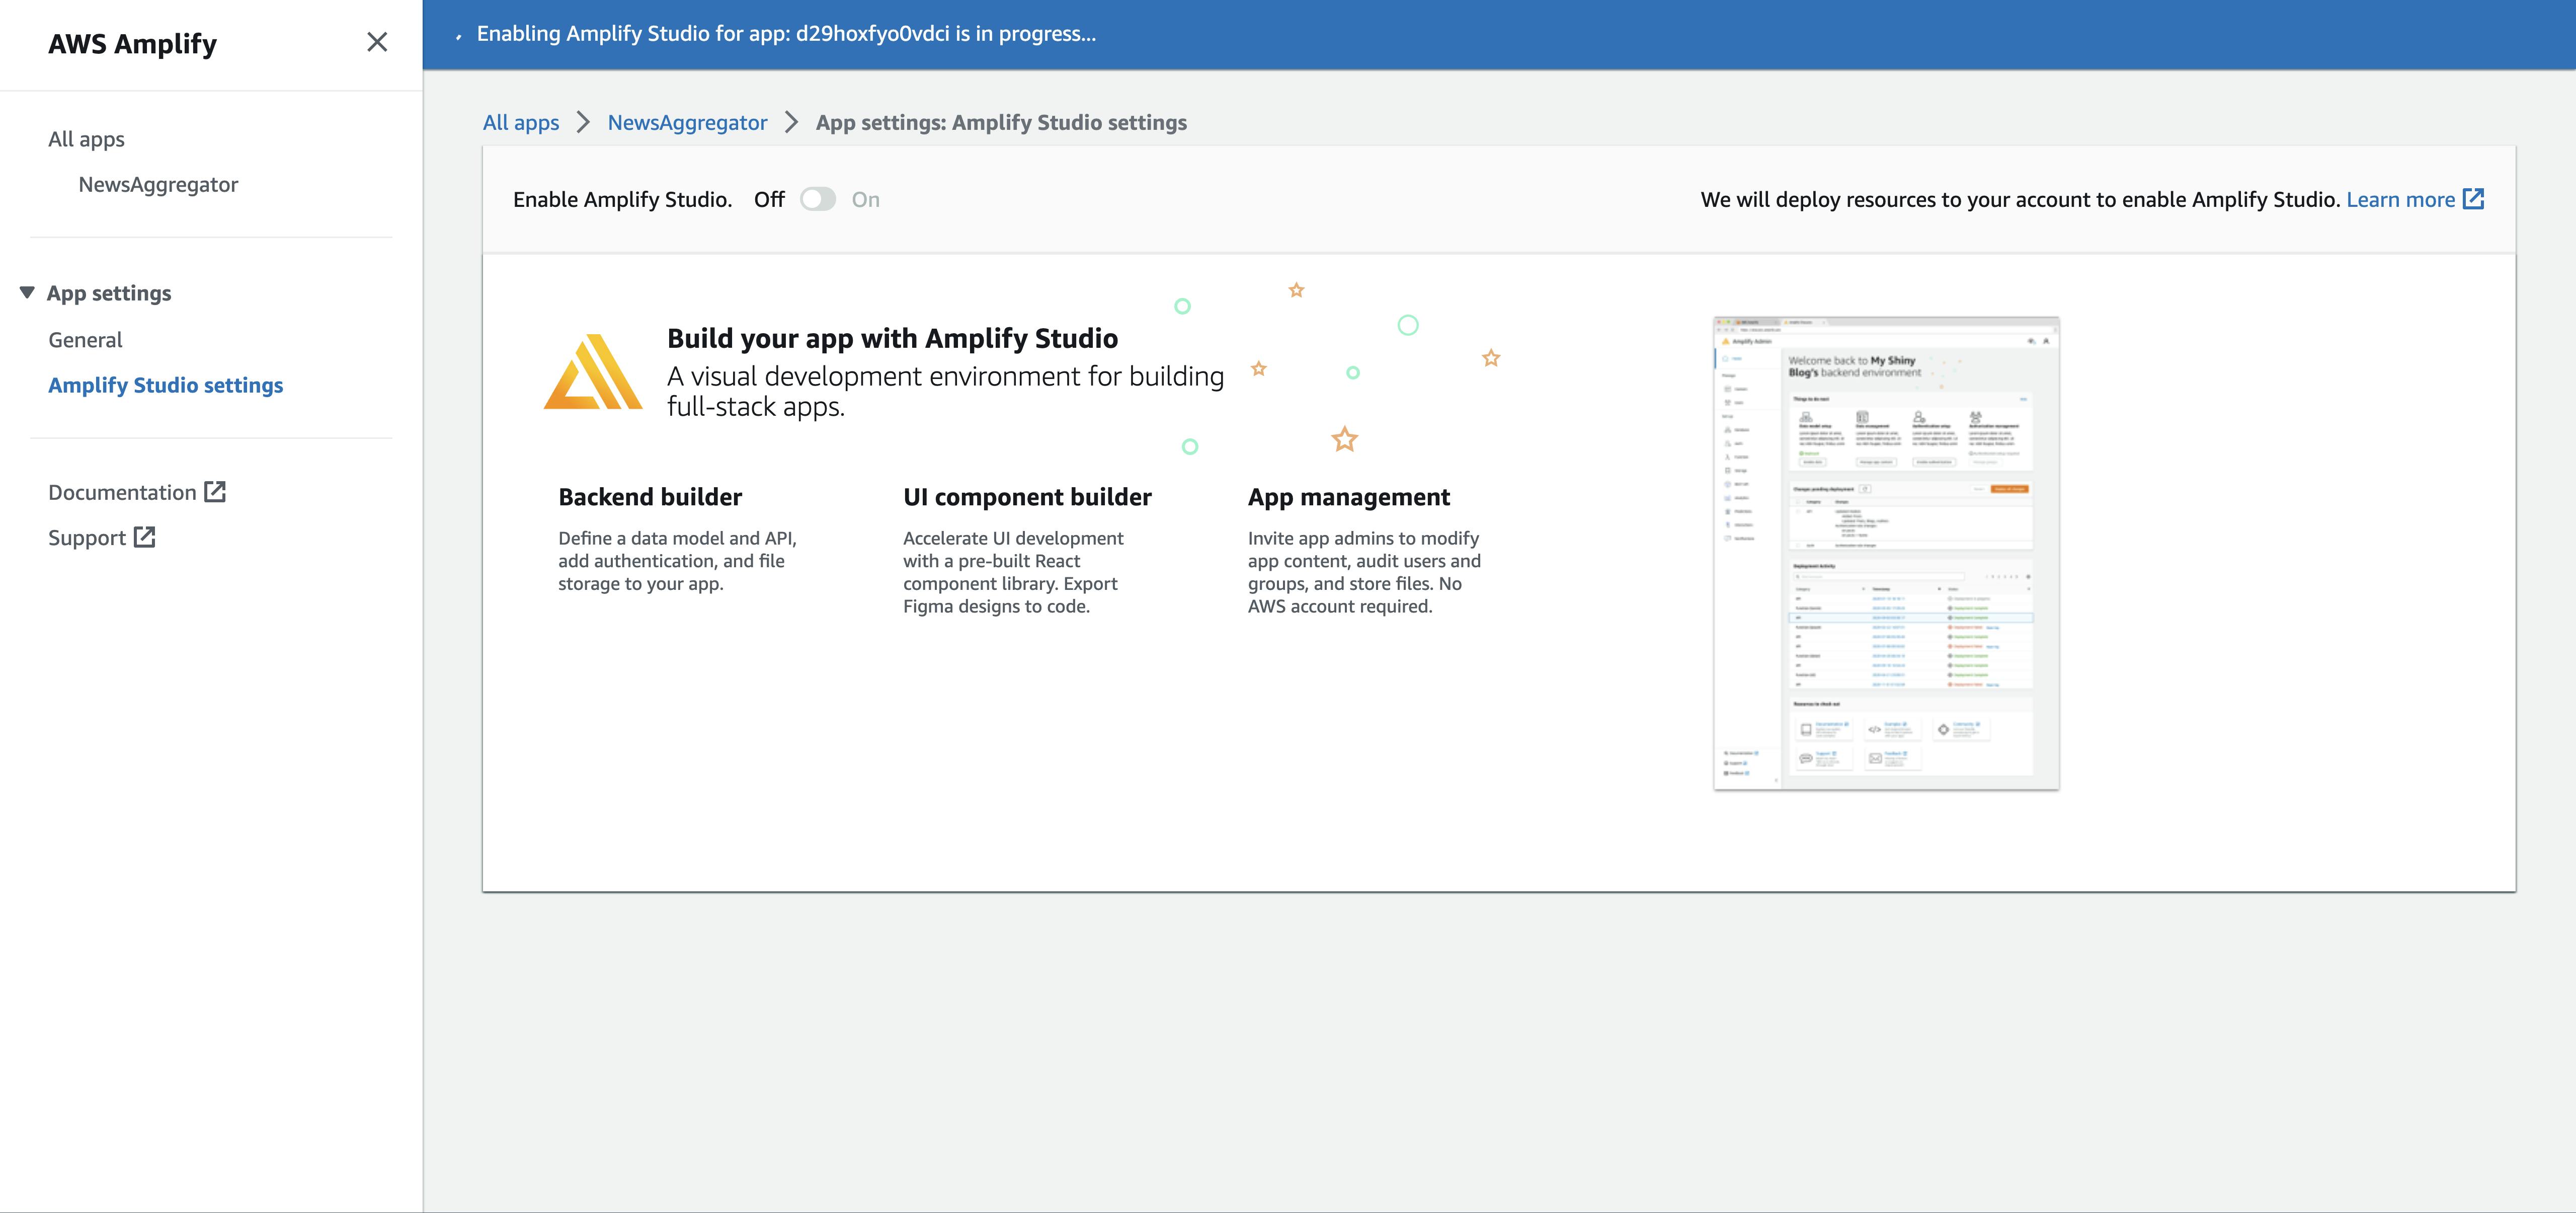
Then, I can easily enable Amplify Studio in the Amplify Studio settings section:
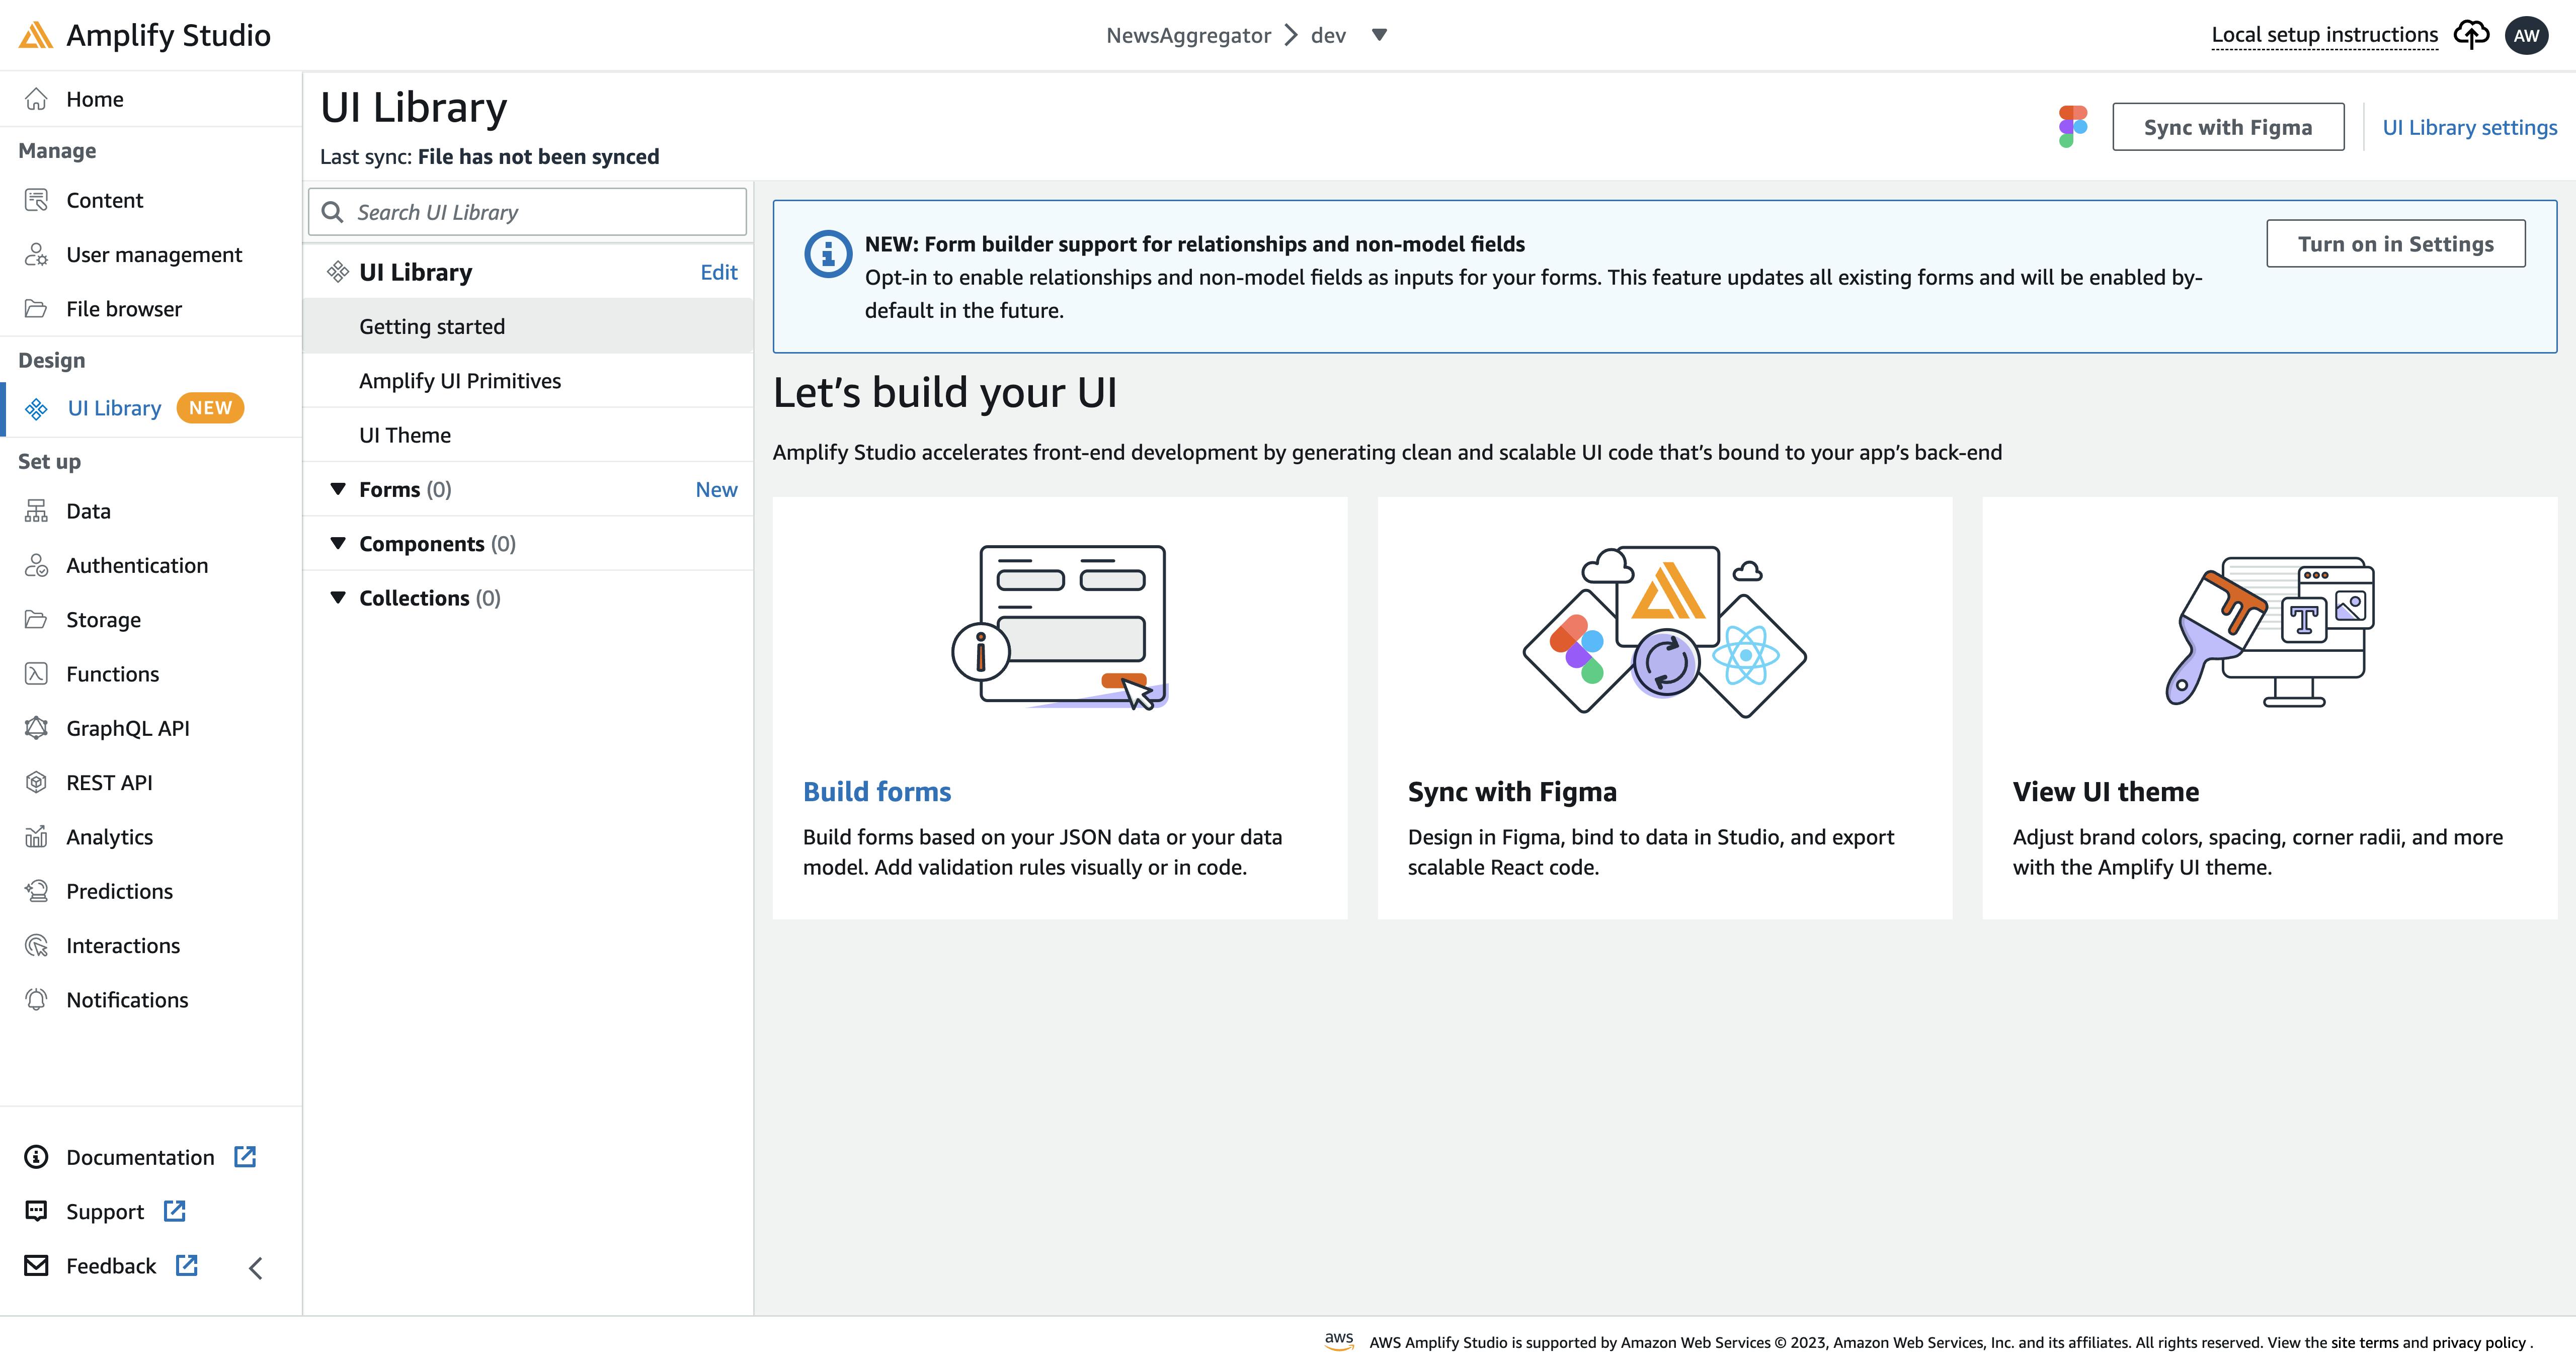
In Amplify Studio, I will utilize the UI library feature. What is it?
Amplify has its own UI library containing primitives for the most common components, such as buttons, layout components, and form components.
Hey there! With the cool new UI Component builder, I can easily sync components from Figma right into React code. Amplify even gives me a handy Figma file to kick things off faster. This Amplify Figma file comes with both UI primitives and component templates. I can even create components in Figma! How awesome is that? ❤️🔥
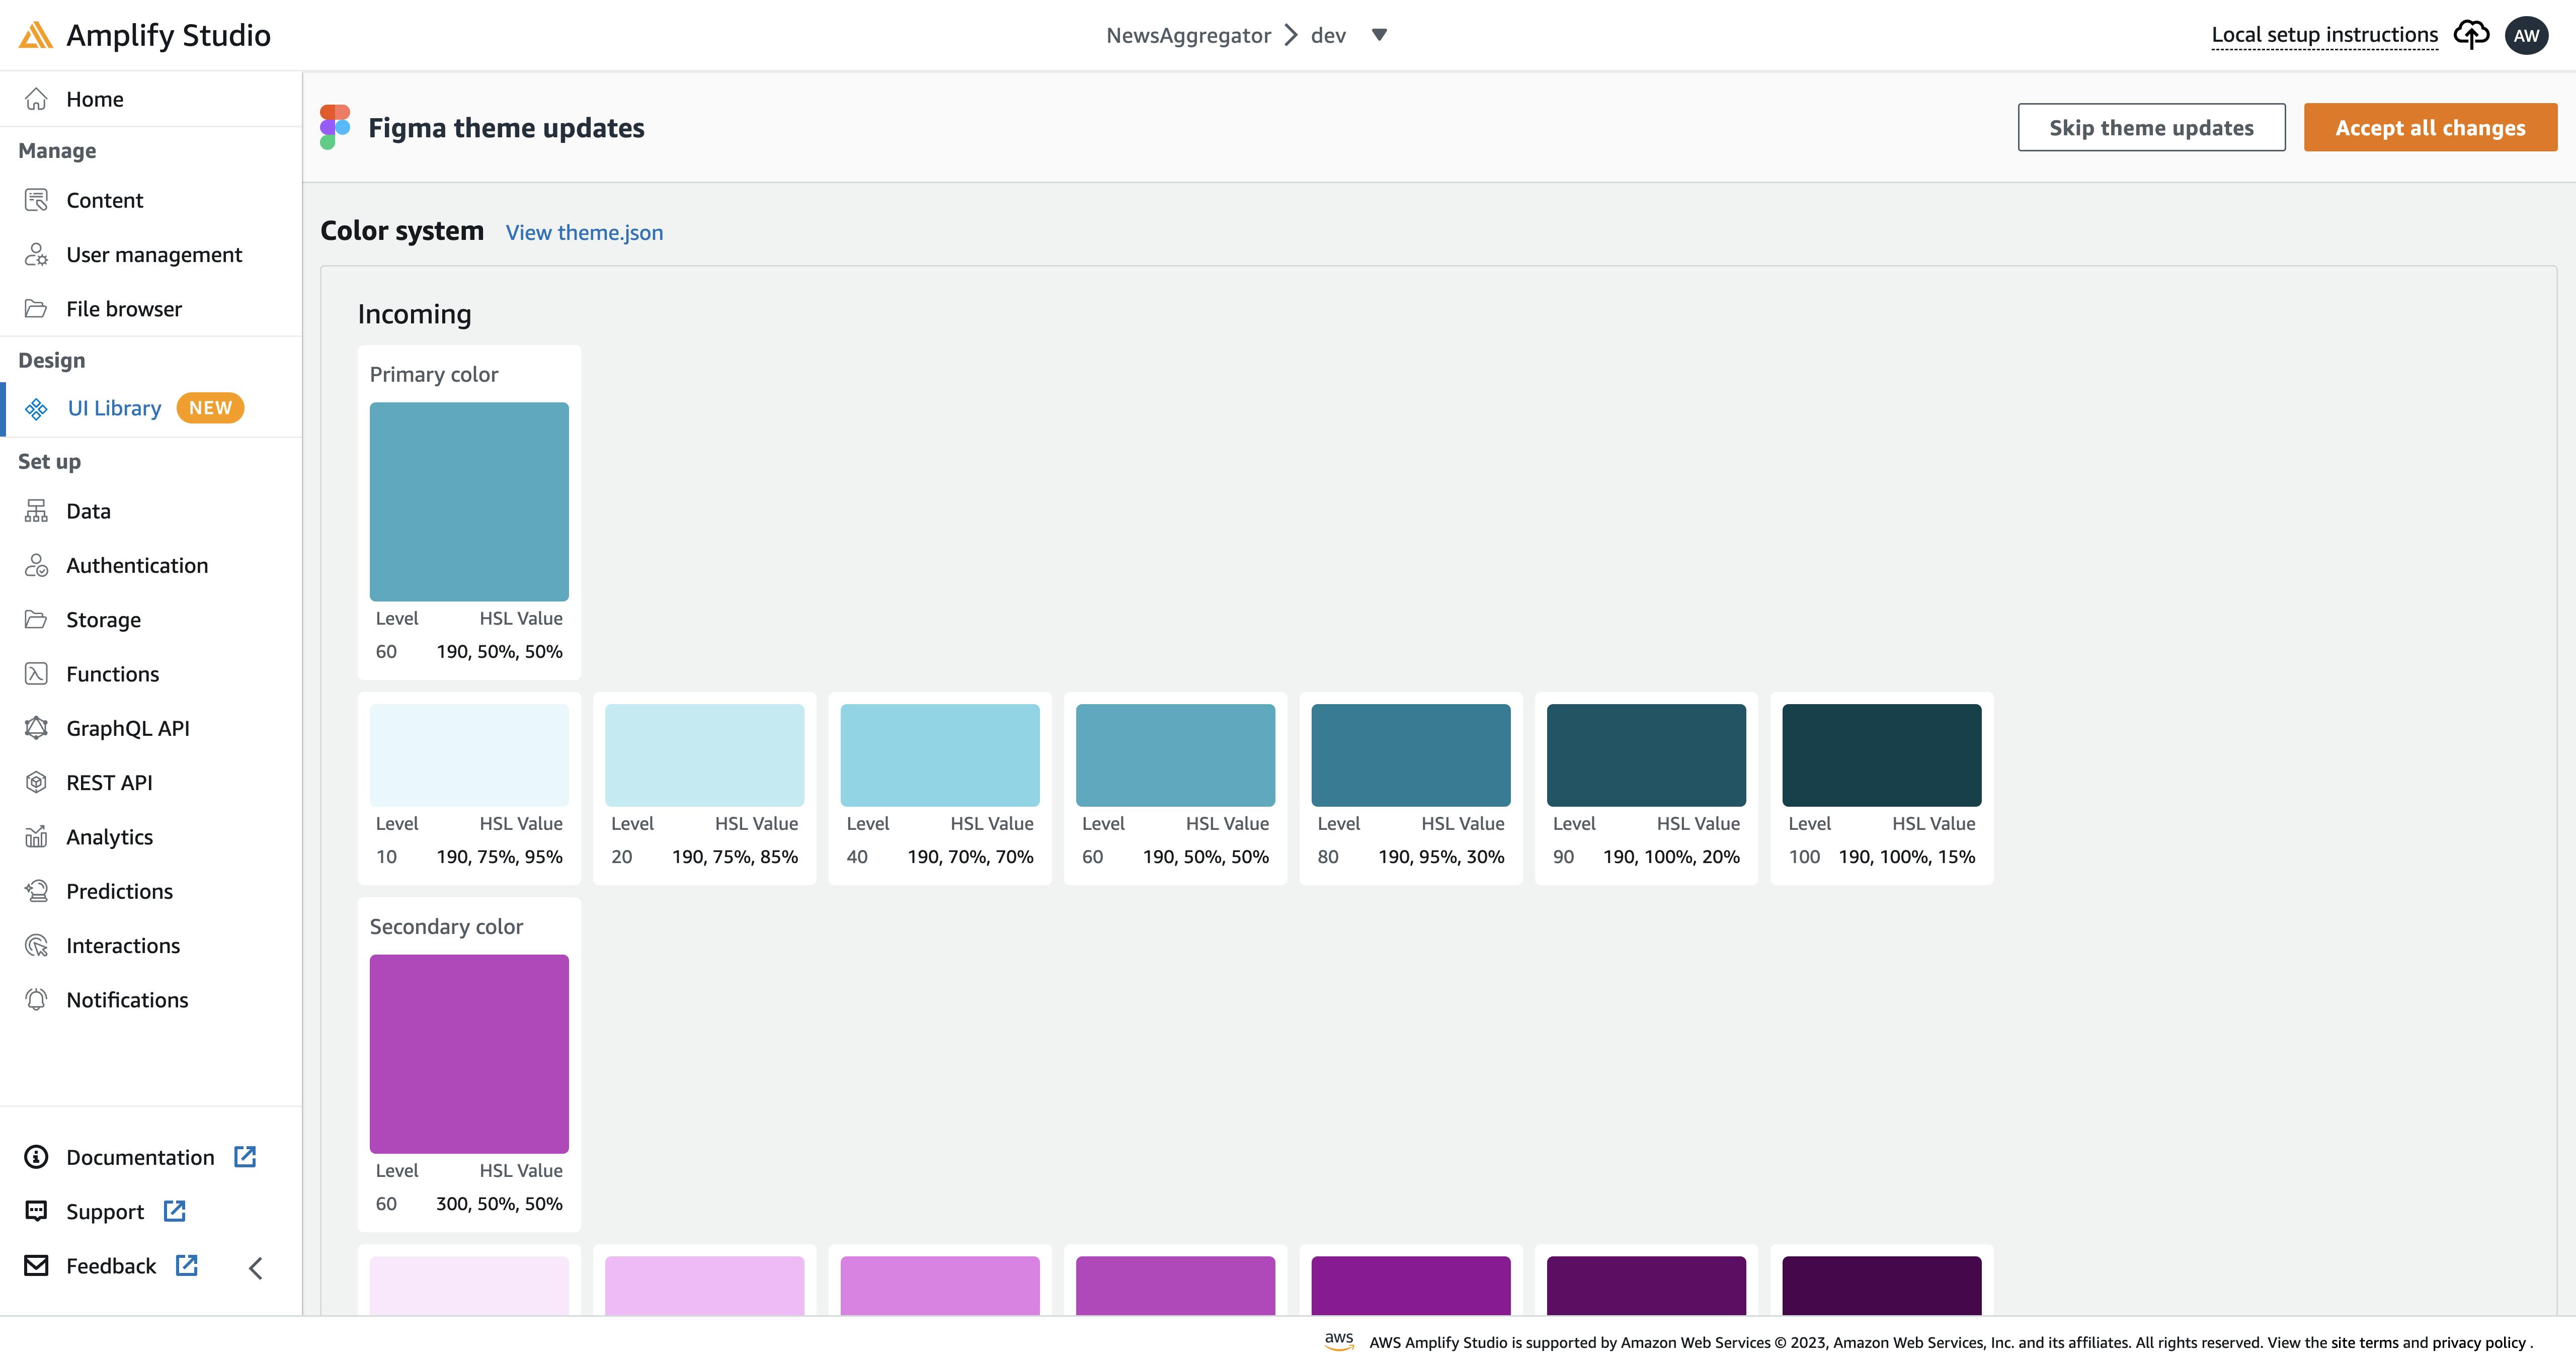
I didn't have much time to work on my component in Figma, so I went ahead and used classic CSS with the TailwindCSS framework instead. You know what's cool? I managed to create both the Create Topic and Create Publisher forms! Pretty neat, huh? 😄
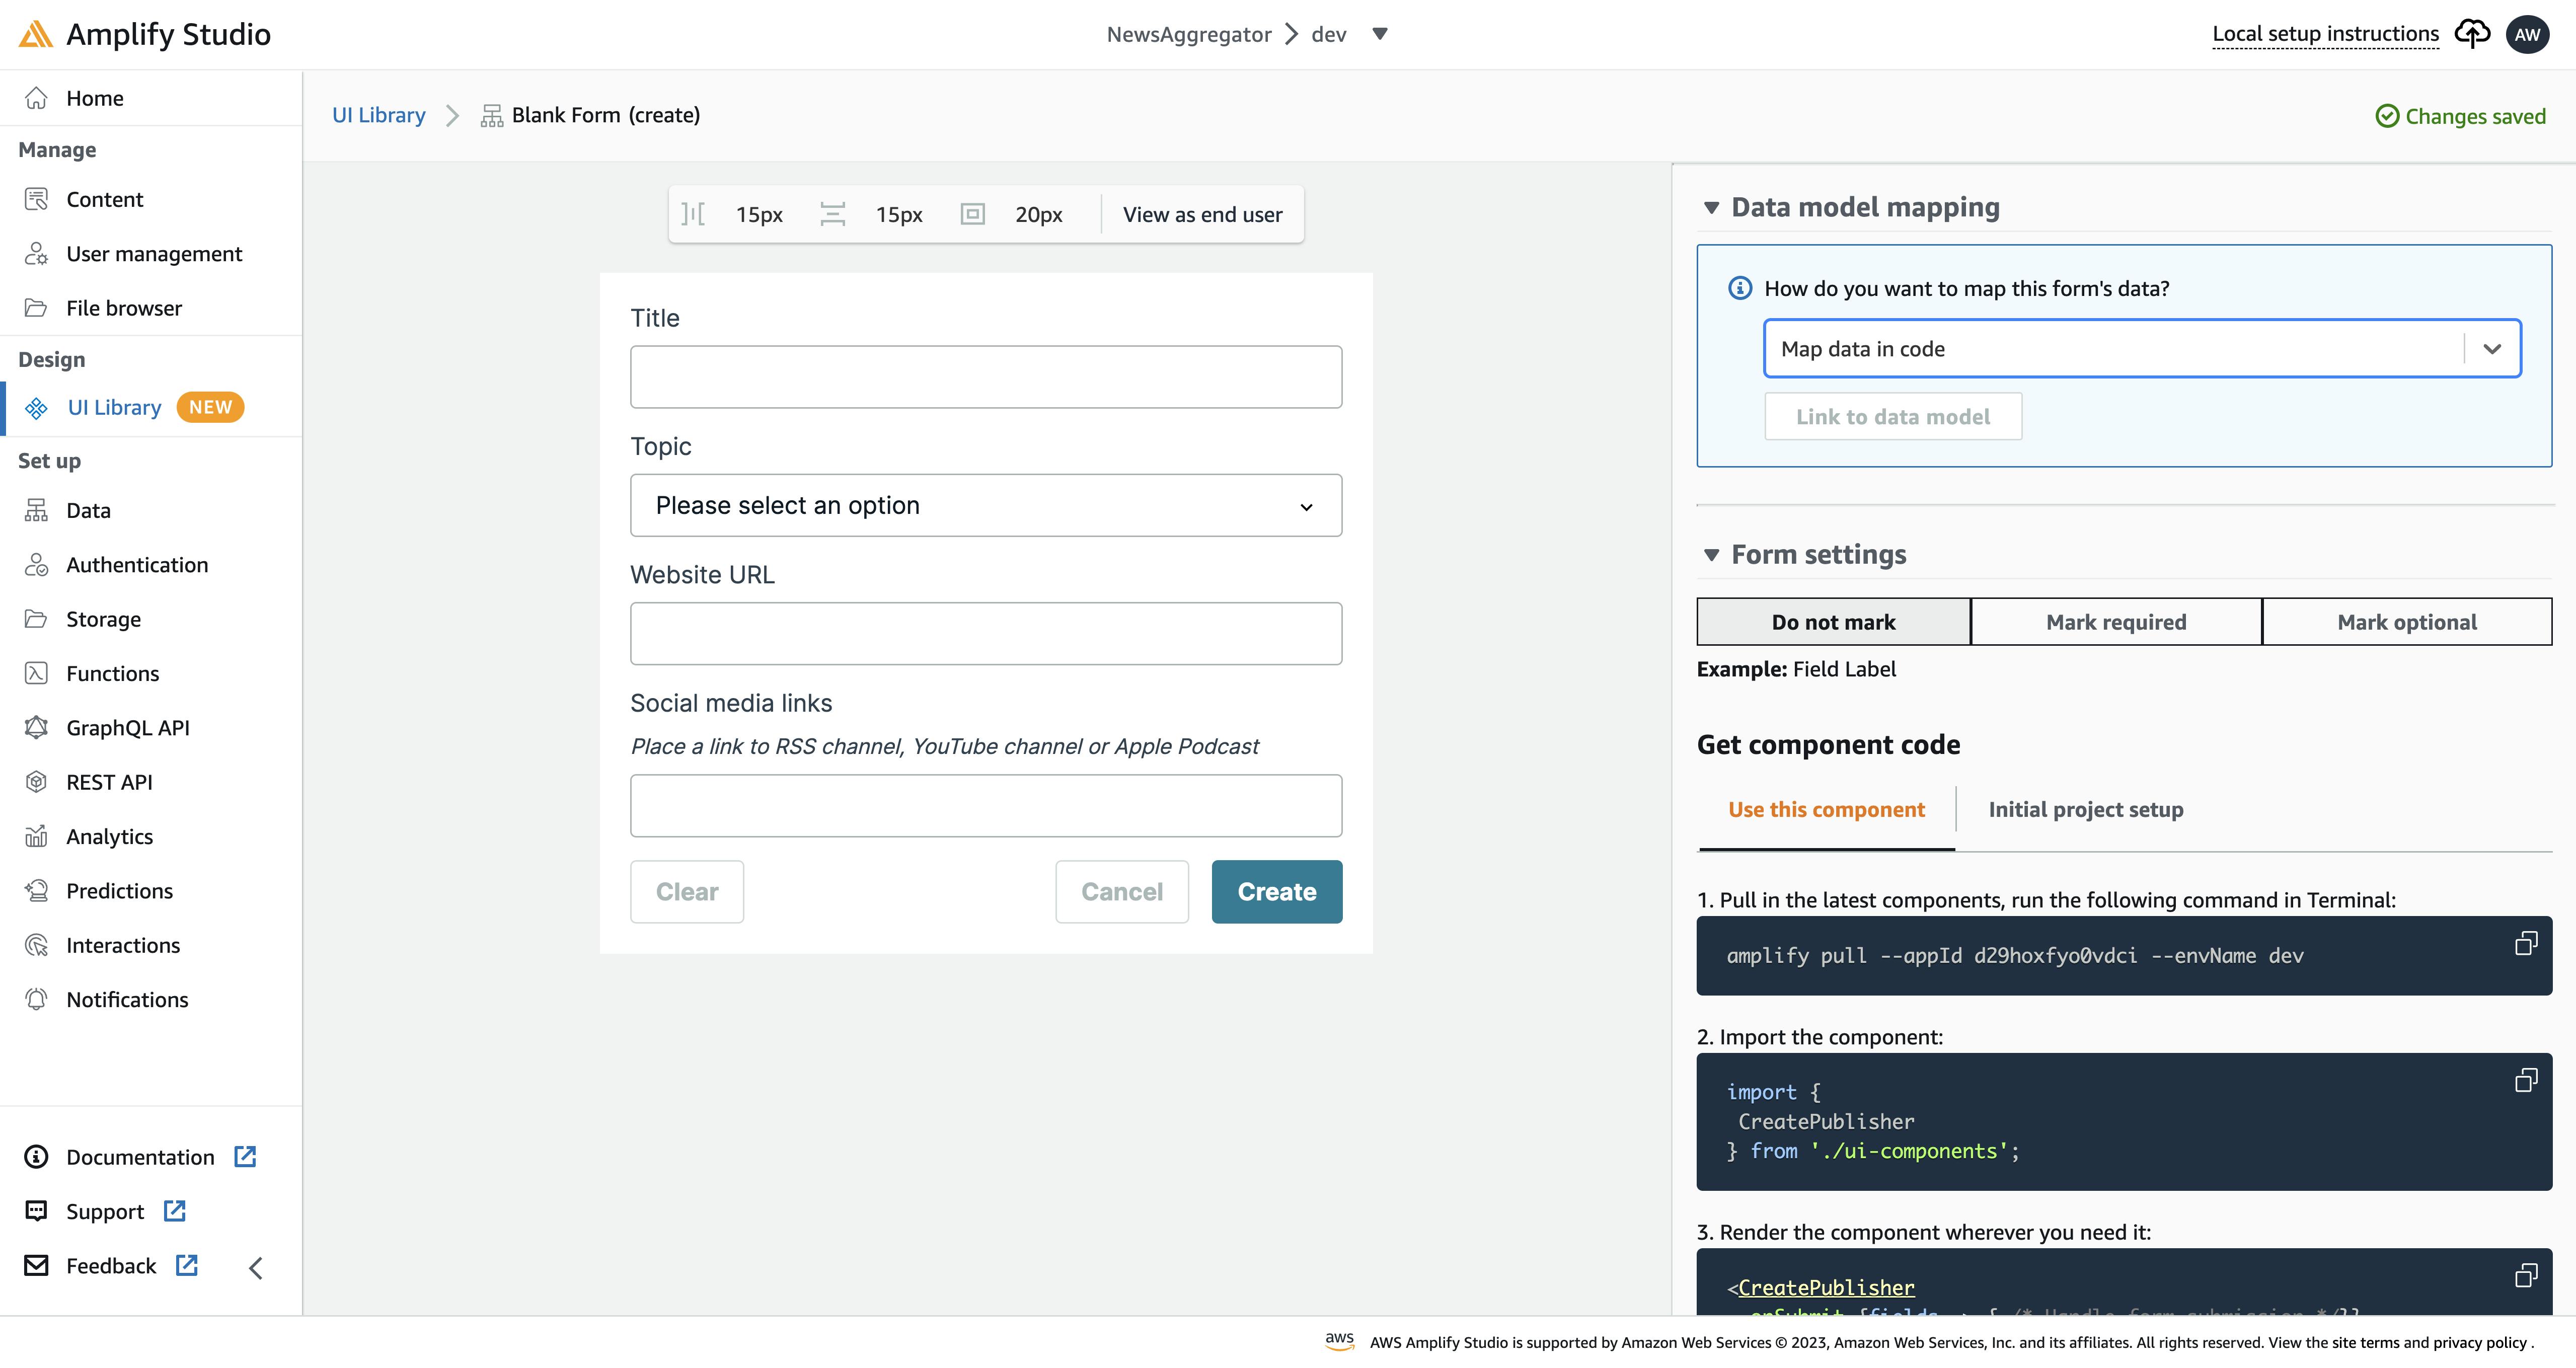
However, since I'm not using Data Store, I can't map this form to my GraphQL schema entity. 🥲
Next, using amplify pull, I successfully integrated the form component into my app and easily implemented it:
export function CreateTopicModal({
  isOpen,
  isLoading,
  onClose,
  onSubmit,
}: IProps) {
  const handleSubmit = useCallback((fields) => {
    onSubmit({
      title: fields.Field0,
    });
  }, []);
  return (
    <Modal
      isOpen={isOpen}
      isLoading={isLoading}
      onClose={onClose}
      title="Create topic"
    >
      <CreateTopic onSubmit={handleSubmit} onCancel={onClose} />
    </Modal>
  );
}
Because this form isn't directly mapped to a GraphQL data entity, It used a field name called Field0! 😐
Authentication
In comparison to Flutter, the React UI library's Authenticator component has many more features and offers great customization. In my Flutter app, I wrapped my entire app with this component, and it just worked seamlessly:
const components = {
  Header() {
    return <Logo />;
  },
  Footer() {
    return <HackathonLogo />;
  },
};

<Authenticator socialProviders={['google']} components={components}>
  <MainLayout>
    <Component {...pageProps} />
  </MainLayout>
</Authenticator>
GraphQL API
In the Flutter app, I used a third-party GraphQL client library and code generator. I chose Apollo as the GraphQL client library and GraphQL code generator. Here is a codegen configuration:
import type { CodegenConfig } from '@graphql-codegen/cli';

const config: CodegenConfig = {
  overwrite: true,
  schema: ['app/graphql/schema.graphql', 'app/graphql/scalars.graphql'],
  documents: 'app/data/**/*.graphql',
  generates: {
    'app/graphql/schema.ts': {
      plugins: [
        'typescript',
        'typescript-operations',
        'typescript-react-apollo',
      ],
      config: {
        scalars: {
          AWSDateTime: "Date",
          AWSJSON: "string",
          AWSTimestamp: "string",
        },
        withHooks: true,
      },
    }
  },
};

export default config;
And now, I can write GraphQL queries and mutations seamlessly:
query ListPublishers {
    myUser {
        ...BaseUser
        topics {
            items {
                ...BaseTopic
                publishers {
                    items {
                        ...PublisherInfo
                    }
                }
            }
        }
    }
}
In this example, I am requesting a list of topics and publishers for the sidebar.
Hosting
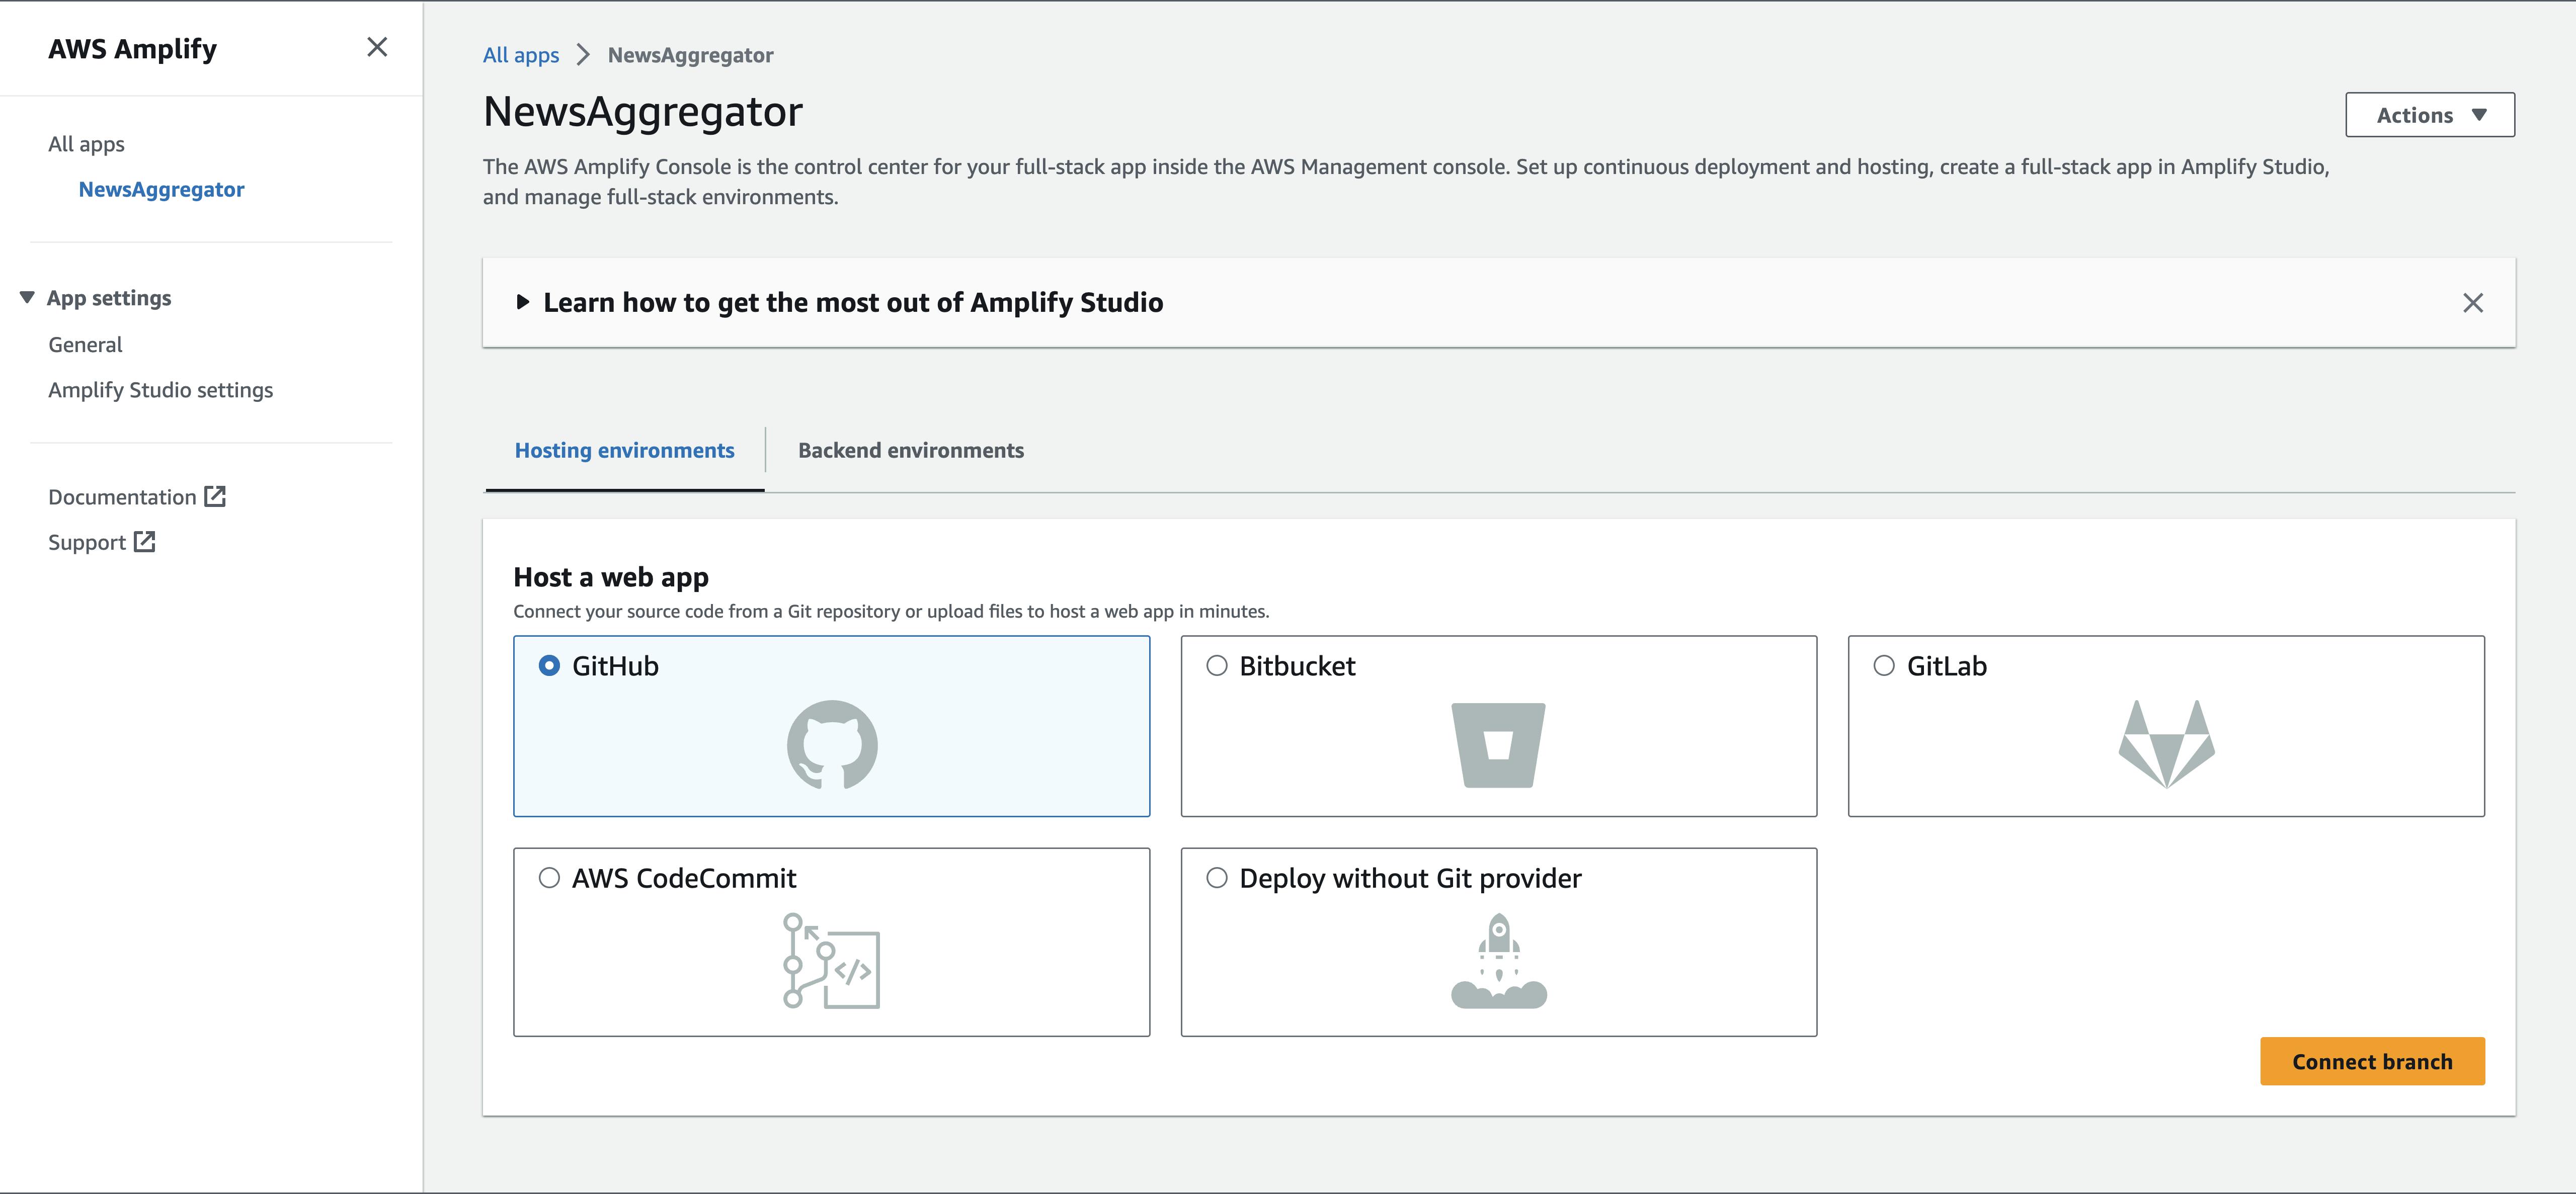
Because I'm using the Next.js framework, Amplify provides me with the possibility to host this project, even with SSR support.
First, I connected my GitHub repository to the AWS console:
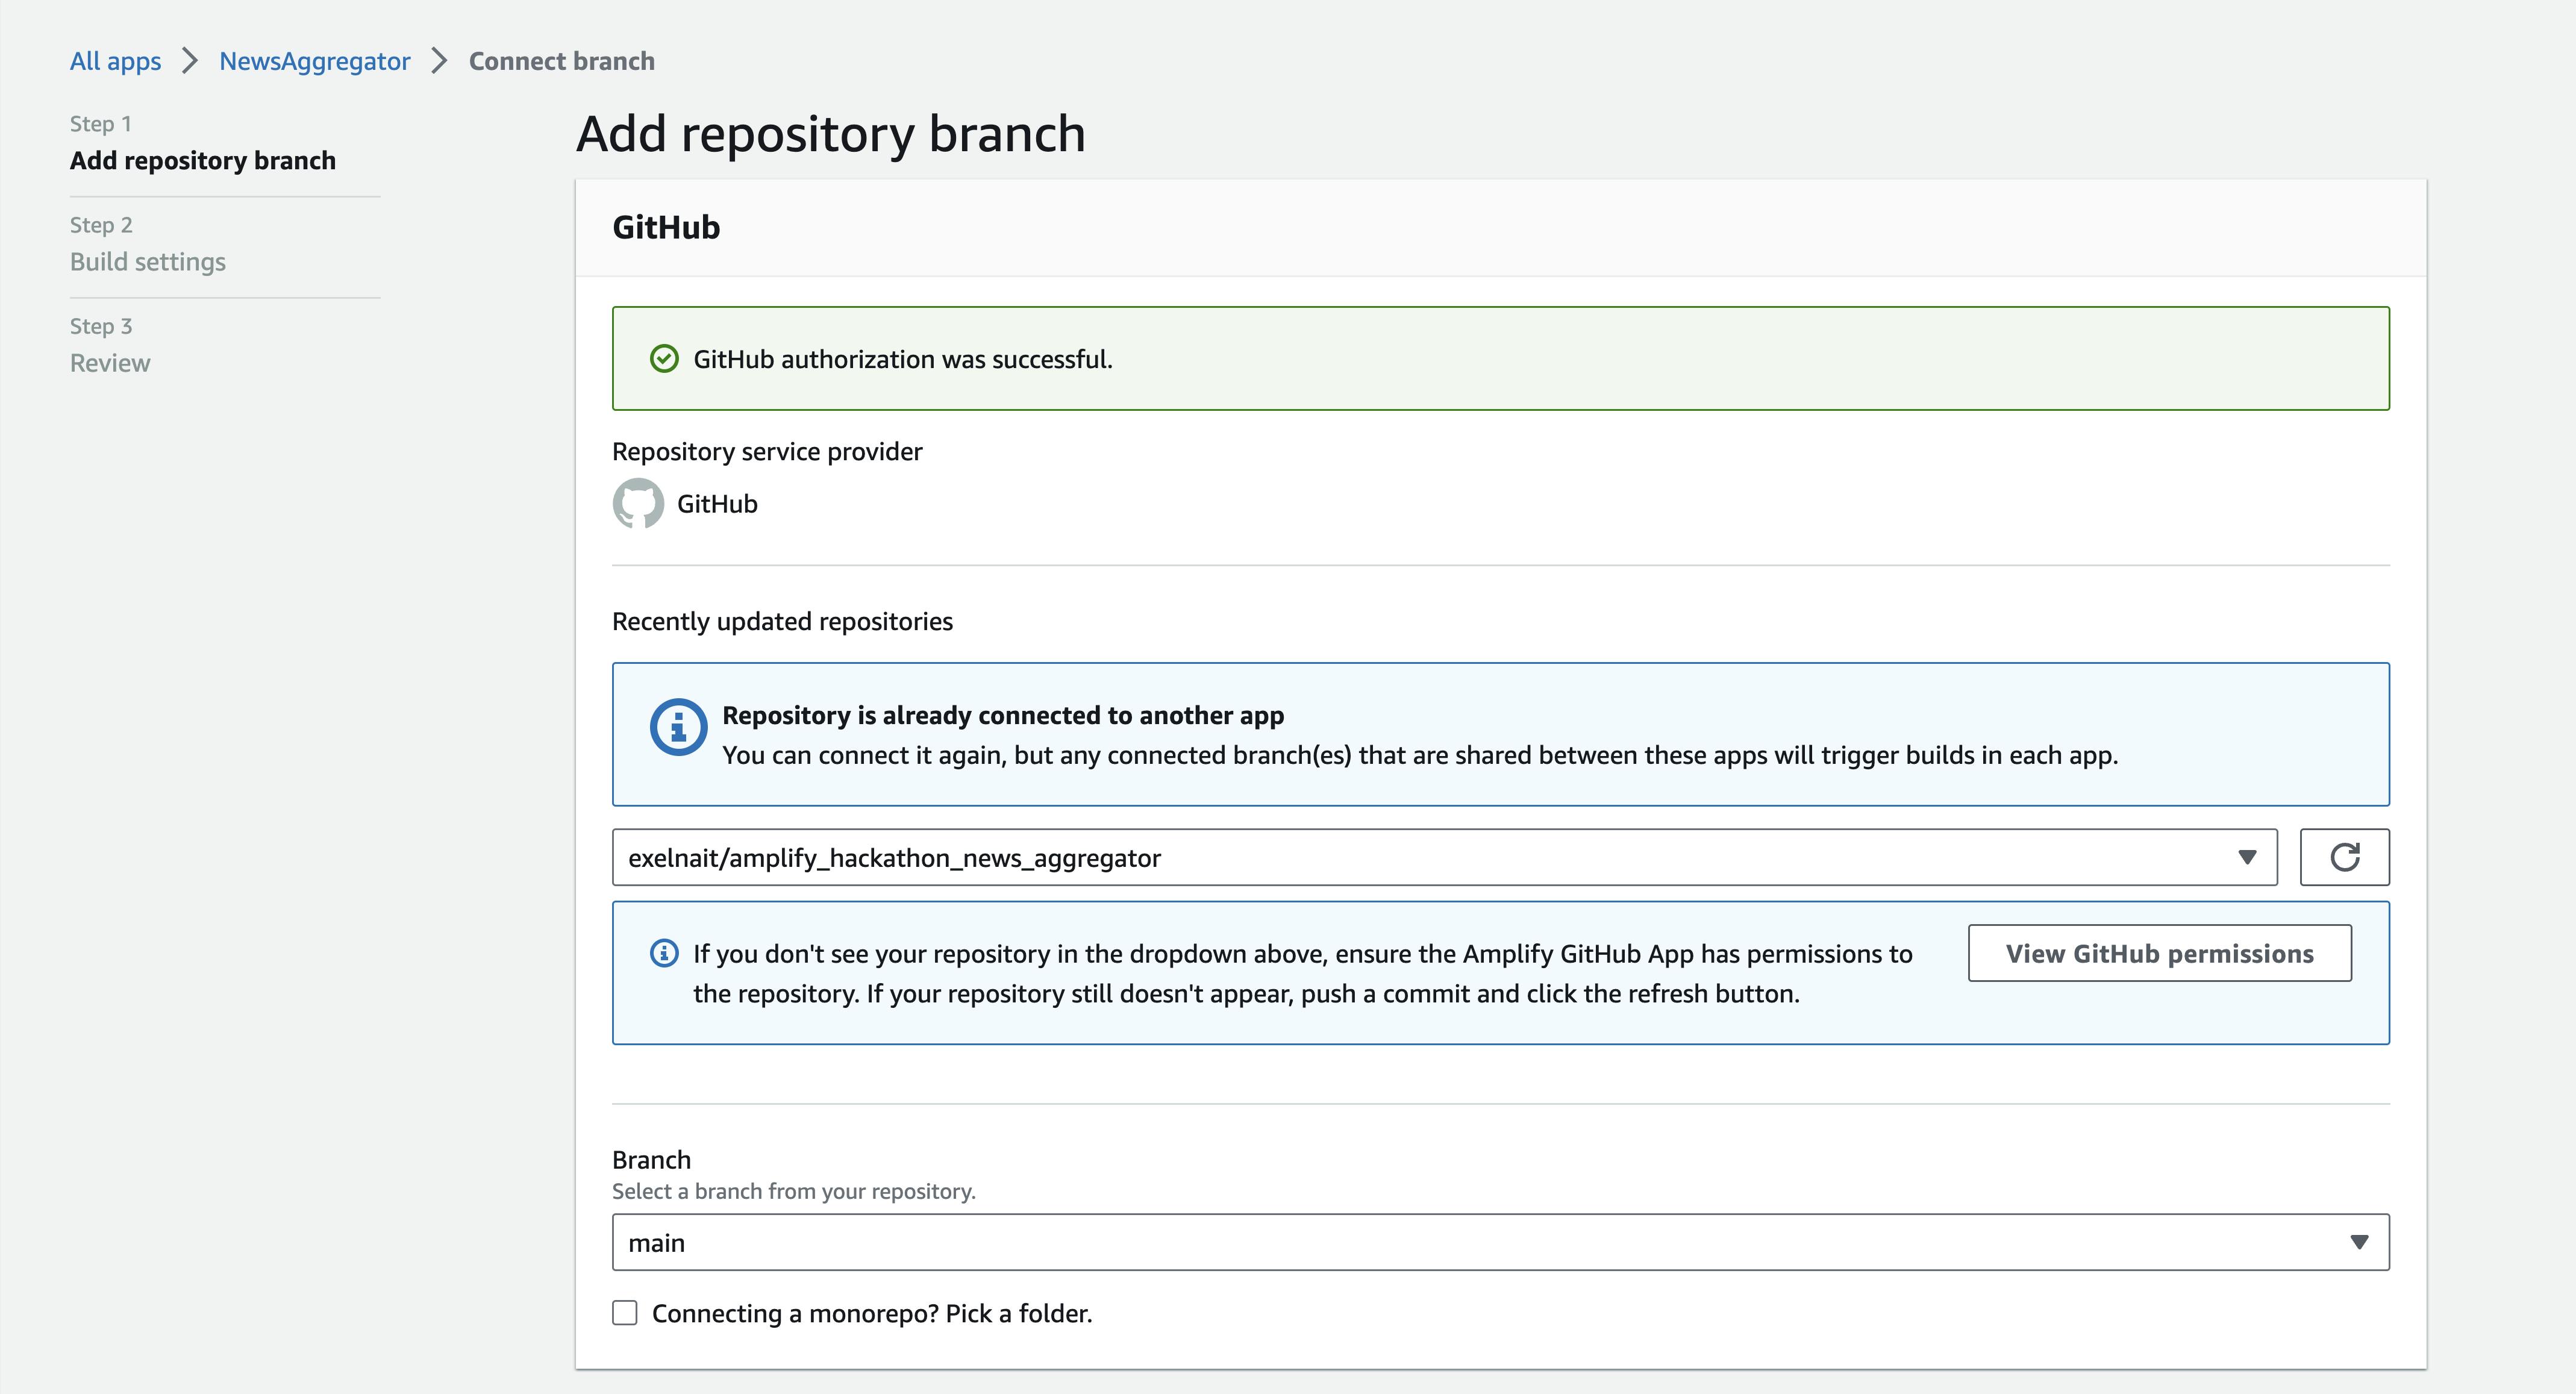
Next, I added a repository and selected a branch.
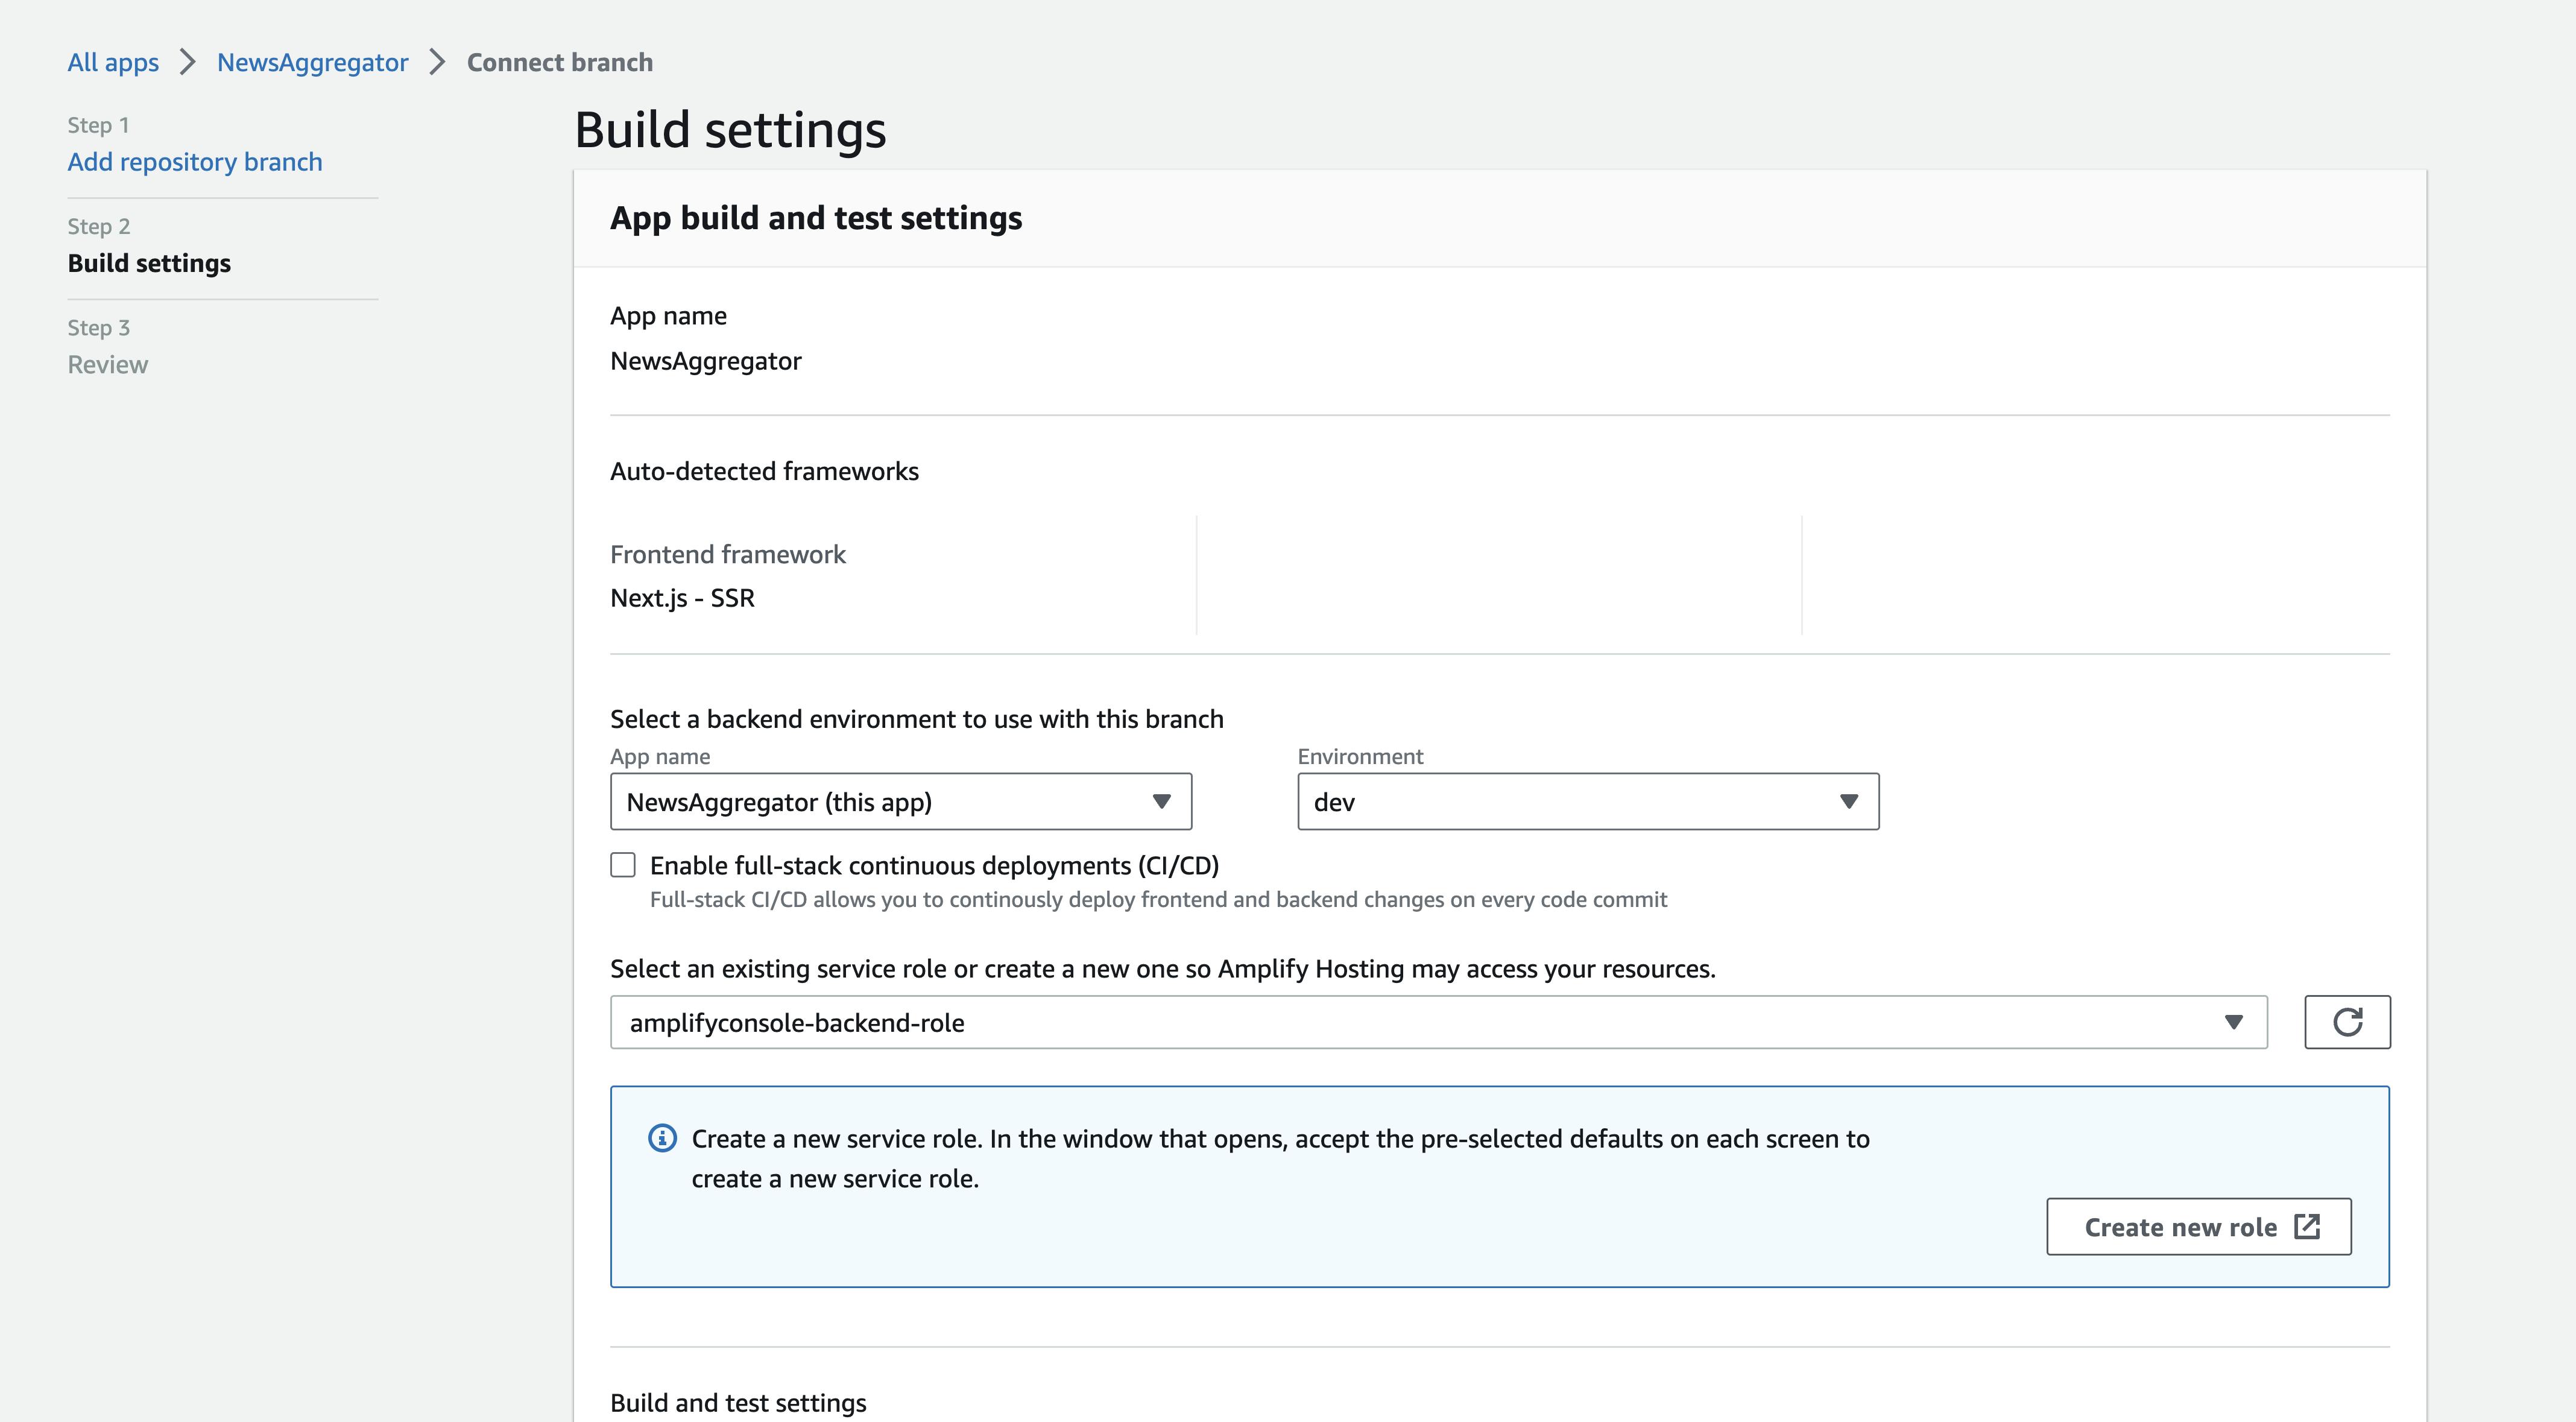
In the end, Amplify detected my framework and set up Next.js with SSR.
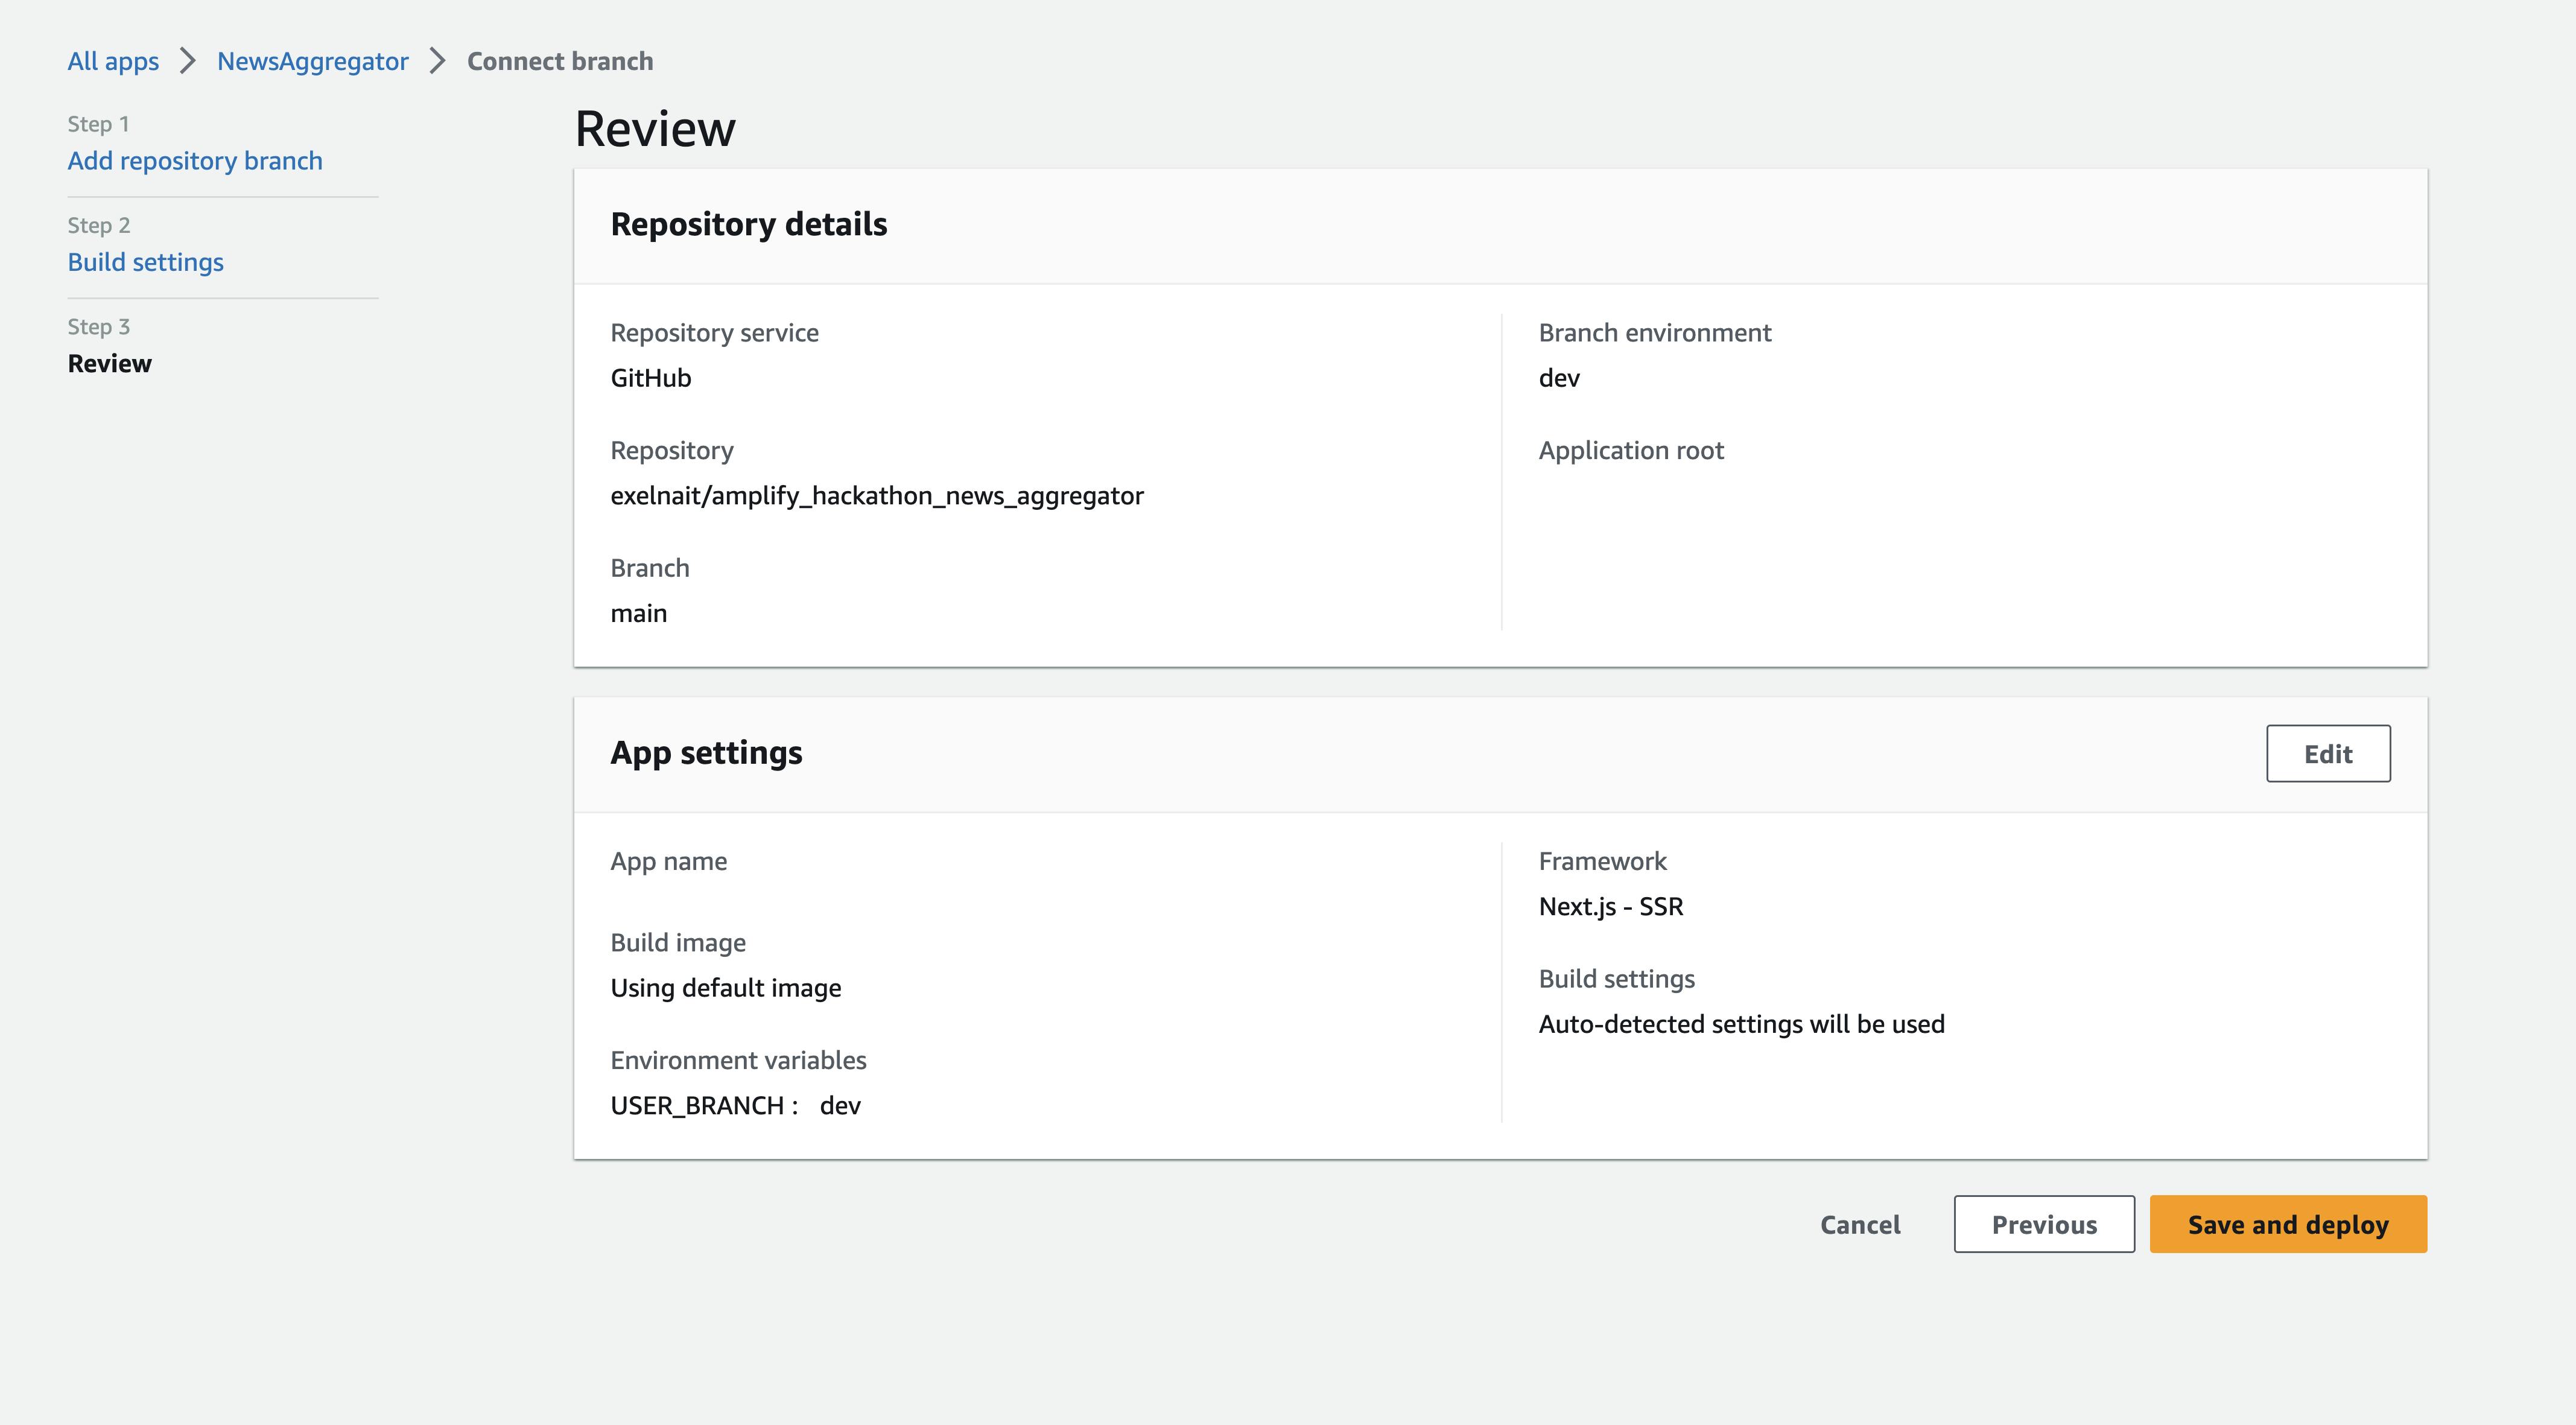
Now, I need to set up a build script because, in my case, I'm using a monorepo and Amplify should know how to build artifacts. To accomplish this, I created an amplify.yaml file containing additional build configurations:
version: 1
applications:
  - backend:
      phases:
        build:
          commands:
    frontend:
      phases:
        preBuild:
          commands:
            - npm i -g nx
            - npm install --silent
        build:
          commands:
            - nx build web-app
      artifacts:
        baseDirectory: dist/packages/web-app/.next
        files:
          - '**/*'
      cache:
        paths:
          - node_modules/**/*
      buildPath: /
Final result
Demo Videos
Topic create
Publisher create
Screens
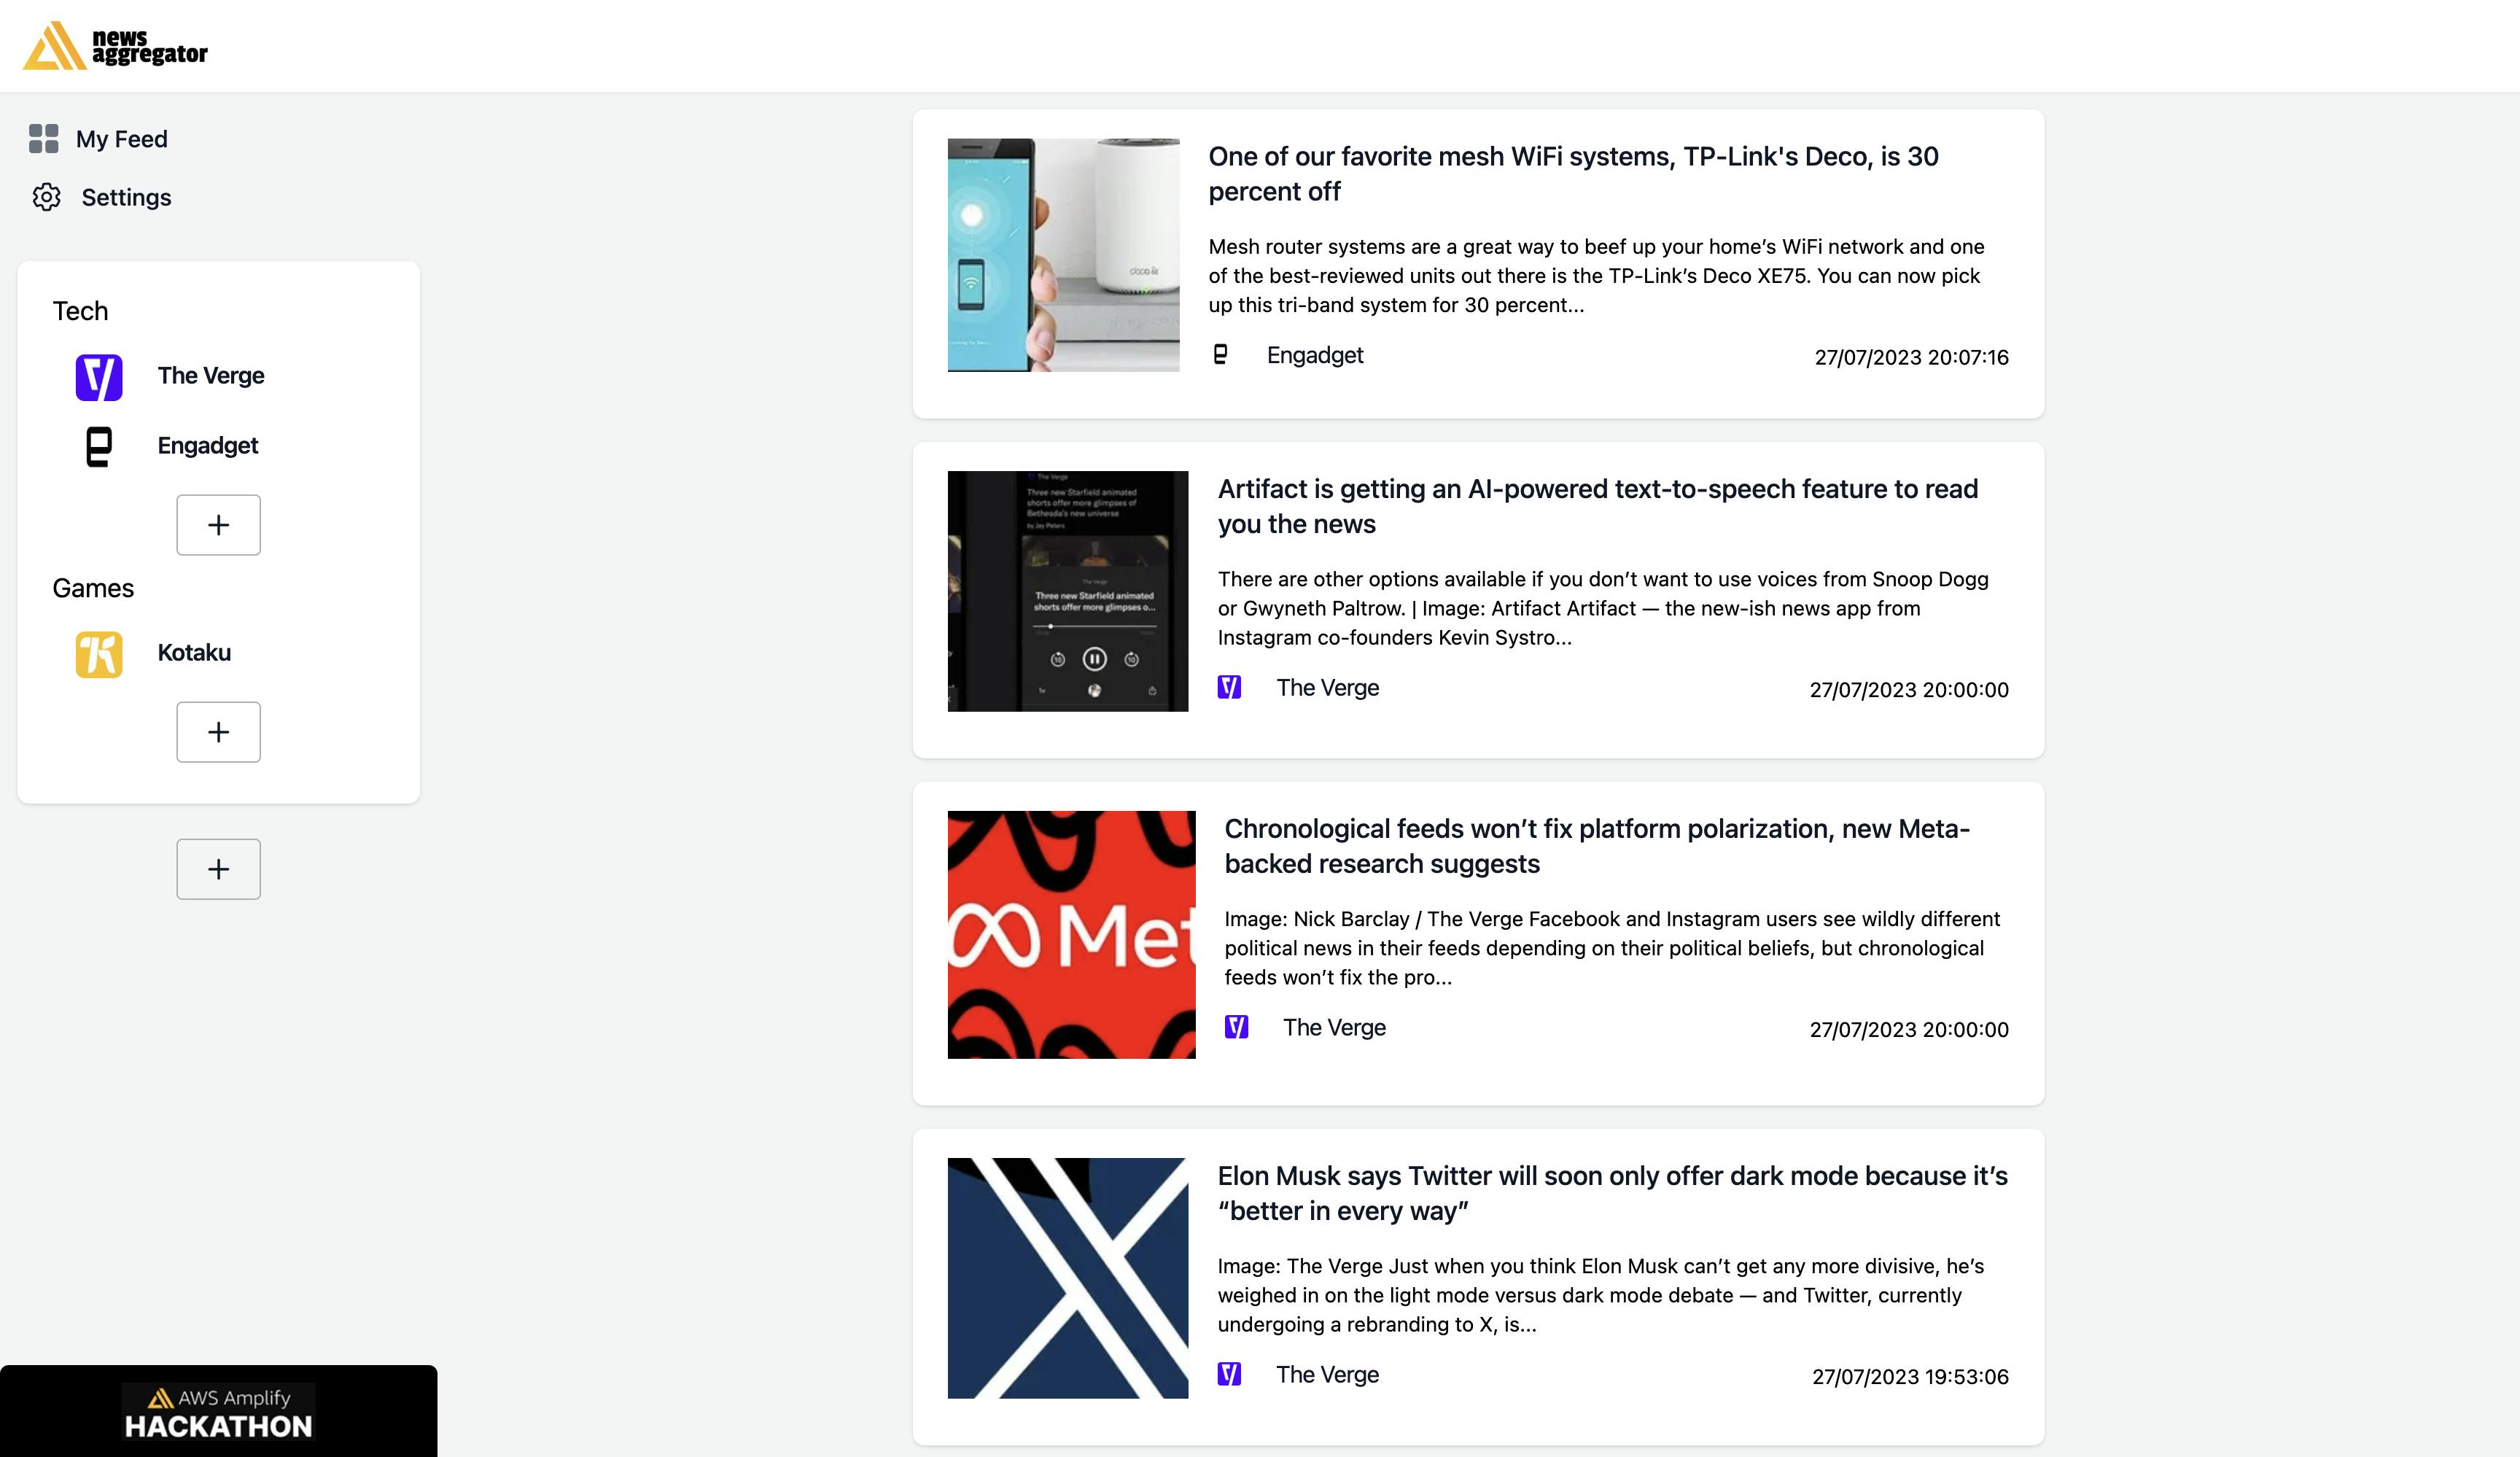
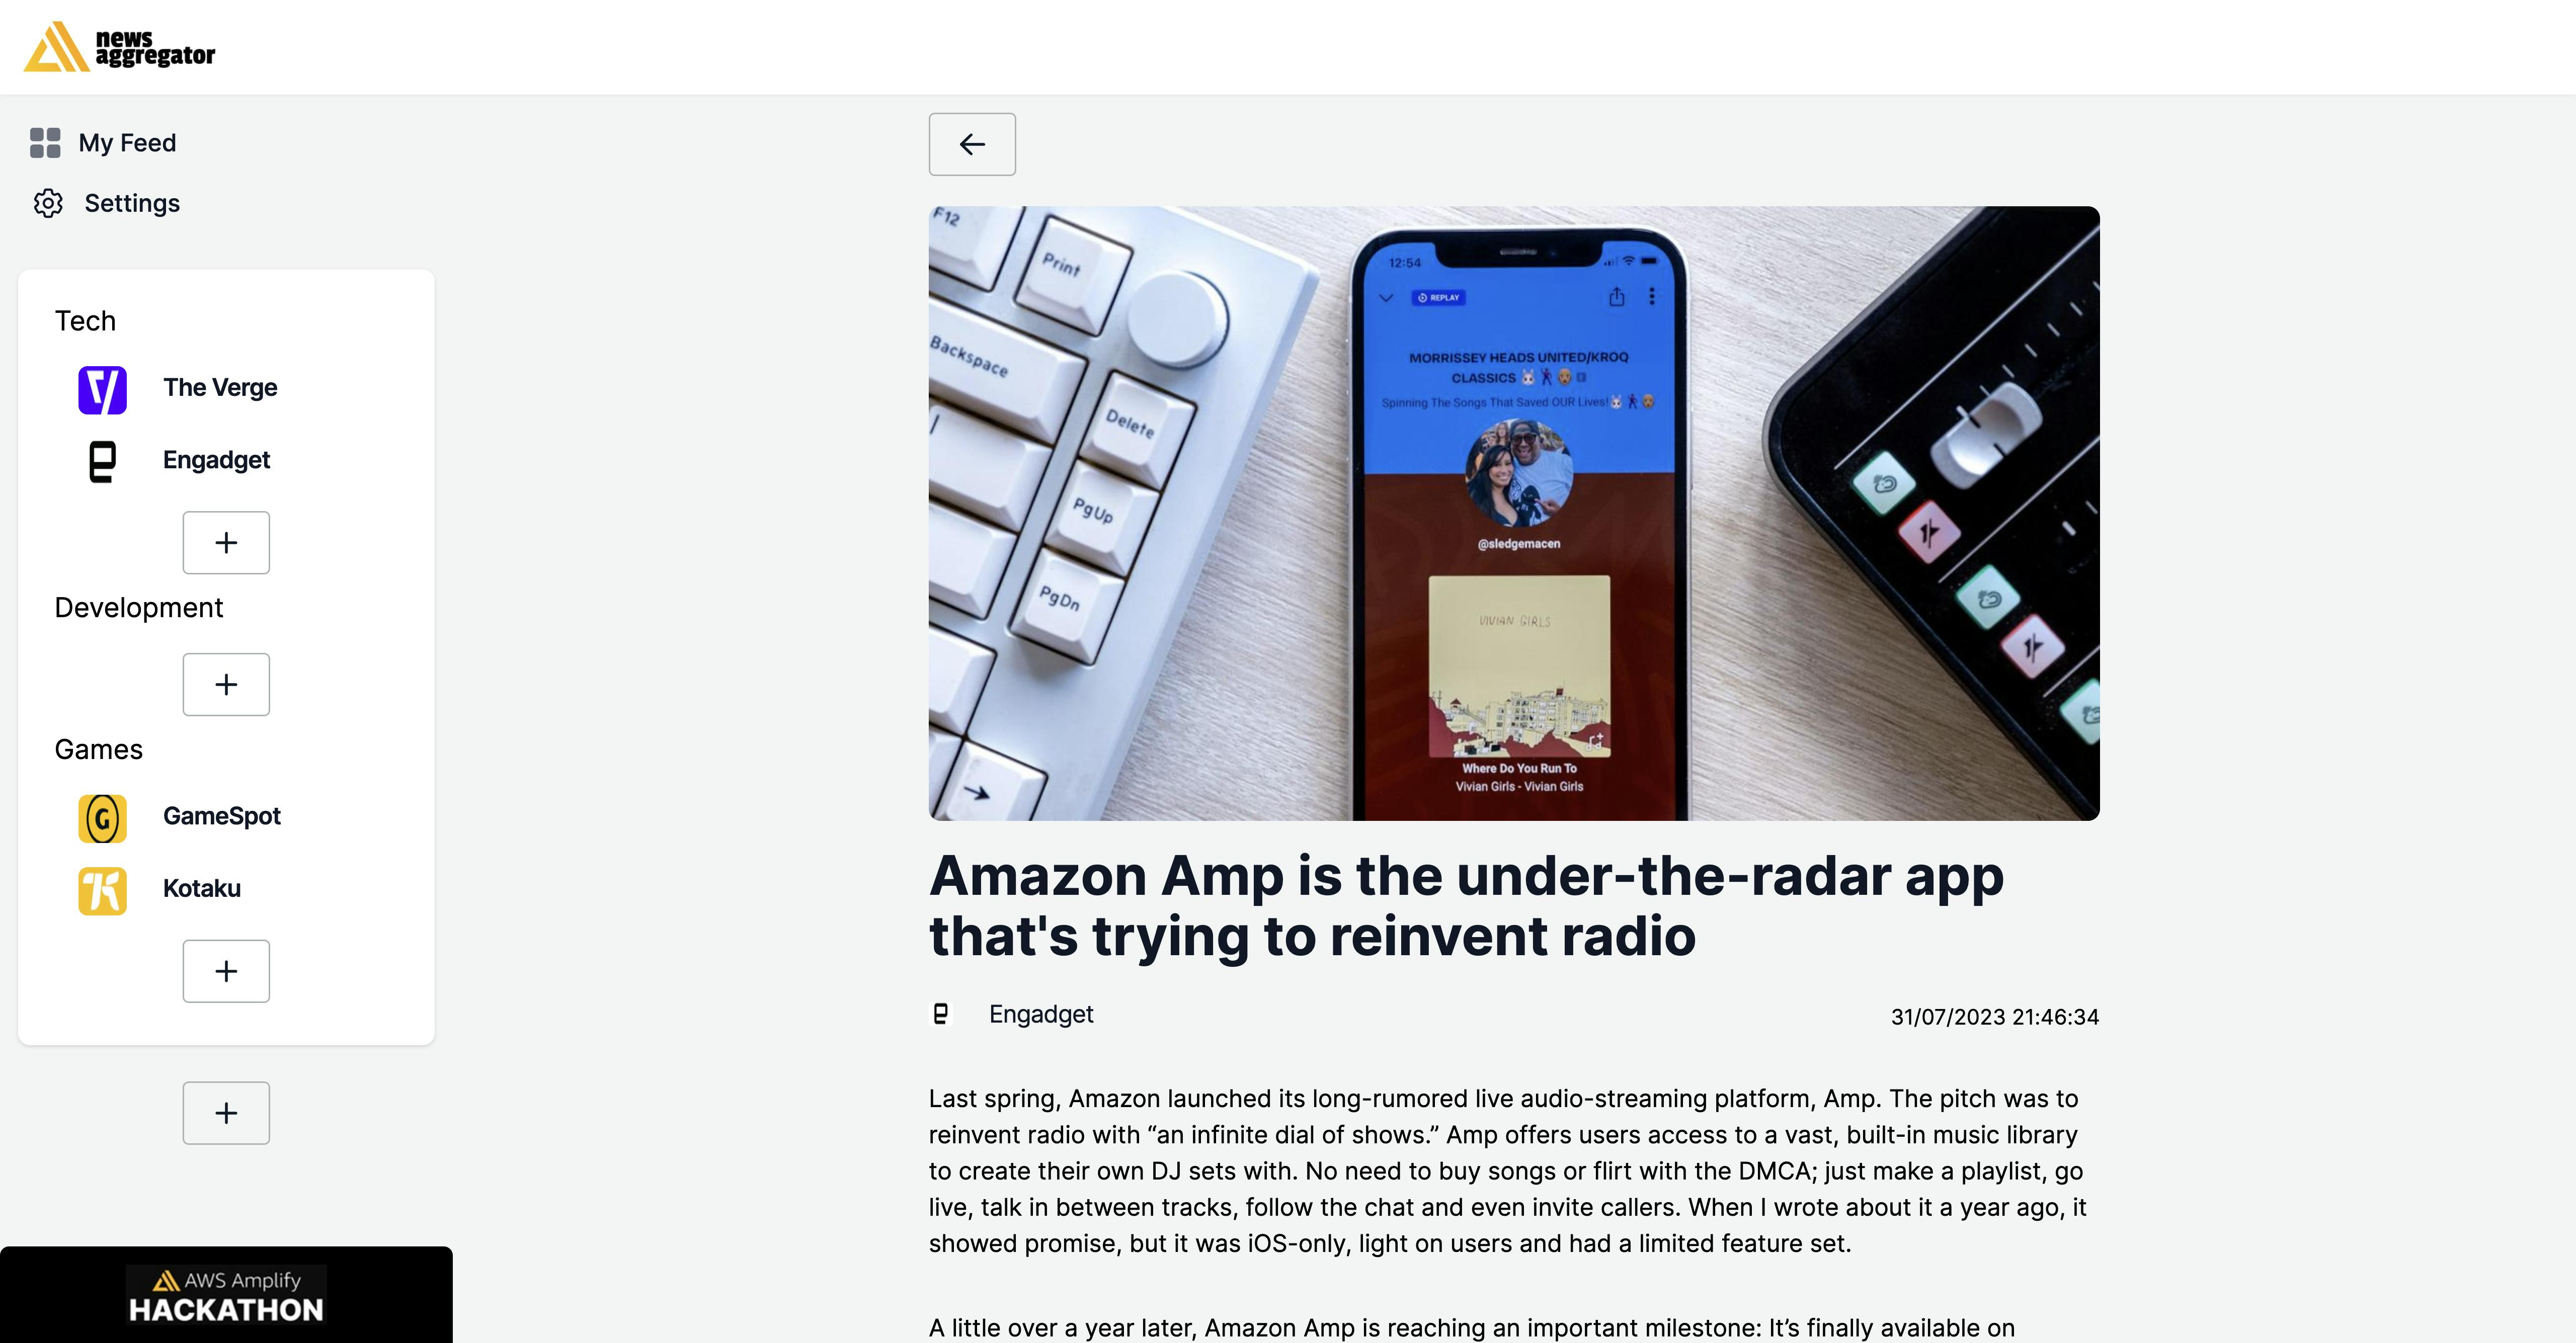
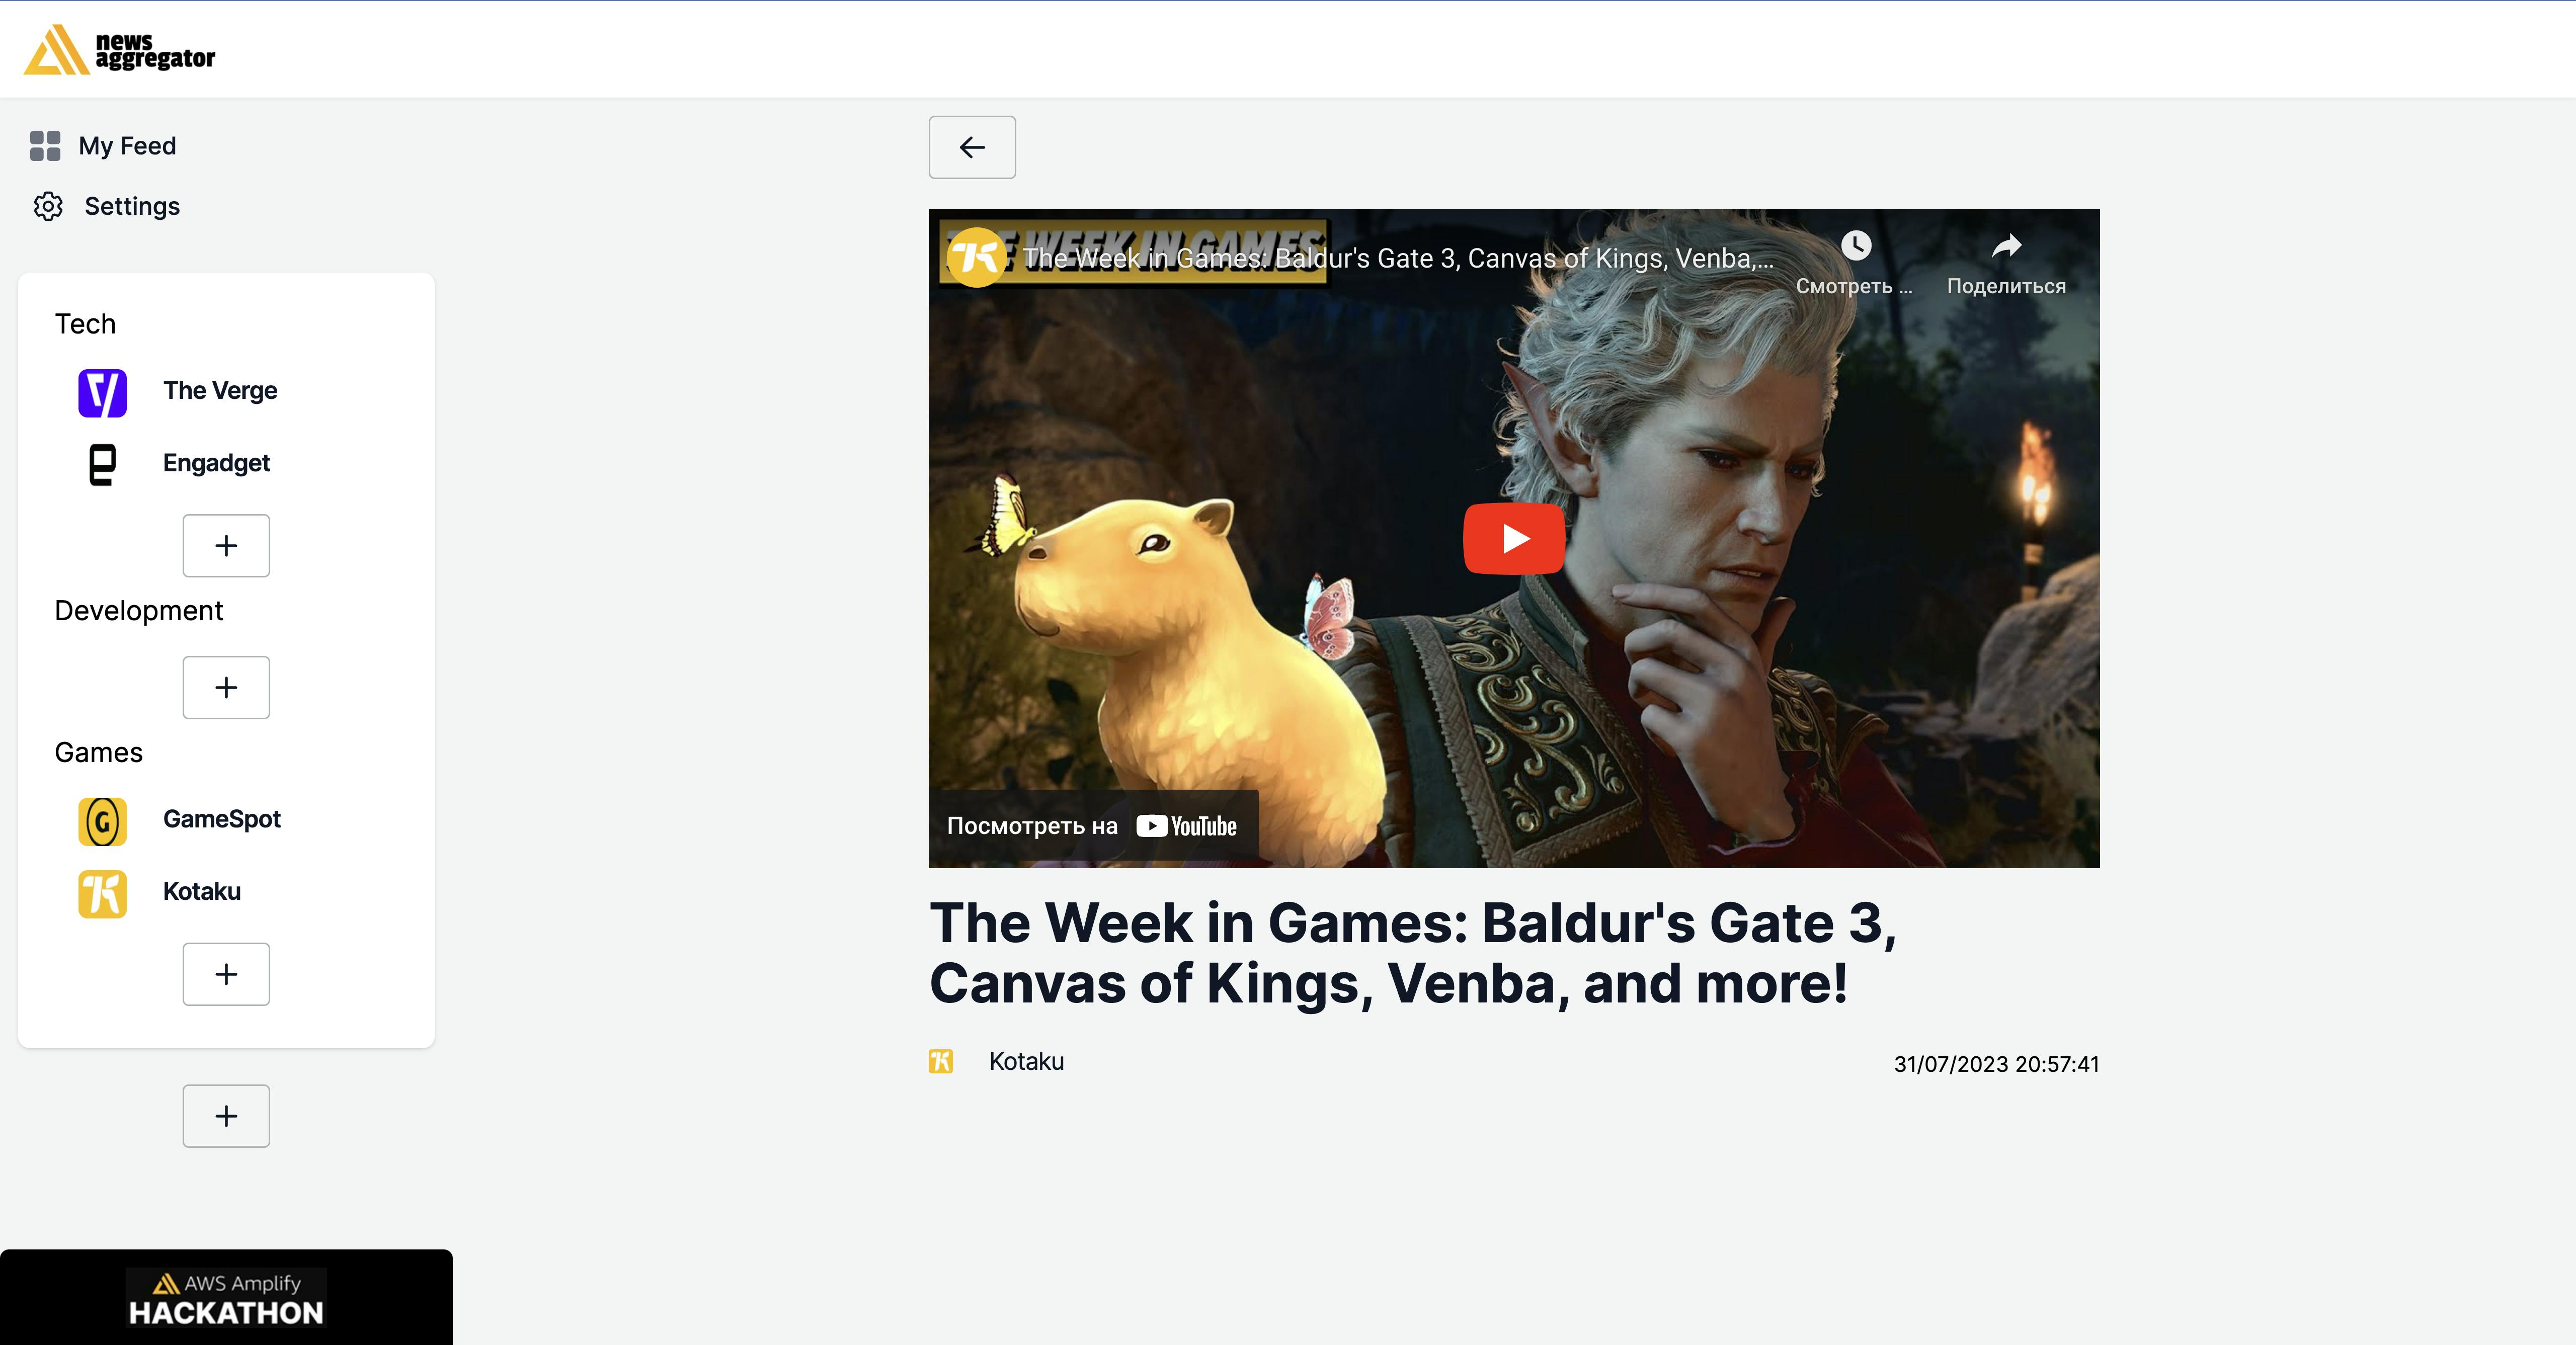
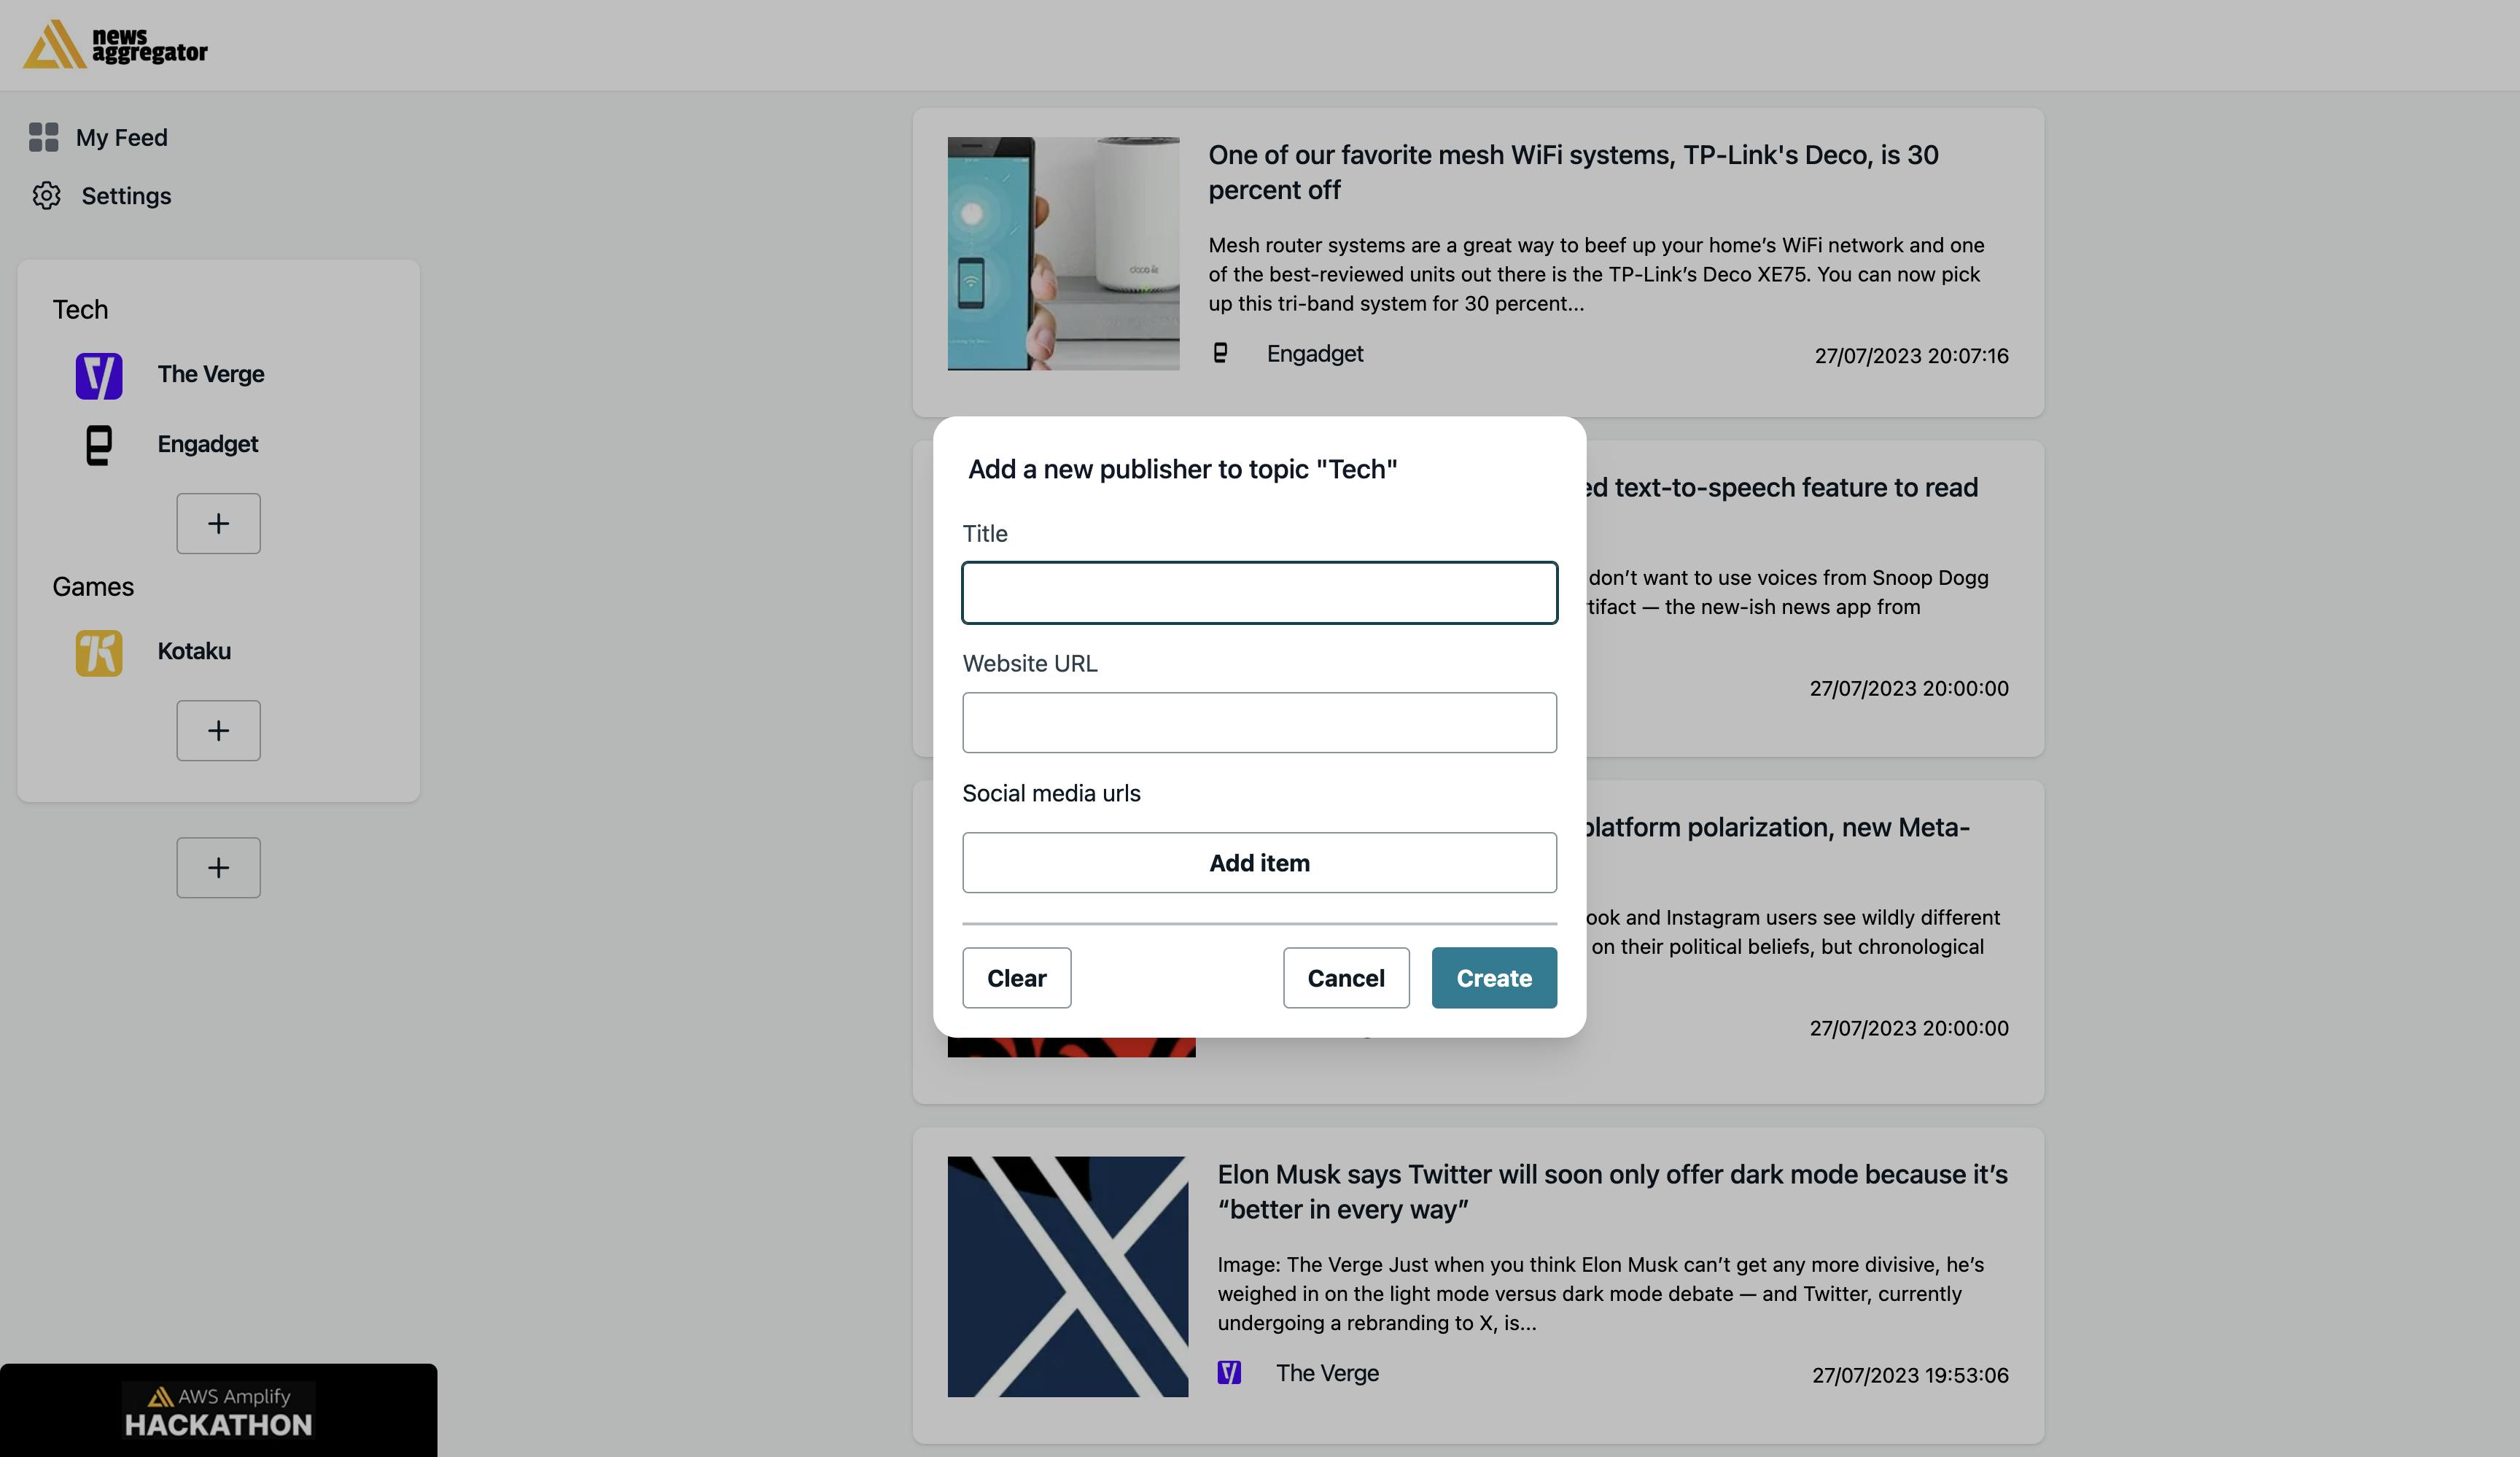
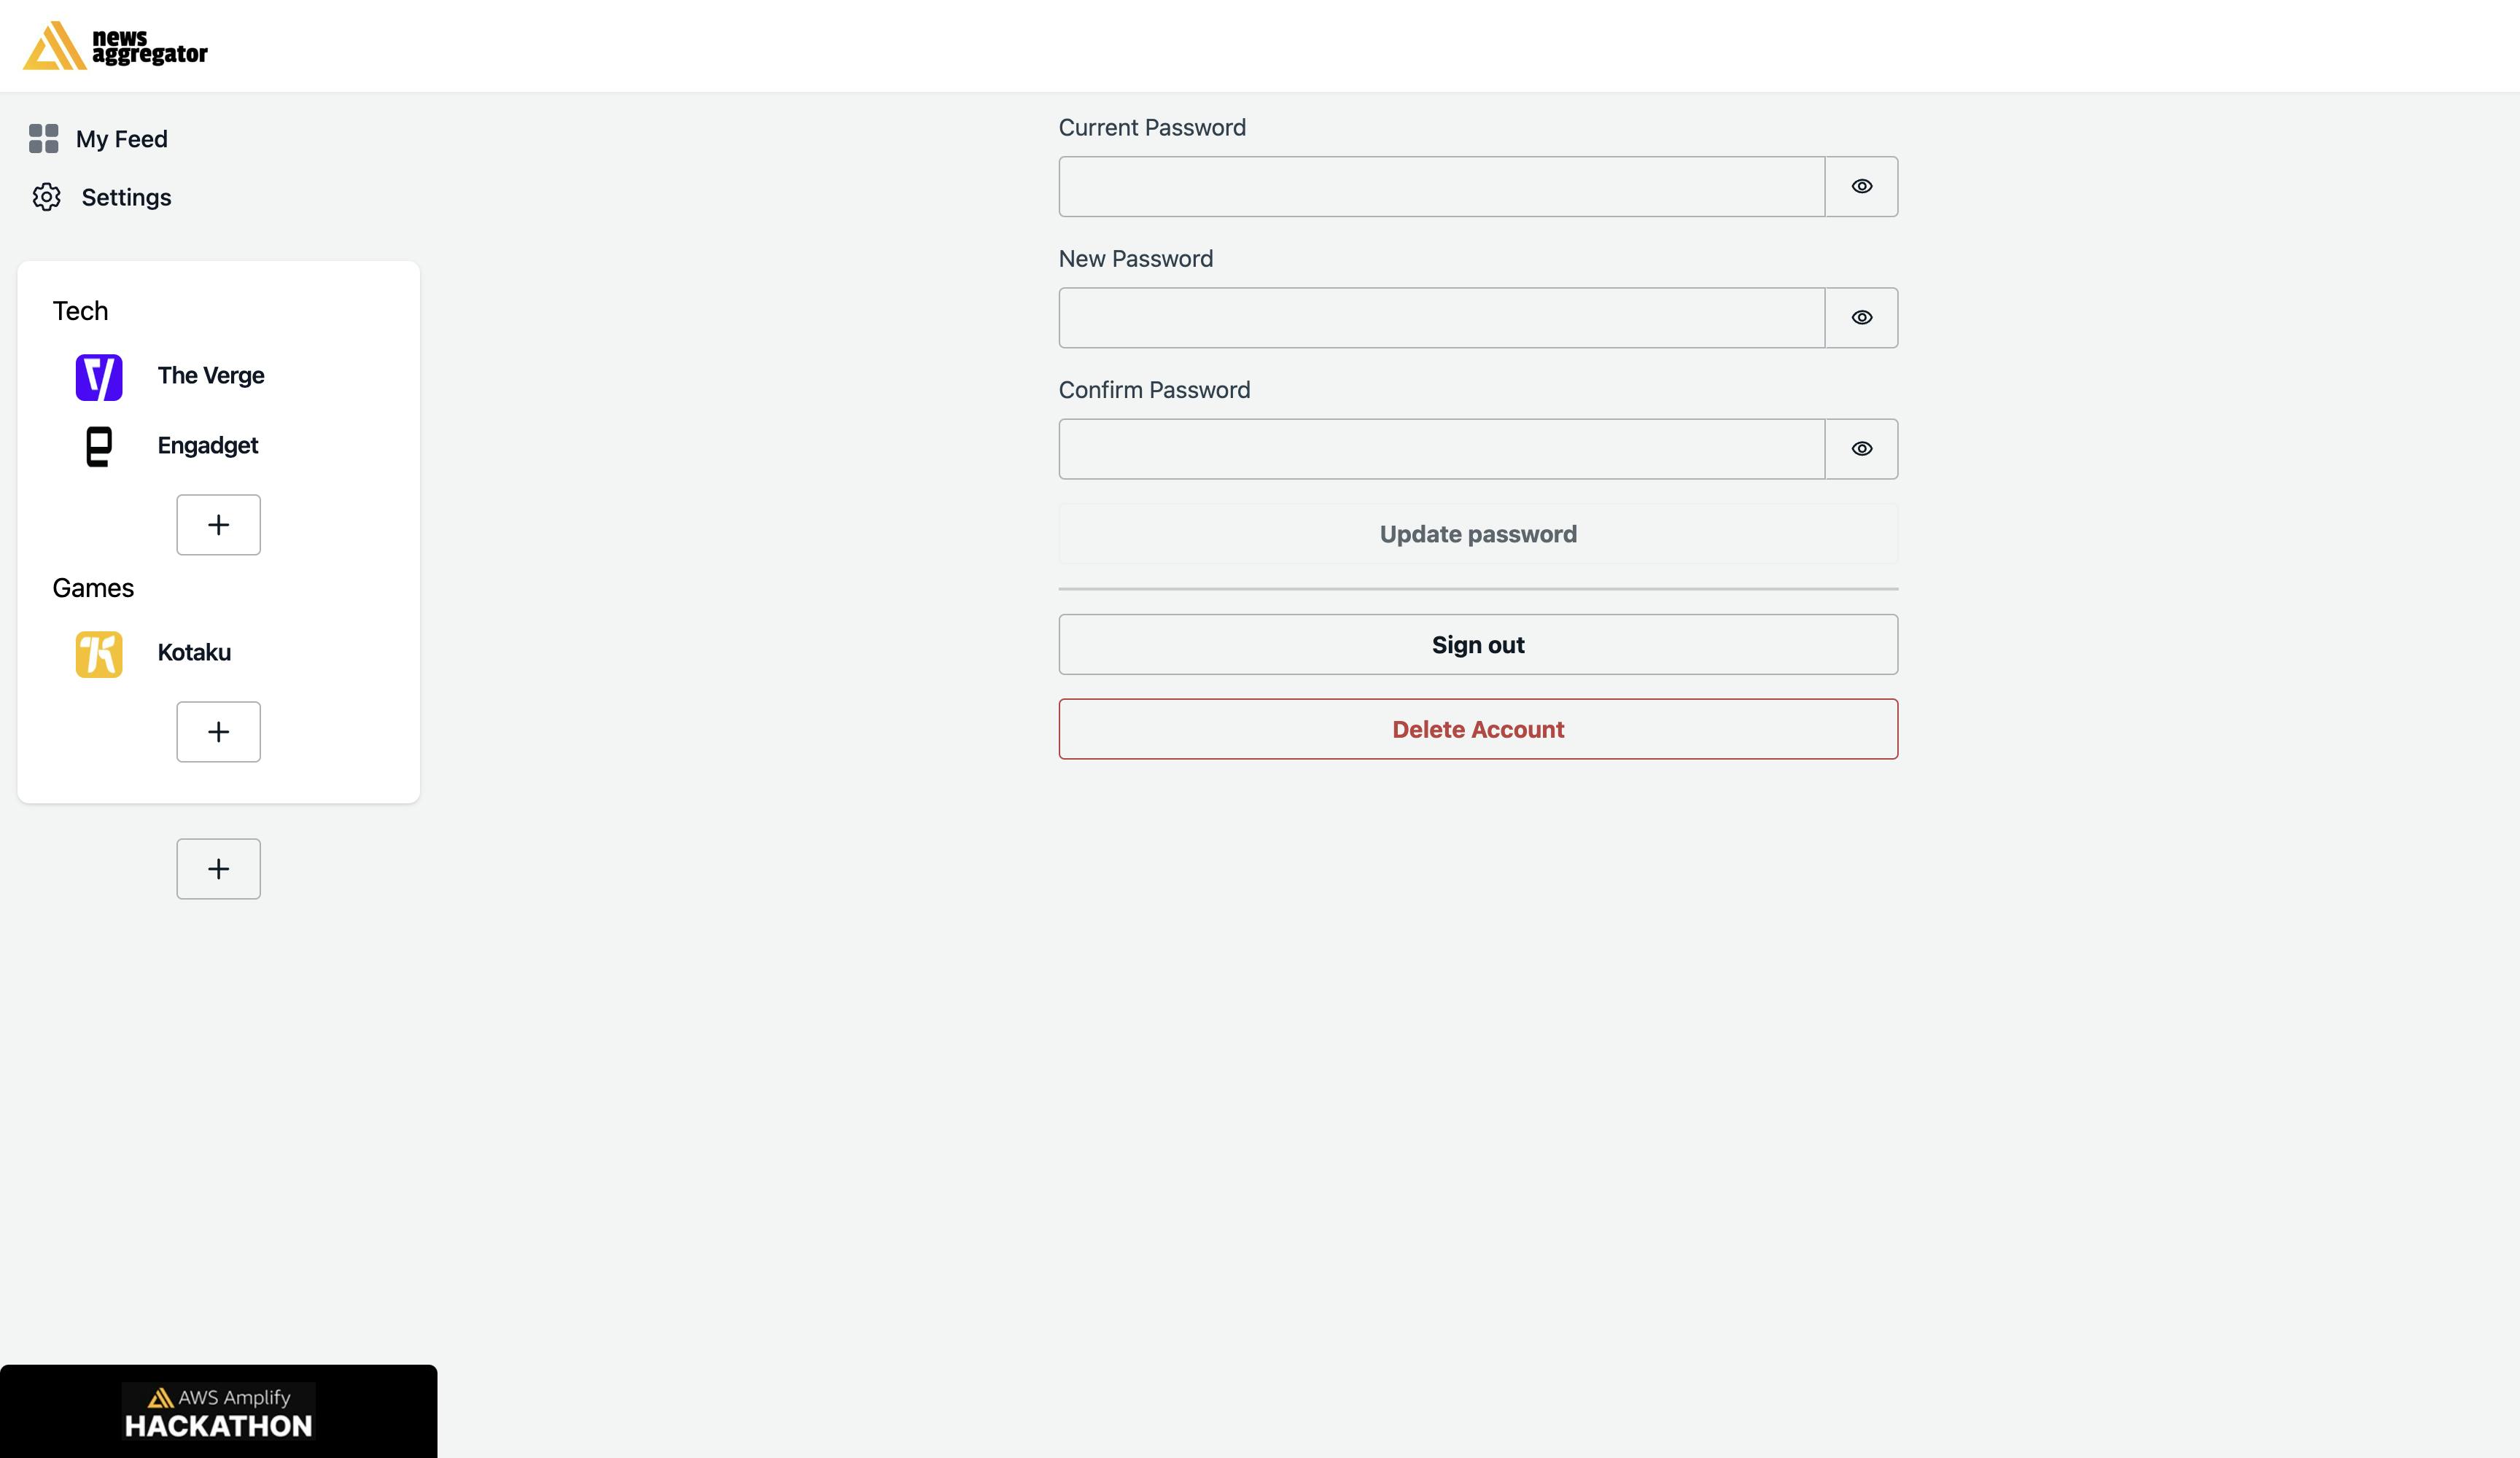
You can start using the news aggregator at this address: https://main.d29hoxfyo0vdci.amplifyapp.com
PS. If you've read the whole article up to this point - you're a champ. Cheers, mate! 🍻
Conclusion
This month has been super exciting! Thanks to Hashnode and AWS Amplify teams for that.
I successfully finished 3 apps, and they're all live and running smoothly. While they might not be the most groundbreaking projects, I put my heart and soul into them!
I enjoyed creating a full-stack project with AWS Amplify. It saved me a lot of time on the development and DevOps side. Especially GraphQL API generation from data models. And because it's a serverless backend, it's very easy to support, and it will charge money based on usage.
I'm so happy I got to explore new things like the @searchable directive in API and the Amplify Studio UI builder for the user interface. The developer experience for the React client app was great - the libraries are mature and packed with features. As for Flutter, it might not be as awesome, but the essential stuff works, so that's a win! 😊
What's next?
I love speaking at conferences and meetups, and Amplify is one of my favourite topics. Now, I have a great example to discuss. I will use this new aggregator in my future talks and workshops.
